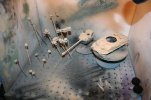
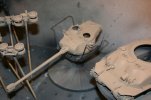
Tamiya 1/35 M51 Super Sherman Early
- Thread starter Elm City Hobbies
- Start date
Beobachtungsbereich
Prep for STAB....STAB ON!
- Joined
- Oct 7, 2011
- Messages
- 254
Looks like I'll be buying yet another product!
Nicely done Scott!
Nicely done Scott!
panzerace007
New Member
- Joined
- Dec 17, 2010
- Messages
- 2,118
HEY SCOTT,
AH .. no telling how Th Tank Farm got that Shermie outta Israel ... They won't tell Me ... lol
Cool Deal on th Tamiya Primer. I've seen it in th LHS , but not thought of tryin it. I like th Technique !
Rock-on Brotha !!
AH .. no telling how Th Tank Farm got that Shermie outta Israel ... They won't tell Me ... lol
Cool Deal on th Tamiya Primer. I've seen it in th LHS , but not thought of tryin it. I like th Technique !
Rock-on Brotha !!
Carsenault
Member
- Joined
- May 7, 2009
- Messages
- 846
Beobachtungsbereich said:Looks like I'll be buying yet another product!
Nicely done Scott!
Cool, Ill be looking for some too.
Nice work Scott!
dukwhunter
New Member
- Joined
- Mar 23, 2012
- Messages
- 1
Hi Scott ,
Just joined the forum here , but love what you have done with the turret . Any more progress forthcoming ?
Thanks
JOEY
Just joined the forum here , but love what you have done with the turret . Any more progress forthcoming ?
Thanks
JOEY
Elm City Hobbies
Active Member
- Joined
- May 7, 2009
- Messages
- 3,241
Yeah, the kit is probably 90% assembled, just some stuff I have found lacking on the Tamiya kit, and having a hard time robbing parts from a perfectly good Dragon kit to replace the parts missing from the Tamiya kit.
Namely on the front of the tank, the M51s usually carry a roll of barbed or razor wire, well on the Tamiya kit, the upper hook is there, but no lower hook (coincidentally, the Dragon kit doesn't come with the lower hook either, but I have the Eduard PE sets for the Dragon M51 that I can "rob" from), as well on the Tamiya kit, the tow cable just basically sits on the hull, with not much to show for as far as how it is held down. Both ends of the tow cable have a clasp system that holds it on, as well as smaller holders the length of the cable (also missing from both the Tamiya and Dragon kits) so the cable just looks like it is sitting there on the hull, so again, going to have to rob from the Eduard set.
Those small things I can over look, and accept with the Tamiya kit, however the lackluster grab handles on the kit being done in a solid square plastic piece on the hatches (which have since been replaced with metal wire), could have easily been done as separate pieces....why they didn't do this is beyond me, as it would have amounted to maybe 10 handles total on the whole kit.
The other item is the fuel cans and their holders. Great Tamiya, you molded the cans and the holders as one piece. Would have been nice if they were separate, so we could model the vehicle with, or without the fuel cans in place, but since you molded them in the holders....why did you then not also mold in the tie down straps for the fuel cans? So...I have to replicate those as well, not too hard....either again rob the parts from the Dragon kit, or it is pretty simple to make a buckle out of some soft copper wire and then thread through some fine masking tape for the strap.
Just been busy here at work, haven't had the time I would like to sit down and finish it up, between incoming and out going orders, getting closer to our local show here of which I do alot of leg work for, as well it is tax season, so making sure all the paperwork is in order....all cuts into building time! Next week should slow down some, so hopefully will get some more bench time. I want to get this and another kit ('50 Chev PU) done for our show here the end of May, plus decide what to build for the SMA contest.
adampolo13
New Member
- Joined
- Dec 7, 2011
- Messages
- 2,633
Great progress on this Scott. Looking forward to seeing the finished product.
schweinhund227
New Member
- Joined
- Jun 24, 2009
- Messages
- 2,511
I like your technique! Imprinting Sand-Paper texture in damp Tamiya surface primer! Wicked! I like it a lot!
Good one Scott M.
Norm.
Good one Scott M.
Norm.
scratchmod
New Member
- Joined
- Feb 13, 2011
- Messages
- 856
Some nice work on this great kit so far. Just saw some mold seems on the rear deck hatch plates, but besides that she looks good. Tammy has done a good job on this kit but could have done some of the detailing better. Good to see this one getting built OOTB almost. I'm working on a burnt out wreck of this tank and have been having fun with it. Look forward to seeing how this turns out.
Elm City Hobbies
Active Member
- Joined
- May 7, 2009
- Messages
- 3,241
Finally....got some color on it. About damn time!


Lifecolor Israeli Sandgrey '61-'73, over Vallejo Black Primer.
Let that cure up over night, and on to detail painting, weathering, etc, etc. Do have 2 figures for it, but will leave them until the end, if I don't get them finished for our show at the end of May, I can just close the hatches up temporarily.
Elm City Hobbies
Active Member
- Joined
- May 7, 2009
- Messages
- 3,241
Yeah, I couldn't really find a suitable match in the Vallejo air (without mixing a couple of colors together) and since Lifecolor has that particular color, figured I would give it a shot.
Turned out ok....was hoping for a little more of the black to show through, but since I wasn't used to thinning Lifecolor paints, I over thinned it (which is usually not a problem). Once the first coat was all dry, I went in for a 2nd coat, and I lightened up on the thinner a bit....as it turned out I lightened up too much.
Either way, just a base coat and will get many more various layers before it is finished!
schweinhund227
New Member
- Joined
- Jun 24, 2009
- Messages
- 2,511
Great work on this Scott ! keep it coming !
