Glorfindel
Active Member
- Joined
- May 2, 2011
- Messages
- 1,504
And here we go....
MIDWAY(1976) Original Theatrical Trailer
I remember one of my older brothers taking me to go see this when I was 11. Looking back at the trailer I
'm amazed at the cast in this picture. But what stuck in my mind all these years, for some unknown reason, is that the Buffalo was the fighter that stuck out the most. As with each new build I like to try something different, or "new", that I haven't done before. So with this build I will be forgoing most of the kit decals and I'll be making my own to represent a Buffalo from Midway and not the markings for the USS Long Island (1941). I'm from Long Island and had no idea we even had an aircraft carrier named after it. There are after market decals (Starfighter Decals) for this kit for the Battle of Midway but they represent Buffalo's from the USS Lexington ( Lex. was lost at this battle), USS Saratoga, 1939-1940 Worlds Fair and again the USS Long Island. By mixing and matching the Starfighter decals one can produce a Buffalo assigned to the Hawaiian Islands.
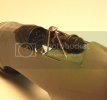
This is what I'm shooting for.

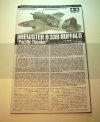
So this is the kit.
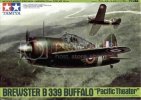
Only two main sprue's and a single clears parts tree.
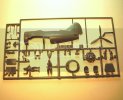
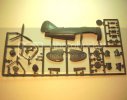
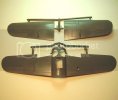
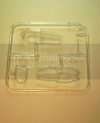
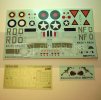
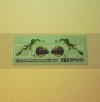
The dragon and boars head decals were printed as white on the decal sheet so Tamiya has printed separate decals for these. Also there is a set of canopy masks with this kit which will be very helpful when painting. Now their not pre-cut so a new blade and a straight edge will be needed to cut each piece of masking out to be fitted.
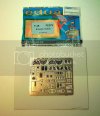
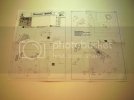
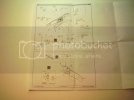
Another first for me to get my feet wet with photo etch was the Eduard color Zoom cockpit set. Boy's there are some extremely small parts on this fret. Overall it looks fantastic and I'm looking forward to sweating it out with much eye pain. (did pick up magnifying visor for this)
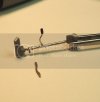
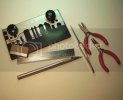
Some photo etch tools that I picked up for this is the Small Shops 5.5" Bending Tool and some tiny pliers for which I will wrap tape around the business end of the tools so as to not mar the photo etch.
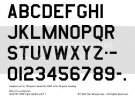
For the decals that I will be making I found WWII Military font that I was able to copy and paste in Print Shop to produce the registry markings for Midway Island.
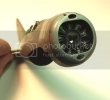
Finally two birds I found online for reference on the Midway Island Buffalo's that others have made. First is of the Tamiya kit.
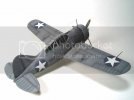
This is the Special Hobby Buffalo which consequently is represented as a Midway Island Buffalo! I opted for the Tamiya kit for two reasons. One...I wanted to build a Tamiya kit as I never have made one before. And 2....I very much wanted to try my hand at making my own decals.
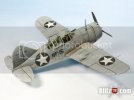
I might make some color adjustments as you can see a contrast in difference on fuselage tone. I think a bit of artistic licensing is in order.
This kit looks as if it's of an older production from Tamiya and appears to be a repop. The parts trees are all bagged together and bounce around in the box leaving some minor scratches and scuff marks here and there. Also there are some swirling marks on the plastic that look like buff marks....don't know if that's from the mold or not, but you can see them visibly in the wing parts photo. Easy sanding and primer will clean that up. The panel lines look a wee bit weak in some areas so I might rescribe a few here and there. Also there are no rivet holes present on this kit. Hmmm, go figure.
So that's it.....the Tamiya Brewster B-339 Buffalo. Buffalo wings for everybody!
MIDWAY(1976) Original Theatrical Trailer
I remember one of my older brothers taking me to go see this when I was 11. Looking back at the trailer I
'm amazed at the cast in this picture. But what stuck in my mind all these years, for some unknown reason, is that the Buffalo was the fighter that stuck out the most. As with each new build I like to try something different, or "new", that I haven't done before. So with this build I will be forgoing most of the kit decals and I'll be making my own to represent a Buffalo from Midway and not the markings for the USS Long Island (1941). I'm from Long Island and had no idea we even had an aircraft carrier named after it. There are after market decals (Starfighter Decals) for this kit for the Battle of Midway but they represent Buffalo's from the USS Lexington ( Lex. was lost at this battle), USS Saratoga, 1939-1940 Worlds Fair and again the USS Long Island. By mixing and matching the Starfighter decals one can produce a Buffalo assigned to the Hawaiian Islands.
This is what I'm shooting for.

So this is the kit.

Only two main sprue's and a single clears parts tree.


The dragon and boars head decals were printed as white on the decal sheet so Tamiya has printed separate decals for these. Also there is a set of canopy masks with this kit which will be very helpful when painting. Now their not pre-cut so a new blade and a straight edge will be needed to cut each piece of masking out to be fitted.

Another first for me to get my feet wet with photo etch was the Eduard color Zoom cockpit set. Boy's there are some extremely small parts on this fret. Overall it looks fantastic and I'm looking forward to sweating it out with much eye pain. (did pick up magnifying visor for this)


Some photo etch tools that I picked up for this is the Small Shops 5.5" Bending Tool and some tiny pliers for which I will wrap tape around the business end of the tools so as to not mar the photo etch.

For the decals that I will be making I found WWII Military font that I was able to copy and paste in Print Shop to produce the registry markings for Midway Island.

Finally two birds I found online for reference on the Midway Island Buffalo's that others have made. First is of the Tamiya kit.

This is the Special Hobby Buffalo which consequently is represented as a Midway Island Buffalo! I opted for the Tamiya kit for two reasons. One...I wanted to build a Tamiya kit as I never have made one before. And 2....I very much wanted to try my hand at making my own decals.

I might make some color adjustments as you can see a contrast in difference on fuselage tone. I think a bit of artistic licensing is in order.
This kit looks as if it's of an older production from Tamiya and appears to be a repop. The parts trees are all bagged together and bounce around in the box leaving some minor scratches and scuff marks here and there. Also there are some swirling marks on the plastic that look like buff marks....don't know if that's from the mold or not, but you can see them visibly in the wing parts photo. Easy sanding and primer will clean that up. The panel lines look a wee bit weak in some areas so I might rescribe a few here and there. Also there are no rivet holes present on this kit. Hmmm, go figure.
So that's it.....the Tamiya Brewster B-339 Buffalo. Buffalo wings for everybody!

