Tamiya's P47 Thunderbolt on the bench

docsudy

Member
Joined
Feb 4, 2024
Messages
57
Good evening fellow SMAs:
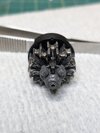
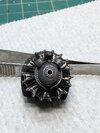
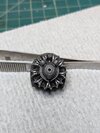
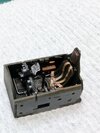
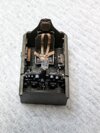
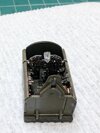
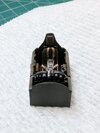
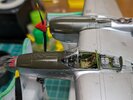
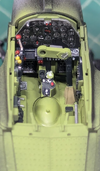
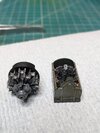
I am posting some images of the cockpit and radial engine of my Tamiya's P47 thunderbolt, 1/48 scale currently on the bench. I wired the engine to make it a little bit more real looking with 24 gauge wire. Was only able to fit one distributor wire per block. I weathered both the cockpit and the radial engine with black and dark brown panel line washes and dry brushing with flat aluminum.
Your comments and suggestions are welcome.
Thanks for looking.
Doc Sudy1000000502.jpg1000000501.jpg1000000498.jpg1000000500.jpg1000000493.jpg1000000494.jpg1000000496.jpg1000000495.jpg
 
Good evening fellow SMAs:
I am posting some images of the cockpit and radial engine of my Tamiya's P47 thunderbolt, 1/48 scale currently on the bench. I wired the engine to make it a little bit more real looking with 24 gauge wire. Was only able to fit one distributor wire per block. I weathered both the cockpit and the radial engine with black and dark brown panel line washes and dry brushing with flat aluminum.
Your comments and suggestions are welcome.
Thanks for looking.
Doc SudyView attachment 125342View attachment 125343View attachment 125344View attachment 125345View attachment 125346View attachment 125347View attachment 125348View attachment 125349
Nice work on the cockpit. Love the detail..
 
The cockpit was easy , the engine was a b......
I totally agree when talking about radials, in some cases they are fairly hidden, but in most they are out there front and center. I think yours looks fantastic, a testament to patience I'd assume.

Is this a razorback or bubble-top?
 
Hello Edbert
Thanks for noticing! This is the Razorback version of Tamiya's. Funny thing I originally bought a quickboost resin engine for the build , thinking it would be so much better. When it came I realized it required the firewall to be cut off from the engine which would be nearly impossible to do at least with my set of tools. So when I looked at the Tamiya's version I realized it wasn't too bad. So I stuck with the original and wired it the best I could do and weathered it. I used a pin vise drill to make the holes, 24 gauge wire ( which was not very malleable making it not easy to bend) but in the end it was the best I could do.
I am finishing the fuselage and wings currently and will have it primed soon. I was thinking about the early Razorback version with olive drab top (dorsal) and lighter grey lower ( ventral surface). Haven't decided if I want to go with a red cowling or white. Any thoughts on weathering in order to make the olive drab look old, faded and dirty. I was thinking about using an oil dot filter technique I have seen on some terriffic modelers you tube videos. As I am a bit new to this game I have yet to try this technique but I thought it could work here.
Any thoughts????Thanks again
Doc Sudy
 
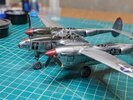
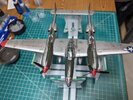
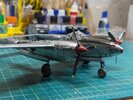
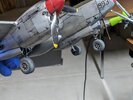
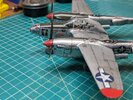
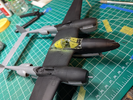
It is your kit so make your own choices. For myself I love camo, paint over bare metal, but I am working on a P-38J right now that will be silver. So sometimes subject matter dictates the path. Which fighter are you depicting, what were the operational dates and were they painted or bare? Personally I'm not particular with historical accuracy, paint it the way you want, just like your car. But a lot of people take the subject matters very seriously, which is also cool. But do whatever you want with YOUR kit.

Metallic topcoats can be hard to get shiny, but if you're going for a weathered look, months of exposure to sun and rain, it is easier. To answer the question of the anti-glare parts, I intend to coat the silver body is a gloss-coat and the olive-drab portions in a matte.

I think you should go first, I'll wait and see how you get on :)
 
Same kit, same scheme.

I built models a lot back in the day, but in 2024 I'm a total newb trying to learn new paints (not Testors) and glues (not Testors), but at least I have the benefit of EXCELLENT kits like "Marge" there.

1727658639744.png

1727661134699.png
 
Last edited:
Looking forward to more images of a great build!!!
I'll try to keep those in a different thread, ha!

But yeah, I love seeing the in-progress posts for everything, there's so much to learn and so little time left. Well maybe time, but not eyesight :-(

Keep taking shots and showing us that Thunderbolt you're building, I have one on my wish list if I can ever whittle down my stash. Also, remember this...

"If you want to take a picture of yourself to send to your girl, pose on a Mustang.

If you want to live and get home to your girl, pose with your Jug!"
 
Ok folks here I go.
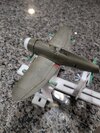
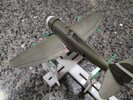
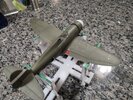
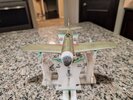
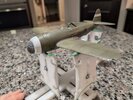
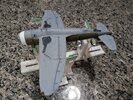
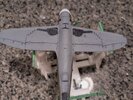
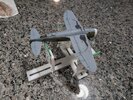
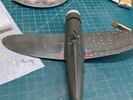
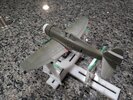
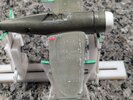
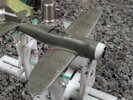
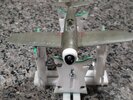
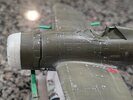
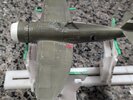
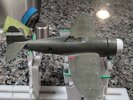
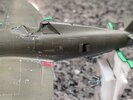
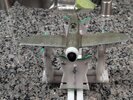
I am posting my initial images of the first stages of weathering my version of Tamiya's Razorback circa late 1943. I have started with black basing the model. I painted the lower or ventral surface Tamiya xf 83 medium sea gray. The upper or dorsal surface was first sprayed with Tamiya xf 81 RAF dark green. I used theses colors as I have discovered that many of the US planes shipped to England were repainted using RAF standard colors ( i.e. as used on the Spitfire). The XF 81 is a lighter version of there true olive drab xf 62. I added a few drops of black and sprayed the major panel lines on the upper surface. I then remixed a batch adding a few drops of desert yellow or buff adding to the dark green to lighten the panels to attempt to show aging. I sprayed the center of most panels and moved carefully outwards to the panel lines. To give the whole thing a more realistic look I sprayed over several panels using a mixed of dark green , adding 2 drops of desert yellow and 2 drops of medium sea grey XF 83 to simulate panels that had been more recently replaced following damaged received from combat.

Chipping was produced by spraying a coat of xtreme dark aluminum followed by abteilung's rubber mask, diluted and hand brushed on areas of wear. Once the dark green layers were sprayed on, a pencil eraser was used to remove the overlying paint to reveal the aluminum underneath.
After a light sand I plan to lay down a few coats of semigloss.
Pin dot filtering to follow to further lighten .
Let me know your thoughts, comments and suggestions
Thanks so much
Doc SudyPXL_20241022_221714609.jpgPXL_20241022_221729174.jpg

PXL_20241022_221747817.jpg

PXL_20241022_221815794.jpg

PXL_20241022_221821540.jpg

PXL_20241022_221833964.jpg

PXL_20241022_221841892.jpg

PXL_20241022_221851179.jpg
 
Good work. It is looking very nice.

I need to get one of those aircraft stands. I got planes to build and that might be easier on the plane stand rather than a bundle of towels to set it on.
 
Good work. It is looking very nice.

I need to get one of those aircraft stands. I got planes to build and that might be easier on the plane stand rather than a bundle of towels to set it on.
Thanks so much. You can find this vendor on Etsy. If you're interested. I'll look it up and get you her business name. They are a little expensive running about $80 for the larger version that can handle both 1/48 and 1/32 scale plans. But so far compared to anything else I've tried. They're well worth it as they're much more sturdier than anything I've tried.
Doc Sudy
 
Hmm, I'll need the larger version. All I have is 1/48 and 1/32 planes. I've been putting off building them because of the pain it is with stuff snapping off due to the towels I've been using.

Thanks for the info. I'll check it out on etsy.
 
I've also seen them improvised by putting some pieces of pipe insulation (you know, those grey foam tubes that are split lengthwise on one side) on the edges of a rectangular box.
 
Back
Top