The Dark Knight Bat Pod in 1/25 by Moebius > WIP
- Thread starter Ohm
- Start date
Ohm
dumpsters, divers and details
- Joined
- Jun 18, 2009
- Messages
- 232
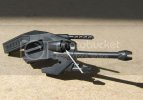
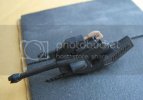
The molded headlight lens detail is cast together with the black plastic of the Munitions Cluster.
They can be painted to the desired effect because it's so small at 3/32" (2 mm).
I couldn't however let this go and decided to drill it out for a clear lens
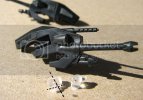
The same 1/16 drill bit was used and then a micro rat tail file cleaned it up to the final cavity shape and size.
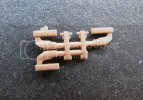
I needed dome shaped clear things to represent the headlights.
The lenses I found are casting tabs from the clear parts sprue of the Revell '66 Chevelle Station Wagon kit# 85-2890
They'll be cut and shaped at the dotted lines until they fit the look
Ohm
dumpsters, divers and details
- Joined
- Jun 18, 2009
- Messages
- 232
8) Thanks fellas
stance noun \ˈstan(t)s\
a : a way of standing or being placed : posture
b : intellectual or emotional attitude
Synonyms: attitude, carriage, poise, posture, station
from: merriam-webster.com
While dry fitting some of the parts together I played around with the stance.
This can be adjustable depending on the position that the Rear Wheel Assembly is inserted over the Chassis Assembly peg part.
Instruction Sheet page 4
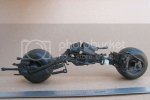
prototypical stance
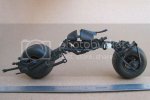
lifted high
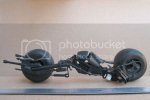
down low
stance noun \ˈstan(t)s\
a : a way of standing or being placed : posture
b : intellectual or emotional attitude
Synonyms: attitude, carriage, poise, posture, station
from: merriam-webster.com
While dry fitting some of the parts together I played around with the stance.
This can be adjustable depending on the position that the Rear Wheel Assembly is inserted over the Chassis Assembly peg part.
Instruction Sheet page 4

prototypical stance

lifted high

down low
JohnSimmons
For Spud: I was once Merseajohn
- Joined
- Jan 4, 2011
- Messages
- 5,645
Cool, I think I prefer it down 8)
Ohm
dumpsters, divers and details
- Joined
- Jun 18, 2009
- Messages
- 232
Thanks for looking in and your comments.
I like the look of it low and scraping but Ziz is right. The 1/1 wouldn't operate in either position based on the foot rest and operations being at impossible angles . . . I was just playing around any way ...
Actually, if you sand smooth the accepting peg part on the Chassis Assembly. Then an infinite rotation position possibilities will be available. Good to know for crazy designs later . . .
I like the look of it low and scraping but Ziz is right. The 1/1 wouldn't operate in either position based on the foot rest and operations being at impossible angles . . .
Actually, if you sand smooth the accepting peg part on the Chassis Assembly. Then an infinite rotation position possibilities will be available. Good to know for crazy designs later . . .
Ohm
dumpsters, divers and details
- Joined
- Jun 18, 2009
- Messages
- 232
Ohm
dumpsters, divers and details
- Joined
- Jun 18, 2009
- Messages
- 232
The hand grips and control details required a lot of web searching for the prototype in 1/1. It's tiny up there I know and I've seen some builds with cables running from the stock kit box parts and they look fine.
But, I couldn't let this go. I had to try and replicate this to some degree of accuracy because I admire the design of this vehicle so I wanted to make something cool with mine
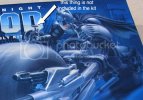
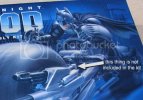
This sensor thing is not included in the kit so I made one with styrene and stretched sprue
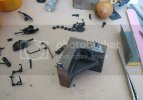
The drilling and most of the work was done before mounting them to the handle bars
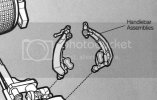
The Hand Grips should be glued to the Handle Bars in a position looking more like the front box art image instead of how the I-sheets indicate.
The "brake" and "clutch" levers should point slightly inward and the whole grip part pointed slightly downward.
This will conflict with the shape of the casted parts and their joining points.
This may be the reason why Moebius didn't include a Riding figure because the loose design of the fitting of the; Foot Rests, Knee Rests, Seat, Elbow Pads, Handle Bars, and Hand Grips.
Or maybe the figure is what a lot of model builders with this kit was waiting for before they start their Bat-Pod to fit the Rider in properly
This is what I came up with using various wire, solder, stretched sprue, and reference from the internets...
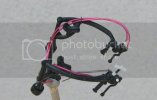
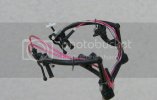
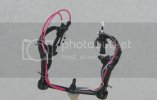
notice the thumb control buttons included
another I-Sheet error alert:
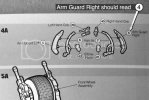
When installing the Arm Guard parts (4) and (5), follow the text instructions which are correct and not the illustrated picture
But, I couldn't let this go. I had to try and replicate this to some degree of accuracy because I admire the design of this vehicle so I wanted to make something cool with mine

This sensor thing is not included in the kit so I made one with styrene and stretched sprue

The drilling and most of the work was done before mounting them to the handle bars

The Hand Grips should be glued to the Handle Bars in a position looking more like the front box art image instead of how the I-sheets indicate.
The "brake" and "clutch" levers should point slightly inward and the whole grip part pointed slightly downward.
This will conflict with the shape of the casted parts and their joining points.
This may be the reason why Moebius didn't include a Riding figure because the loose design of the fitting of the; Foot Rests, Knee Rests, Seat, Elbow Pads, Handle Bars, and Hand Grips.
Or maybe the figure is what a lot of model builders with this kit was waiting for before they start their Bat-Pod to fit the Rider in properly
This is what I came up with using various wire, solder, stretched sprue, and reference from the internets...


notice the thumb control buttons included
another I-Sheet error alert:

When installing the Arm Guard parts (4) and (5), follow the text instructions which are correct and not the illustrated picture
Ohm
dumpsters, divers and details
- Joined
- Jun 18, 2009
- Messages
- 232
Quaralane - Thank you. I'm currently wiring the batteries and plumbing the radiator hose then onto painting
Dark Kyp - Thanks for looking in and your comment
Thanks, Scott, I just looked too closely at the prototype and got carried away
Dark Kyp - Thanks for looking in and your comment
Thanks, Scott, I just looked too closely at the prototype and got carried away
Similar threads
Latest posts
-
-
-
-
BSG "War of The Gods" 1/6 Scale Wall Display
- Latest: BattleScale Collectica
-
-

