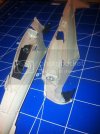
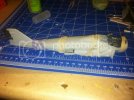
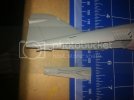
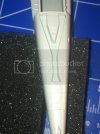
The first in, well, way too long

kolja

Member
Joined
Nov 22, 2011
Messages
103
My last project was in spring/summer 2008, then a move and a few deployments really slowed things down.

But, I'm back at it - for this first build back i picked the hopefully-straightforward-to-build 1:72 Italeri A-6E Intruder. I got in in trade, and a start had been made on the cockpit, but there was still a little touch up to be done. This is where I was with it about an hour ago:

photo-2.jpg
 
Intruder!!!! Nice. I love these airframes. I have the Kinetic Prowler sitting on deck with PE for the fall. I'll be watching this with interest as I love seeing it come together.
 
I like the Intruder , good start too :)

Love the Avatar ;D

Chris.
 
Thanks guys!

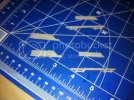
Mounted the compressor blades in each half, and this plate thingie that has the turbine faces on it into one half:

photo-4.jpg

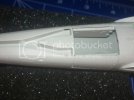
Then sandwiched the cockpit into the fuselage halves, and added the separate keel.

photo-5.jpg

The fit is really nice. The keel is a perfect fit and I don't think it will need any filling at all. The spine will only need enough work to make the seam invisible (there's no panel line there on the real thing). I will say that it would be a good idea to test the instrument panel BEFORE doing all the sandwiching. Mine turned out a little wide - it was an easy fix to sand a bit on each side, and it was easy enough to remount since the nose radome isn't on yet, but all the same it would have been easier to figure out ahead of time... c'est la guerre!
 
Yeah, I guess folks are kind of surprised at the size of the Prowler/Intruder (there's an active thread on another site where folks are expressing that very sentiment). It's about a 55 foot wingspan...

As to the wings, I haven't actually decided yet. Everything else being equal I'd like them folded; I like the visual interest, and the reduced space on the shelf. But I need to take a closer look at the exposed wing joints to see how presentable they are, and do some test fitting to see how the fit is. If it seems like too much work, the wings will be spread.
 
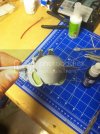
After very minor seam cleaning, I added the tailhook well:

photo-2-2.jpg

Which was a pretty neat fit-

photo-3-1.jpg

And while I was back there added the former fuselage speed brakes, which also fit nicely after only needing to smooth out the sprue attachment points:

photo-5-1.jpg

Last for the night I joined the inboard wing tops and bottoms:

photo-4-1.jpg
 
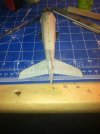
Cleaned up what little putty I did use, and also one lonely ejector pin mark that was easily sanded away. Then added the elevators:

photo-2-3.jpg

After checking out some pictures on the internet, I decided the kit parts were good enough for folded wings so after cleaning up the seams on the inboard wings (really, just where cement and melty plastic had oozed out) I added the wingfold parts. There was ONE gap on the inboard wings, on the starboard side auxiliary heat exchanger intake, between top and bottom halves. It was easily fixed with CA.

photo-4-2.jpg
 
Coming along nicely! Following this one.

I saw and really wanted Italeri 1/48 Intruder few months ago but it was like ~50e which is Eduard MiG-21 + few colors money... And in my head Eduard > Italeri ;D

Cheers!
 
The Eduard MiG-21 that just came out a year or two ago? I just read a very favorable review of it in an issue of Fine Scale Modeler from last summer (thanks to deployments I'm as behind in magazine subscribtions as I am in model building!).
 
Yeah, that's the one. I've seen it in my local modelling club unbuilt and fell in love on the first site, later saw bunch of WIPs, finished models and reviews, so yeah, what can i say - it's on my wish list for some time ;D ... If you like the plane you should check it out.

PS Don't let me ruin your topic because in word oFF-topic two Fs stand for FlipFlop ;D ;D ;D lol
Cheers!
 
I DID get some work done last night, it was just too late to post when I finished as I had a long day ahead of me today.

I started painting the intake ducts white. I've decided to hand paint them, as they're molded all in one piece, like a "D" if you're looking at them head on, and I didn't think airbrushing would work out so well. Since the nosewheel well, with the keel installed, is pretty constrained, I figure I'd hand paint that too, and while I'm at it I'm painting the area that will be behind the intakes (the opposite 'wall' from the ladder wells). I'm using Tamiya flat white, which brushes on OK and ought to cover in about 4 coats (it dries quick, so 2 last night and 2 tonight). I've heard Vallejo brushes on even better so I may try to get my hands on some of that for the colors I normally find myself brushing (basically white and cockpit colors). I added the exhaust pipes - the external ducting behind the exhaust I painted flat black first, and then painted on steel, hoping to get an exhaust stained look. The steel wound up covering it entirely, but I figure I'll go back at the end and either add Tamiya smoke or black pastel powder to get the look I want. Only a little bit of putty added at the joints there, otherwise a pretty decent fit.

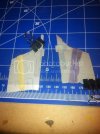
I also cleaned up the seams on the outboard wings and started adding the speed brake hinge fairings out on the tips. Then I mounted the inboard wings. Here I ran into the first real gaps - I'm not TOTALLY prepared to blame the kit, it could always be my parts prep. But fortunately the gaps between the wing roots and fuselage was uniform, so I added some thin Evergreen styrene strip with enough liquid cement to 'melt' it into the gap. That took up most of the open volume, so while I'll still add some putty it won't wind up being too much, and with it being an inside corner it should require a minimum of cleanup.
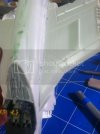
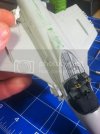
photo-2-4.jpg

photo-3-3.jpg

The first, admittedly fuzzy, iphone picture is the left wing root with the styrene added. The second one is the right wing root before adding the styrene to show the gap I was working with.
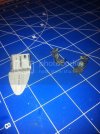
 
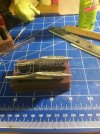
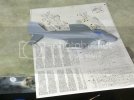
I'm getting close to starting to airbrush, and I usually start with white. The HARM are off the sprue and the mold parting lines cleaned up. I assembled the 8 Rockeye last night and I was cleaning the seams where the halves joined, I noticed there were no positive mounting pins/holes. Aside from being a minor inconvenience in assembling, I know from experience this makes them prone to popping off when packed up for moving. So, I drilled a bunch of holes in the pylons and inserted copper wire with CA:

photo-2-5.jpg

I just had some scrap wiring out in the garage; I peeled off some insulation and unbraided the copper inside for plenty of relatively fine wire for my next several projects. I'd already drilled one hole in each HARM to stick them on a toothpick for painting, so I'll just have to drill one more in each of those. I'm using the same scheme to mount the ejector racks to the inboard pylons (not yet done in this picture - also not yet done here is trimming the wire - I deliberately cut it long for initially installing it to make it easier to handle), and will install wire to the racks and drill holes in each Rockeye.

Other than that, the landing gear struts are off the sprue and cleaned up, and pretty much everything else that needs to be white ready to be, well, painted white. The windscreen and canopy got their dunk in Future the other night and one of these day's I'll mask and spray them too.
 
More drilling and cutting wires - mounting the ejector racks to the pylons with their wire pins worked out pretty much like I'd hoped and is practically bullet proof. I added wire pins to hold the Rockeye themeselves, and drilled holes in the ordnance. All that's done now and the Rockeye, like the HARM, are ready for white paint.

I installed the intakes, with blue-tac to mask the white, carefully lined up to match the intake lips which will be gray. I'll do the splitter plates separate and add them after painting.

photo-2-6.jpg

There's a good sized gap behind the intakes where they meet the ladder wells. I filled the gaps with putty but sanding will be tight. If I have to I can close the ladders but I'd prefer not to...
 
Coming along nice Kolja . You mentioned 'Airbrush ' ....I heard you ;D ;D

Chris.
 
Had a lot of travel, both for work and for leisure, but was able to get some work done the last couple nights. Last night I fired up the airbrush and shot white on wheel hubs, landing gear struts, gear door interiors, main landing gear wells, ladder wells (which cleaned up alright), and ordnance. It all went fairly well, though as I disassembled the airbrush for cleaning, I discovered I was really quite lucky. In retrospect my decision to reassemble it after it's last cleaning wasn't the best (despite my best efforts, it was rather gunked up and stuck together in some places) and I probably would have been better off to have packed it away apart after cleaning, given it another cleaning when I got ready to use it again and then been off to the races. I was definitely more lucky than skilled in this case!

Tonight I just did some touch up with the white on some of the tighter corners, painted silver on the landing gear strut oleos, and put yellow stripes on the ordnance. On all the rockeye there's engraved lines to follow (probably too deep, but not really worth my fixing at this point). The HARM don't have that engraving, and freehanding the first one didn't pan out so well. I cleaned it up as best I could and am touching up the white before trying again. The second HARM I masked before striping.
 
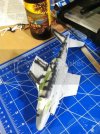
Yet more travel (but to Hawaii so I'm not going to complain) but I've been able to get back at it. Here I am halfway through the light gray underside (which is when my compressor decided to call it a night). You can see I'm giving preshading another try - I've yet to get to a point where I have enough airbrush trigger finesse to really make it work, but it's a harmless technique to keep practicing. Worse case is I just wind up completely overcoating it with the color coats anyway...

photo-2-7.jpg
 
Looking good kolja, is that a local Hawain brew in the background... half your luck, the most exotic traveling I do for work is to work and back lol
 
It's Hawaiian (I'd already had a taste for it before I visited the islands for work last month - and partook of it often!) but not local. The exchange just happened to have some. Now the fridge happens to be stocked with Rogue and Sierra Nevada Summerfest.

Last night I finished the major painting:

photo-2-8.jpg

Hopefully tonight I'll have the chance to spray some Future, at least on one side of it...
 

Latest posts

Back
Top