The "Jilted Harlot"

Sadly, not good.
I'm going to have to redo the lighting plan as the green LEDs I was using just don't put out enough light.
Luckily, I have others available here at home already.

This also meant that I had to strip the clear resin lens out of the engine housing

More details to follow later on
 
Quaralane said:
Sadly, not good.
I'm going to have to redo the lighting plan as the green LEDs I was using just don't put out enough light.
Luckily, I have others available here at home already.

Why don't you go get some "Super Bright" LEDs, sand lightly with a 400X paper, dip the bulbs in Tamiya Clear Green, X-25. After they're dry, dip them in Future and let dry.
 
scratchy said:
Quaralane said:
Sadly, not good.
I'm going to have to redo the lighting plan as the green LEDs I was using just don't put out enough light.
Luckily, I have others available here at home already.

Why don't you go get some "Super Bright" LEDs, sand lightly with a 400X paper, dip the bulbs in Tamiya Clear Green, X-25. After they're dry, dip them in Future and let dry.

I have done this before, it does work! You just need to be careful to not scratch them.
 
Lights are taken care of, actually.
I have a set of LEDs I bought for the Solaria that I haven't used yet.
They are NICE and bright.

Also recieved the crew figures in the mail today. Just have to pick out the ones I'm going to use now.

With luck, I should have a "real" update by the weekend
 
All right, time for a much-delayed update.

Attempted to silver the lens I was planning on using.
fm-mf-144-13.jpg

After looking at the light output on that group of LEDs, I'm abandoning that idea in favor of a much brighter set of LEDs
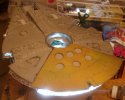
I have also gone in and drilled out the vents in the grill to allow for more light to come out.
The new engine nozzles have also been added to the grill and drilled out.
Also showing in this pic is the completed dish assembly
fm-mf-144-14.jpg

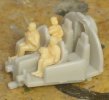
Picked out some N-scale figures to act as crew, and tried them out in the cockpit.
fm-mf-144-15.jpg

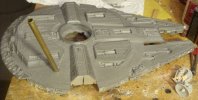
Filled the underside of the new top plate with Aves and also built the turret housings
fm-mf-144-16.jpg

Using templates for the 1/72 Falcon, I shrunk them down and printed them out for use at this size.
fm-mf-144-17.jpg

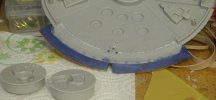
I drilled a hole in the bottom of the ship to accomodate a piece of brass tube that will mount it to the base and allow for me to pass the wiring through to the power pack.
fm-mf-144-18.jpg

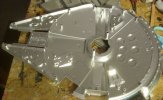
Using coats of black and aluminum, I' did the majority of the light blocking for the ship.
fm-mf-144-19.jpg

Youtube link:
MF Group Build-Jilted Harlot-Part 3
 
Nice progress. Too bad about the LED's in the resin....

But it looks like you have the solution figured out.
 
Great Update Q!!! Those figures are going to work out nicely. Looking Great!!!
 
Yeah nice job Q and good find with those figures (dont suppose you'll find a chewie lookalike in that pack though lol)
 
Thanks, guys.

@merseajohn,
Don't have to worry about finding a Chewie. The Harlot doesn't have a wookiee in her crew, so I'm safe :p
 
Time to get some serious work done on this.

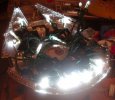
I laid out a battery-powered light string into the hull and then taped the bulb/wires into place with electrical tape.
Powered up the lights to see what I have.
fm-mf-144-20.jpg

Then, I tested it with the hull top in place.
fm-mf-144-21.jpg

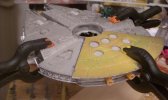
After running the wires down the brass tube for the stand, I clamped the upper and lower hull halves together and glued it up
fm-mf-144-22.jpg

Youtube link:
MF Group Build-Jilted Harlot-Part 4
 
There's absolutely nothing like a light test to an unfinshed build, it just throws life into her. Looking good!

I like the idea of the N scale figures, how are the... too big - too small or just right?
 

Latest posts

Back
Top