The One I Have Been Waiting for

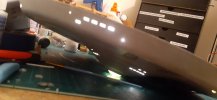
So last night I sprayed about 6 coats of Tamiya gloss clear on the saucer to get even a semigloss layer for decals. It just did NOT wanna gloss that saucer! I finally got it, but accidentally got a couple minor runs and a finderprint in the clearcoat.:( Fortunately I was able to save it with some wetsanding with 1000 grit. Then had to touch up a couple spots. I also had to fix up a spot on the impulse deck that I thought I had filled.

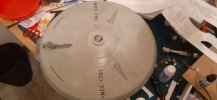
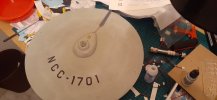
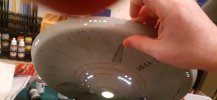
So all that sorted, finally got a couple decals down on the saucer underside last night, and just finished decaling the underside.20211004_170754.jpg

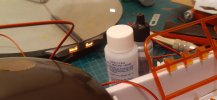
I also painted the accelerator and engine deck. I deviated from show accuracy by painting a gunmetallish color mixed from black, silver and blue grey on the outer sections of the engine housing. I did this with both the 3d and physical models of the Condor and really liked the look so did it here.20211003_184449.jpg

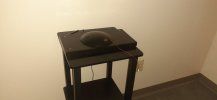
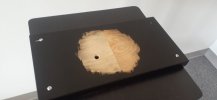
And last nighr I also came up with a way to permanently attach the base piece to the tall endtable. Its not completely finished, and due to a drill accident I now have a spot on the baseplate that is screwed up. I will fix it.20211004_170736.jpg
 
So I am doing the top. I have had to use the kit registry and panel decals on the upper saucer. While the HDA/Trekworx decals are better for color and look better once dry, there are three issues I have.
A. The decals for the panels at the back of the saucer, and on B deck are oversize.
B. The larger decals, like the panel and registry are just a bit too thin to get positioned right. I had to scrap the rear panels and upper registry decals as the more I tried to get them positioned right the more they deform and/or roll up on themselves.
C. The decals with yellow parts, like the cargo hatches on the underside and B deck look perfect on the paper, but once on the kit the yellow turns green due to the thinness of the decal and the hull color.

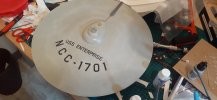
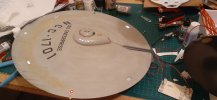
Its a shame too cos I overall prefer the HDA decals, but for a kit of this size I think they are not quite up to snuff. For a smaller kit they would be great.20211004_185954.jpg20211004_192453.jpg
 
Last edited:
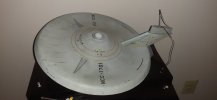
SAUCER IS DONE!!!20211005_182312.jpg20211005_182320.jpg20211005_182332.jpg20211005_182353.jpg20211005_182441.jpg

There are bits that are screwed up that I now cannot fix, so I sadly will just have to live with them, like the paint globs on the impulse exhaust vanes.

Also having a hopefully not big issue with some lights only coming on when the power plug is position a certain way in its socket on the sec. Hull board. Hopefully its just cos the plug can't be fully plugged in yet.
 
Had a health scare at work and got forced to go to the hospital. Long story short, I occasionally get stress induced muscle spasms in my chest, and as long as I stay calm and chill for a bit I am fine. But I got worked up cos it rarely happens at work, they thought I was having a heart attack despite repeatedly telling them what it really was, and they made ambulance take me to the hospital, where I was stuck till early evening(and by that time had been better four or more hours). And of course the diagnosis of the hospital was... exactly what I said it was. >.>

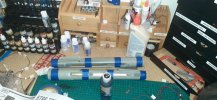
Anyways, once home, and after eating the first meal I'd had since 6 AM(!), I got the main nacelle bodies glued up.20211007_000813.jpg

I got primer on the secondary hull halves, and by the weekend will likely get the window lights installed and the hull glued up. I also painted the front parts of the nacelles that the motors and bussard lights attach to. Tomorrow I will likely wire those bits up, though it'll be a day or more before I attach them, as I want the main nacelle tubes finished before that happens.

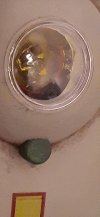
Also mocked up the PL display dome on my custom base and have the attachment to the table finalized. Though I'll have to take apart the splices of the power wire soon so I can get the wire through the metal tube the ship installs onto.20211006_235604.jpg
 
ONE BUSSARD READY!!

And the main tubes are going through patching. The seams were fairly bad, but also found some divits in the casting itself. Those are being handled. Was SO happy thenBussard works though. One more to go.20211007_142330.jpg20211007_142333.jpg
 
Last for the day I think. Just about wrapped up on puttywork on the nacelles.20211007_185310.jpg

Got the intercoolers painted and clearcoated. So once the main necelles are done the intercoolers can be installed.

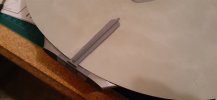
And test fit the dorsal and saucer. The gap between the two seems a bit large, even though that gap is supposed to be noticable. Before I install the dorsal permanently I may file the top of the attachment section down some.20211007_185251.jpg

And will be ordering a 3 lb block of steel to weigh down the bottom of the stand, and also gonna order a gold Starfleet emblem from Etsy for the base.
 
Tell me you're not spraying rattle cans that close to unprotected carpet in that new apartment you're always worried about damaging in some way .
 
Yeah , to the left .
I'm surprised you don't have the same coverage to the right is all .
 
Man that looks familiar. I also had a large cardboard spray "booth" of my own when I painted my big Enterprise. The only difference is mine was set up in the garage near the big garage door and I used an airbrush. Worked like a charm.
 
Man that looks familiar. I also had a large cardboard spray "booth" of my own when I painted my big Enterprise. The only difference is mine was set up in the garage near the big garage door and I used an airbrush. Worked like a charm.
I wish I had the means to keep it in the shop, but there are no windows in there. So unfortunately this is my only option. Been lucky that there have been no accidents.
 
So since the GF crashed a bit early, I decided to do a bit more. Got the detail painting on the nacelles done. Tomorrow will get the drybrush of the lighter grey, gloss on the outboard sides and hopefully decals tomorrow night or early Sunday.20211009_001257.jpg20211009_001303.jpg
 

Latest posts

Back
Top