- Joined
- Mar 6, 2023
- Messages
- 2,090
Yellow is a pain in the a$$ to paint. I'm not sure how many coats it's going to take to cover.Looks like it's coming along.just fine.
I don't think I will paint another one yellow.
Yellow is a pain in the a$$ to paint. I'm not sure how many coats it's going to take to cover.Looks like it's coming along.just fine.
I reiterate, looks like it's coming along just fine.Yellow is a pain in the a$$ to paint. I'm not sure how many coats it's going to take to cover.
I don't think I will paint another one yellow.
Your build looks great. Nice job on the seam.The one door didn't have the proper height, didn't sand it, just the way it was. I added a styrene strip to the top, seems to work.
Progress for the day, here I stop.
View attachment 118918
View attachment 118919
View attachment 118920
Thank you, Kind Sir.Your build looks great. Nice job on the seam.
Looking good. PM
The filling and sanding has done the trick, looking great. PanthermanThe one door didn't have the proper height, didn't sand it, just the way it was. I added a styrene strip to the top, seems to work.
Progress for the day, here I stop.
View attachment 118918
View attachment 118919
View attachment 118920
Thank you, Kind Sir!The filling and sanding has done the trick, looking great. Pantherman
Thanks for the advice.When you are mounting the tail rotor, drill a small hole on the opposite side of the rotor. Using the drill itself or a thin piece of metal, you can push the pin into the rotor as far as it will go. Takes the wobble out.
Putty, paint over the hole.
View attachment 118994
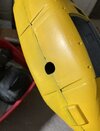
Glue the hook onto the mount first, let it set overnight, maybe go sofar as touse crazy glue. Cut away the forward and rear bevel, put glue on the left and right remaining side, slide into place then pull it down into place.Thanks for the advice.
I forgot to put the winch in before I put the fuselage together.
I will figure something out.
View attachment 118995
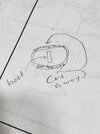
That is exactly what I was thinking.Glue the hook onto the mount first, let it set overnight, maybe go sofar as touse crazy glue. Cut away the forward and rear bevel, put glue on the left and right remaining side, slide into place then pull it down into place.
View attachment 119000
N.A.S.A. moment..... Houston, we have a problem.That is exactly what I was thinking.
Great minds!!
Looks great. Excellent work on a lousy kit.Progress to date, getting ready for the main rotor blades.
View attachment 119001
View attachment 119002
View attachment 119003
Thanks!!! So much trimming.......Looks great. Excellent work on a lousy kit.
Sorry guys, I'm falling a little behind you. I think once I get the internals painted it should move along nicely. PanthermanGot some more done. It's only dry fitted until my new paints arrive next week. Pantherman
View attachment 118864View attachment 118865View attachment 118866View attachment 118867View attachment 118868View attachment 118869View attachment 118870View attachment 118871
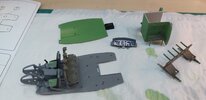
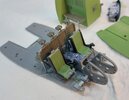
Almost done the painting, just the PE belts to fit. PanthermanSorry guys, I'm falling a little behind you. I think once I get the internals painted it should move along nicely. Pantherman
View attachment 119029
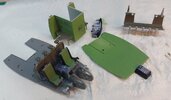
Lookin' good from here.Sorry guys, I'm falling a little behind you. I think once I get the internals painted it should move along nicely. Pantherman
View attachment 119029
