USS Enterprise E from Star Trek Nemesis
- Thread starter trekriffic
- Start date
trekriffic
Well-Known Member
- Joined
- Jan 6, 2012
- Messages
- 1,051
Yes, somewhat dimmer with more intense colors.Seems to be coming. Likely looks less bright in person
trekriffic
Well-Known Member
- Joined
- Jan 6, 2012
- Messages
- 1,051
Did some work on the quantum torpedo port...
A slot was drilled and filed out previously for the quantum torpedo launch port which is just above the Captain's yacht in the underside of the saucer. The port will glow blue thanks to a transparent blue styrene part leftover from the 1/350 TOS Enterprise light kit. The part was glued in behind the opening with epoxy. It will be lit with a 2mm LED:
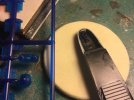
USS Enterprise E - Nemesis-WIP - Quantum Torpedo Port by Steve J, on Flickr
I glued the K size power jack into the secondary hull with epoxy. Later I'll pack some AVES Apoxy Sculpt in around it for added strength:
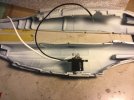
USS Enterprise E - Nemesis-WIP - Power Jack Installed by Steve J, on Flickr
The inboard and outboard pylon halves were glued together with Testors tube glue for both pylons:
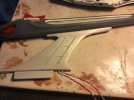
USS Enterprise E - Nemesis-WIP - Pylon Inboard Half Attached by Steve J, on Flickr
After spraying with adhesion promoter followed by Krylon Grey primer I will attach the upper nacelle grill halves using metal foil adhesive which is basically a tacky white glue. This water based glue will not craze clear plastic parts. I had already painted the raised center strip with Krylon white primer over Krylon flat black for light blocking down the middle of the clear covers:
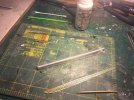
USS Enterprise E - Nemesis-WIP - Nacelle Grill PE by Steve J, on Flickr
Took about two hours to finish gluing and cleaning up the brass nacelle grills with isopropyl alcohol on a cotton swab. The metal foil adhesive makes a sticky mess and there's no way to avoid getting it on the painted side of the grills while you work to separate and space the grills while burnishing them down:
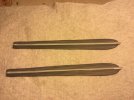
USS Enterprise E - Nemesis-WIP - Nacelle Grill PE Installed by Steve J, on Flickr
More to come. Think I'll work on the impulse engines next.
A slot was drilled and filed out previously for the quantum torpedo launch port which is just above the Captain's yacht in the underside of the saucer. The port will glow blue thanks to a transparent blue styrene part leftover from the 1/350 TOS Enterprise light kit. The part was glued in behind the opening with epoxy. It will be lit with a 2mm LED:

USS Enterprise E - Nemesis-WIP - Quantum Torpedo Port by Steve J, on Flickr
I glued the K size power jack into the secondary hull with epoxy. Later I'll pack some AVES Apoxy Sculpt in around it for added strength:

USS Enterprise E - Nemesis-WIP - Power Jack Installed by Steve J, on Flickr
The inboard and outboard pylon halves were glued together with Testors tube glue for both pylons:

USS Enterprise E - Nemesis-WIP - Pylon Inboard Half Attached by Steve J, on Flickr
After spraying with adhesion promoter followed by Krylon Grey primer I will attach the upper nacelle grill halves using metal foil adhesive which is basically a tacky white glue. This water based glue will not craze clear plastic parts. I had already painted the raised center strip with Krylon white primer over Krylon flat black for light blocking down the middle of the clear covers:

USS Enterprise E - Nemesis-WIP - Nacelle Grill PE by Steve J, on Flickr
Took about two hours to finish gluing and cleaning up the brass nacelle grills with isopropyl alcohol on a cotton swab. The metal foil adhesive makes a sticky mess and there's no way to avoid getting it on the painted side of the grills while you work to separate and space the grills while burnishing them down:

USS Enterprise E - Nemesis-WIP - Nacelle Grill PE Installed by Steve J, on Flickr
More to come. Think I'll work on the impulse engines next.
trekriffic
Well-Known Member
- Joined
- Jan 6, 2012
- Messages
- 1,051
Update...
I had been debating whether or not to open up the window ports or just rely on gloss white paint to give the illusion of lit windows. Then I thought about how cool those low light shots of the E looked with all those rows of lit up window ports so I finally decided to just go ahead and bite the bullet...
Using a pinvise and a fine pointed round file I commenced drilling out the saucer windows. Some of them will not be drilled out so I can paint them black later on. This took me about 6 hours and I am probably about only half finished with the upper saucer:
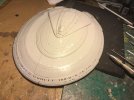
USS Enterprise E - Nemesis-WIP- Drilling Out the Saucer Window Ports by Steve J, on Flickr
The windows show up well when backlit. Still have a few hundred more to drill out:
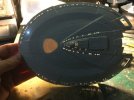
USS Enterprise E - Nemesis-WIP- Saucer Windows by Steve J, on Flickr
After drilling for What seemed like hours on end I took a break to work on the impulse engines and shuttle control room part...
This is one of the two impulse engine vents. I sanded off the raised detail on the clear kit part and glued the PE grills in place with metal foil adhesive per the PE instructions. Then I used the aftermarket decal, putting it on the inside face of the clear part. It will be lit by a red LED:
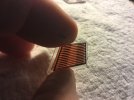
USS Enterprise E - Nemesis-WIP- impulse Engine Vent by Steve J, on Flickr
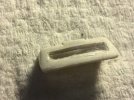
I removed a section of the saucer shuttle bay control room face and glued in a rectangular piece of clear styrene. The PE window frame will be glued on over the clear styrene with metal foil adhesive. Then I will use styrene strip to frame around the PE frame as the windows appear to be recessed from what I see in images of the external bay. The windows will be lit by ambient light inside the saucer:
USS Enterprise E - Nemesis-WIP- Saucer Shuttle Bay Control Room by Steve J, on Flickr
OK... well... back to drilling windows. Hope to be done with them by July.
Steve
I had been debating whether or not to open up the window ports or just rely on gloss white paint to give the illusion of lit windows. Then I thought about how cool those low light shots of the E looked with all those rows of lit up window ports so I finally decided to just go ahead and bite the bullet...
Using a pinvise and a fine pointed round file I commenced drilling out the saucer windows. Some of them will not be drilled out so I can paint them black later on. This took me about 6 hours and I am probably about only half finished with the upper saucer:

USS Enterprise E - Nemesis-WIP- Drilling Out the Saucer Window Ports by Steve J, on Flickr
The windows show up well when backlit. Still have a few hundred more to drill out:

USS Enterprise E - Nemesis-WIP- Saucer Windows by Steve J, on Flickr
After drilling for What seemed like hours on end I took a break to work on the impulse engines and shuttle control room part...
This is one of the two impulse engine vents. I sanded off the raised detail on the clear kit part and glued the PE grills in place with metal foil adhesive per the PE instructions. Then I used the aftermarket decal, putting it on the inside face of the clear part. It will be lit by a red LED:

USS Enterprise E - Nemesis-WIP- impulse Engine Vent by Steve J, on Flickr
I removed a section of the saucer shuttle bay control room face and glued in a rectangular piece of clear styrene. The PE window frame will be glued on over the clear styrene with metal foil adhesive. Then I will use styrene strip to frame around the PE frame as the windows appear to be recessed from what I see in images of the external bay. The windows will be lit by ambient light inside the saucer:

USS Enterprise E - Nemesis-WIP- Saucer Shuttle Bay Control Room by Steve J, on Flickr
OK... well... back to drilling windows. Hope to be done with them by July.
Steve
trekriffic
Well-Known Member
- Joined
- Jan 6, 2012
- Messages
- 1,051
That is a LOT of drilling.
Last time I did anything like that was back with the old AMT fiber optic Enterprise D and Deep Space Nine kits
Yep. I had the fiber optic D too. That was easy compared to this though, you only had to drill a single hole for each window for the fiber strand to fit thru.
For the E, I drill at least two holes for each window and then work the drill bit in and out, back and forth, in the slot to clean out the remaining plastic between the holes. I also clean up and debris left on the inside of the hull.
I had the Deep Space 9 kit too but ended up giving it to my nephew some years ago without ever opening it.
trekriffic
Well-Known Member
- Joined
- Jan 6, 2012
- Messages
- 1,051
Took a break from drilling out windows on the E to see if I could cast the phaser strips for the nacelle pylons using Silly Putty and Envirotex jewelry resin.
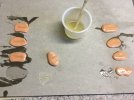
I found two phaser strips on the aft end of the upper saucer that were the right length for making copies of. Breaking off a small chunk of Silly Putty I pressed it down over the strip on the model and carefully peeled it away. It made a perfect negative in the putty. I made a total of eight molds even though I would only need two strips for each pylon; I figured I could then pick the best four to use in case some didn't turn out as well:
USS Enterprise E - Nemesis-WIP- Casting Phaser Strips by Steve J, on Flickr
The resin dried overnight and I was able to peel it off the Silly Putty with no problems.
I'd never tried this casting method before and am quite pleased with the results.
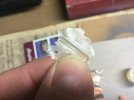
Some flash to clean up first then I'll prime them:
USS Enterprise E - Nemesis-WIP- Nacelle Pylon Phaser Strip with Flash by Steve J, on Flickr
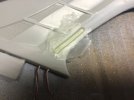
Each nacelle pylon has one phaser strip top and bottom along the trailing edge. Only the Nemesis E version has them on the pylons. This saved me a lot of time having to make them from scratch using styrene plastic. It would have been challenging to make them all exactly alike going that route so I'm extremely happy with how well the Envirotex casting method worked:
USS Enterprise E - Nemesis-WIP- Resin Cast Phaser Strip Test Fit by Steve J, on Flickr
Now back to drilling out windows. I'm about 3/4 of the way done of the upper saucer.
I found two phaser strips on the aft end of the upper saucer that were the right length for making copies of. Breaking off a small chunk of Silly Putty I pressed it down over the strip on the model and carefully peeled it away. It made a perfect negative in the putty. I made a total of eight molds even though I would only need two strips for each pylon; I figured I could then pick the best four to use in case some didn't turn out as well:

USS Enterprise E - Nemesis-WIP- Casting Phaser Strips by Steve J, on Flickr
The resin dried overnight and I was able to peel it off the Silly Putty with no problems.
I'd never tried this casting method before and am quite pleased with the results.
Some flash to clean up first then I'll prime them:

USS Enterprise E - Nemesis-WIP- Nacelle Pylon Phaser Strip with Flash by Steve J, on Flickr
Each nacelle pylon has one phaser strip top and bottom along the trailing edge. Only the Nemesis E version has them on the pylons. This saved me a lot of time having to make them from scratch using styrene plastic. It would have been challenging to make them all exactly alike going that route so I'm extremely happy with how well the Envirotex casting method worked:

USS Enterprise E - Nemesis-WIP- Resin Cast Phaser Strip Test Fit by Steve J, on Flickr
Now back to drilling out windows. I'm about 3/4 of the way done of the upper saucer.
jmilesmusicman
Member
- Joined
- Oct 9, 2013
- Messages
- 45
Nice innovation using the putty to cast the phaser arrays. Way cheaper and faster than getting them 3D printed.
trekriffic
Well-Known Member
- Joined
- Jan 6, 2012
- Messages
- 1,051
I finally finished drilling out the upper saucer. Good grief there were a lot of windows:
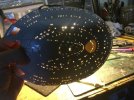
USS Enterprise E - Nemesis-WIP- Upper Saucer Windows by Steve J, on Flickr
Moving on...
Making good progress on the lower saucer. A few more to go before moving on to the secondary hull halves:
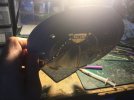
USS Enterprise E - Nemesis-WIP- Lower Saucer Windows by Steve J, on Flickr
I think I'm getting the hang of window drilling at this point:
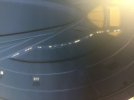
USS Enterprise E - Nemesis-WIP- Lower Saucer Window Light Test by Steve J, on Flickr
I use a pinvise and a micro drill bit (70, 71, or 72 works well) to drill thru the plastic. Thankfully the kit has the window ports molded into the hull or it would be a nightmare to get the openings all straight and uniform in shape. A pointed round file is used for final shaping and debris cleanup. Any windows that don't quite come up to snuff after shaping are filled in using my syringe and Perfect Plastic Putty, a water-based white filler putty. They will become dark windows at some point:
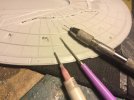
USS Enterprise E - Nemesis-WIP- Window Drilling Tools by Steve J, on Flickr
The saucer shuttle bay control room window piece was glued to the saucer using Testors model cement. I'm thinking now of lighting the windows with a small LED now. The LED would also light a pair of fiber optic strands for external floods underneath and to either side of the control room in front of the shuttle bay doors:
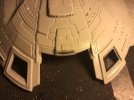
USS Enterprise E - Nemesis-WIP- Shuttle Bay Control Room Glued by Steve J, on Flickr
The brass PE doors were primed and glued to the clear kit part after sanding smooth. Something I also discovered - two tiny holes in the photo-etch piece for feeding .030" fiber optic strands from inside the model for the floodlights that illuminate the doors underneath the control room windows as seen in Nemesis. Just shows that Paul at Paragrafix thinks of everything:
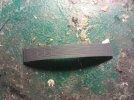
USS Enterprise E - Nemesis-WIP- Shuttle Bay Rollup Doors by Steve J, on Flickr
Next up... Drilling secondary hull windows and fiber optics.

USS Enterprise E - Nemesis-WIP- Upper Saucer Windows by Steve J, on Flickr
Moving on...
Making good progress on the lower saucer. A few more to go before moving on to the secondary hull halves:

USS Enterprise E - Nemesis-WIP- Lower Saucer Windows by Steve J, on Flickr
I think I'm getting the hang of window drilling at this point:

USS Enterprise E - Nemesis-WIP- Lower Saucer Window Light Test by Steve J, on Flickr
I use a pinvise and a micro drill bit (70, 71, or 72 works well) to drill thru the plastic. Thankfully the kit has the window ports molded into the hull or it would be a nightmare to get the openings all straight and uniform in shape. A pointed round file is used for final shaping and debris cleanup. Any windows that don't quite come up to snuff after shaping are filled in using my syringe and Perfect Plastic Putty, a water-based white filler putty. They will become dark windows at some point:

USS Enterprise E - Nemesis-WIP- Window Drilling Tools by Steve J, on Flickr
The saucer shuttle bay control room window piece was glued to the saucer using Testors model cement. I'm thinking now of lighting the windows with a small LED now. The LED would also light a pair of fiber optic strands for external floods underneath and to either side of the control room in front of the shuttle bay doors:

USS Enterprise E - Nemesis-WIP- Shuttle Bay Control Room Glued by Steve J, on Flickr
The brass PE doors were primed and glued to the clear kit part after sanding smooth. Something I also discovered - two tiny holes in the photo-etch piece for feeding .030" fiber optic strands from inside the model for the floodlights that illuminate the doors underneath the control room windows as seen in Nemesis. Just shows that Paul at Paragrafix thinks of everything:

USS Enterprise E - Nemesis-WIP- Shuttle Bay Rollup Doors by Steve J, on Flickr
Next up... Drilling secondary hull windows and fiber optics.
trekriffic
Well-Known Member
- Joined
- Jan 6, 2012
- Messages
- 1,051
trekriffic
Well-Known Member
- Joined
- Jan 6, 2012
- Messages
- 1,051
trekriffic
Well-Known Member
- Joined
- Jan 6, 2012
- Messages
- 1,051
So yesterday I got ambitious and decided to tackle two things at once - the three docking ports on the aft end of the lowest of the three "bridge" decks and the aft facing dual torpedo launcher located atop the aft end of the same deck...
Using the decal sheet I took some measurements to help determine the length I needed to make the torpedo launcher. It's going to be smaller than I imagined in my mind which is often the case:
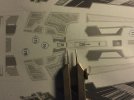
USS Enterprise E - Nemesis-WIP- Decal Measurements by Steve J, on Flickr
Drawing from the few images available online I made a few sketches. This launcher is unique to the Nemesis version of the ship and the kit does not include it so I'll use styrene rectangular rod and U-channel to make the main body and the two tiny photorp tubes respectively:
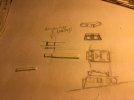
USS Enterprise E - Nemesis-WIP- Aft Saucer Dual Photorp Launcher Sketches and Sizing by Steve J, on Flickr
Changing gears after spending over an hour just figuring out the right width of the launcher (yeah, I'm anal that way) I turned my attention to the docking ports. The kit has three barely visible round indents indicating where the ports are located on the hull. Unfortunately, the kit is designed so the hatches would sit flush not extending out from the hull on three short access tubes. So...
I ended up finding a 5/64" diameter wood dowel that fit the photo-etch hatches perfectly. The wood dowel will fit the height of the sides and rear of the lowest bridge deck better than the styrene tubing I had planned to use. The PE hatches will be glued to the wood dowel pieces using 5 minute epoxy:
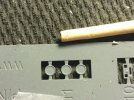
USS Enterprise E - Nemesis-WIP- Photo Etch Docking Port Hatches by Steve J, on Flickr
Because the sides of the bridge deck are slightly slanted and the docking ports need to be vertical I decided to drill holes and insert a short length of the wood dowel into each hole:
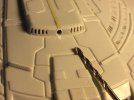
USS Enterprise E - Nemesis-WIP- Hole Drilling for Wood Dowels by Steve J, on Flickr
After inserting the dowels into the holes I dolloped some epoxy on the inside to glue them in place. Some divots left by the drill bit were filled with Perfect Plastic Putty:
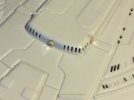
USS Enterprise E - Nemesis-WIP- Wood Dowels by Steve J, on Flickr
After a little puttying and sanding I painted the dowels with Mister Surfacer 1000:
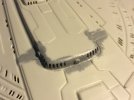
USS Enterprise E - Nemesis-WIP- Docking Ports Primed by Steve J, on Flickr
Having sorted the docking port tubes I went back to the photorp launcher which, after another hour or so of eye straining work, I brushed with Mister Surfacer and dry fitted above what I abbreviatedly refer to as "the lowest bridge superstructure aft observation deck". Catchy isn't it? I feel satisfied that the launcher's shape and dimensions are very close to what Is shown in the CGI images. Some cleanup will be needed before I spray prime it and apply the finishIng coats to the hull:
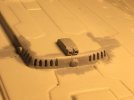
USS Enterprise E - Nemesis-WIP- Test Fit Aft Saucer Photorp Launcher by Steve J, on Flickr
You wouldn't think this all took about 3 hours would you? It did of course. As I've grown older I tend to spend a lot more time measuring and test fitting than I did in my more impatient youth; usually, I don't mind saying, with much better results.
Thanks for reading. Think I'll spend some time on the saucer shuttle bay window frames and doors next. Have to bend some fiber...
Using the decal sheet I took some measurements to help determine the length I needed to make the torpedo launcher. It's going to be smaller than I imagined in my mind which is often the case:

USS Enterprise E - Nemesis-WIP- Decal Measurements by Steve J, on Flickr
Drawing from the few images available online I made a few sketches. This launcher is unique to the Nemesis version of the ship and the kit does not include it so I'll use styrene rectangular rod and U-channel to make the main body and the two tiny photorp tubes respectively:

USS Enterprise E - Nemesis-WIP- Aft Saucer Dual Photorp Launcher Sketches and Sizing by Steve J, on Flickr
Changing gears after spending over an hour just figuring out the right width of the launcher (yeah, I'm anal that way) I turned my attention to the docking ports. The kit has three barely visible round indents indicating where the ports are located on the hull. Unfortunately, the kit is designed so the hatches would sit flush not extending out from the hull on three short access tubes. So...
I ended up finding a 5/64" diameter wood dowel that fit the photo-etch hatches perfectly. The wood dowel will fit the height of the sides and rear of the lowest bridge deck better than the styrene tubing I had planned to use. The PE hatches will be glued to the wood dowel pieces using 5 minute epoxy:

USS Enterprise E - Nemesis-WIP- Photo Etch Docking Port Hatches by Steve J, on Flickr
Because the sides of the bridge deck are slightly slanted and the docking ports need to be vertical I decided to drill holes and insert a short length of the wood dowel into each hole:

USS Enterprise E - Nemesis-WIP- Hole Drilling for Wood Dowels by Steve J, on Flickr
After inserting the dowels into the holes I dolloped some epoxy on the inside to glue them in place. Some divots left by the drill bit were filled with Perfect Plastic Putty:

USS Enterprise E - Nemesis-WIP- Wood Dowels by Steve J, on Flickr
After a little puttying and sanding I painted the dowels with Mister Surfacer 1000:

USS Enterprise E - Nemesis-WIP- Docking Ports Primed by Steve J, on Flickr
Having sorted the docking port tubes I went back to the photorp launcher which, after another hour or so of eye straining work, I brushed with Mister Surfacer and dry fitted above what I abbreviatedly refer to as "the lowest bridge superstructure aft observation deck". Catchy isn't it? I feel satisfied that the launcher's shape and dimensions are very close to what Is shown in the CGI images. Some cleanup will be needed before I spray prime it and apply the finishIng coats to the hull:

USS Enterprise E - Nemesis-WIP- Test Fit Aft Saucer Photorp Launcher by Steve J, on Flickr
You wouldn't think this all took about 3 hours would you? It did of course. As I've grown older I tend to spend a lot more time measuring and test fitting than I did in my more impatient youth; usually, I don't mind saying, with much better results.
Thanks for reading. Think I'll spend some time on the saucer shuttle bay window frames and doors next. Have to bend some fiber...
trekriffic
Well-Known Member
- Joined
- Jan 6, 2012
- Messages
- 1,051
Update... Main saucer shuttle bay observation/control room modifications...
First I glued the photo-etch window frames in place over the clear plastic insert with CA. I used styrene rectangular rod to frame the windows so they will be recessed. After the glue cures I'll add another thinner strip to the bottom piece of the frame before filing and sanding commences. Then will follow some puttying to fill in any gaps:
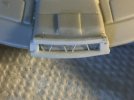
USS Enterprise E - Nemesis-WIP- Shuttle Bay Window Framing by Steve J, on Flickr
Later...
After adding another layer of styrene rectangular rod around the photo-etch window frames I filed and sanded to a sharper angle resulting in a much more screen accurate look for the face of the shuttle bay observation/ control room. I'm pretty chuffed with how this turned out:
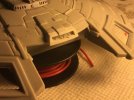
USS Enterprise E - Nemesis-WIP- Finished Shuttle Bay Window by Steve J, on Flickr
Still some cleanup to do but she'll look even better with a coat of Mister Surfacer afterward:
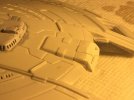
USS Enterprise E - Nemesis-WIP- Saucer Shuttle Bay Control/Observation Window Mods by Steve J, on Flickr
Darting here and there...
The forward photon torpedo tube is glued into a recess carved into the second level above the main saucer hull directly above what will be the forward saucer fiber optic "spotlight". I show spotlight in quotes since the actual illumination of the ship's name and registry will come from the Raytheon Effect internally shining thru the hull plastic. The fiber optic light will just be there to sell the illusion:
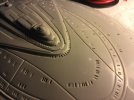
USS Enterprise E - Nemesis-WIP- Dorsal Saucer Forward Torpedo Tube by Steve J, on Flickr
Think I'll work on the impulse engines next...
First I glued the photo-etch window frames in place over the clear plastic insert with CA. I used styrene rectangular rod to frame the windows so they will be recessed. After the glue cures I'll add another thinner strip to the bottom piece of the frame before filing and sanding commences. Then will follow some puttying to fill in any gaps:

USS Enterprise E - Nemesis-WIP- Shuttle Bay Window Framing by Steve J, on Flickr
Later...
After adding another layer of styrene rectangular rod around the photo-etch window frames I filed and sanded to a sharper angle resulting in a much more screen accurate look for the face of the shuttle bay observation/ control room. I'm pretty chuffed with how this turned out:

USS Enterprise E - Nemesis-WIP- Finished Shuttle Bay Window by Steve J, on Flickr
Still some cleanup to do but she'll look even better with a coat of Mister Surfacer afterward:

USS Enterprise E - Nemesis-WIP- Saucer Shuttle Bay Control/Observation Window Mods by Steve J, on Flickr
Darting here and there...
The forward photon torpedo tube is glued into a recess carved into the second level above the main saucer hull directly above what will be the forward saucer fiber optic "spotlight". I show spotlight in quotes since the actual illumination of the ship's name and registry will come from the Raytheon Effect internally shining thru the hull plastic. The fiber optic light will just be there to sell the illusion:

USS Enterprise E - Nemesis-WIP- Dorsal Saucer Forward Torpedo Tube by Steve J, on Flickr
Think I'll work on the impulse engines next...
trekriffic
Well-Known Member
- Joined
- Jan 6, 2012
- Messages
- 1,051
Final modifications...
After closer inspection of Nemesis screen caps (and other online reference material) I realized the upper window framing needed to be about twice as thick as the lower window frame. The easiest way to do this was to sand off the upper "roof" panels and lay on a piece of styrene sheet before adding the panels back using more thin styrene sheet cut to the dimensions of the panels I had just sanded off. I also added a couple of narrow side panels to either side of the window framing that are visible when viewing the control room windows at certain angles off to the side. Afterward I puttied any gaps. Next I'll give her a coat of Mister Surfacer:
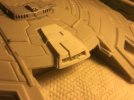
USS Enterprise E - Nemesis-WIP- Final Shuttle Observation Room Final Mods by Steve J, on Flickr
After closer inspection of Nemesis screen caps (and other online reference material) I realized the upper window framing needed to be about twice as thick as the lower window frame. The easiest way to do this was to sand off the upper "roof" panels and lay on a piece of styrene sheet before adding the panels back using more thin styrene sheet cut to the dimensions of the panels I had just sanded off. I also added a couple of narrow side panels to either side of the window framing that are visible when viewing the control room windows at certain angles off to the side. Afterward I puttied any gaps. Next I'll give her a coat of Mister Surfacer:

USS Enterprise E - Nemesis-WIP- Final Shuttle Observation Room Final Mods by Steve J, on Flickr
trekriffic
Well-Known Member
- Joined
- Jan 6, 2012
- Messages
- 1,051
The hull will be primed with Krylon Matte White. Here I've mixed up a batch of the enamel finishing coat paint which consists of about 95% MM Flat White and 5% MM Neutral Grey. I say 5% but it may even be less than that; it's like a chef saying add a "dash" of grey. It"s not pure white but it may be close to Insignia White which I've heard has a slight grayish tint to it. I wanted a very light grey white and I think this will work. I want to be careful and not drown out the aztec paneling of which some are a very light grey:
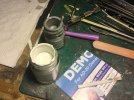
USS Enterprise E - Nemesis-WIP- Mixing the Main Final Hull Color by Steve J, on Flickr
Here's a comparison of my custom final main hull color mix next to the kit plastic. You can see it's much lighter;
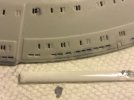
USS Enterprise E - Nemesis-WIP- Hull Color Mix Comparison by Steve J, on Flickr
My custom mix as compared to flat white. Just a tad of grey:
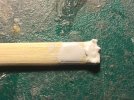
USS Enterprise E - Nemesis-WIP- Paint on a Stick by Steve J, on Flickr
Hope everyone had a happy and safe 4th of July, sounded like a war zone around here! :shock:
Anyway, that's all for now. Stand by for further updates beaming into your personal communication device...

USS Enterprise E - Nemesis-WIP- Mixing the Main Final Hull Color by Steve J, on Flickr
Here's a comparison of my custom final main hull color mix next to the kit plastic. You can see it's much lighter;

USS Enterprise E - Nemesis-WIP- Hull Color Mix Comparison by Steve J, on Flickr
My custom mix as compared to flat white. Just a tad of grey:

USS Enterprise E - Nemesis-WIP- Paint on a Stick by Steve J, on Flickr
Hope everyone had a happy and safe 4th of July, sounded like a war zone around here!
Anyway, that's all for now. Stand by for further updates beaming into your personal communication device...
trekriffic
Well-Known Member
- Joined
- Jan 6, 2012
- Messages
- 1,051
Here's today's progress. I'd intended to work on the impulse engines but got sidetracked once again and went back to completing some finishing touches on the nacelles...
Using leftover parts from the 1/350 Enterprise clear lighting kit I made a dome for the front of each nacelle to replace the opaque plastic bump that constituted the magnetic field sensor array. The clear dome is lit by a short length of fiber optic:
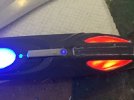
USS Enterprise E - Nemesis-WIP- Magnetic Field Sensor by Steve J, on Flickr
These panels sit just aft of the bussards on each nacelle just forward of the nacelle grills on either side of the housing for the magnetic field sensor array. The molded kit detailing was inaccurate and soft. These parts, made from thin styrene sheet, are accurate to the CGI image:
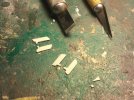
USS Enterprise E - Nemesis-WIP- New Nacelle Panels by Steve J, on Flickr
After sanding off the primer, the new panels were attached to the nacelle using Testors tube glue. Afterward, Perfect Plastic Putty was packed in around the edges:
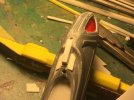
USS Enterprise E - Nemesis-WIP- New Panels Glued in Place by Steve J, on Flickr
The grills butt right up to the new panels with very little gappage:
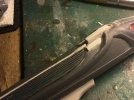
USS Enterprise E - Nemesis-WIP- Test Fit of Nacelle Grill to New Panels by Steve J, on Flickr
The blue nacelle decals that came with the Acreation Decals were applied to the underside of the clear nacelle covers:
 [/url
[/url
][url=https://flic.kr/p/2jiSiCX]USS Enterprise E - Nemesis-WIP- Light Test with Aftermarket Blue Nacelle Decals by Steve J, on Flickr
A hole was drilled into the shaft of each clear dome and a short length of curved 50 mil fiber optic strand was glued into the shaft:
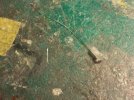
USS Enterprise E - Nemesis-WIP- New Magnetic Field Sensor by Steve J, on Flickr
Each dome on each nacelle is lit by a fiber optic strand catching blue light from the blue LED strip under each nacelle cover:
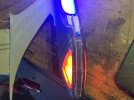
USS Enterprise E - Nemesis-WIP- Magnetic Field Sensor Dome Lit by Steve J, on Flickr
That's all I got done today. Comments welcome as always.
Using leftover parts from the 1/350 Enterprise clear lighting kit I made a dome for the front of each nacelle to replace the opaque plastic bump that constituted the magnetic field sensor array. The clear dome is lit by a short length of fiber optic:

USS Enterprise E - Nemesis-WIP- Magnetic Field Sensor by Steve J, on Flickr
These panels sit just aft of the bussards on each nacelle just forward of the nacelle grills on either side of the housing for the magnetic field sensor array. The molded kit detailing was inaccurate and soft. These parts, made from thin styrene sheet, are accurate to the CGI image:

USS Enterprise E - Nemesis-WIP- New Nacelle Panels by Steve J, on Flickr
After sanding off the primer, the new panels were attached to the nacelle using Testors tube glue. Afterward, Perfect Plastic Putty was packed in around the edges:

USS Enterprise E - Nemesis-WIP- New Panels Glued in Place by Steve J, on Flickr
The grills butt right up to the new panels with very little gappage:

USS Enterprise E - Nemesis-WIP- Test Fit of Nacelle Grill to New Panels by Steve J, on Flickr
The blue nacelle decals that came with the Acreation Decals were applied to the underside of the clear nacelle covers:
 [/url
[/url][url=https://flic.kr/p/2jiSiCX]USS Enterprise E - Nemesis-WIP- Light Test with Aftermarket Blue Nacelle Decals by Steve J, on Flickr
A hole was drilled into the shaft of each clear dome and a short length of curved 50 mil fiber optic strand was glued into the shaft:

USS Enterprise E - Nemesis-WIP- New Magnetic Field Sensor by Steve J, on Flickr
Each dome on each nacelle is lit by a fiber optic strand catching blue light from the blue LED strip under each nacelle cover:

USS Enterprise E - Nemesis-WIP- Magnetic Field Sensor Dome Lit by Steve J, on Flickr
That's all I got done today. Comments welcome as always.
Similar threads
- Replies
- 2
- Views
- 218
- Replies
- 0
- Views
- 102

