USS Odysseus NCC-1978-A
- Thread starter Quaralane
- Start date
Quaralane
Well-Known Member
- Joined
- May 22, 2009
- Messages
- 11,263
Thanks again, guys.
Ran into a setback when I was trying to fix some of the light leak.
The hull slipped, and popped open.
Luckily, none of my connections or fibers were damaged.
Glued her back up and am going to try and get some actual work done on her this weekend.
Ran into a setback when I was trying to fix some of the light leak.
The hull slipped, and popped open.
Luckily, none of my connections or fibers were damaged.
Glued her back up and am going to try and get some actual work done on her this weekend.
Jamaicanmodels69
New Member
- Joined
- Apr 17, 2011
- Messages
- 604
Nice Work Q saw the lighting a page back looking great!!! ;D
Quaralane
Well-Known Member
- Joined
- May 22, 2009
- Messages
- 11,263
Not a lot for this update.
Mostly because of some of the troubles I'd had getting things going right.
When I went to work on closing up the light leaks around the edges, I wound up dropping the hull and having it pop open.
This meant having to reglue it.
On the bright side, the light leaks are almost completely gone now, and nothing inside broke free or came loose.
I'd tinted the deflector and warp grills using a mix of blue ink and elmers glue to provide both color and some light diffusion.
However, when I went to attach the LED strip with 5 minute epoxy, I couldn't get things to set right and wound up having to strip the deflector and start over.
After redoing the Elmer's/ink coating, I re-glued the LED strip to the deflector using CA glue. This time, things should work out all right.
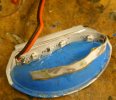
I also started working out how the base is going to be set up.
I've got a piece of about 1/2" tubing that I'll be using to support the model.
I have a bowl that I'll mount the support into and house the power pack inside.
A hole has been cut into the seconadry hull to hold the tube and accept the wiring eventually.
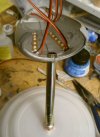
Youtube link:
Intrepid Class-USS Odysseus NCC-1978-A-Part 9
Mostly because of some of the troubles I'd had getting things going right.
When I went to work on closing up the light leaks around the edges, I wound up dropping the hull and having it pop open.
This meant having to reglue it.
On the bright side, the light leaks are almost completely gone now, and nothing inside broke free or came loose.
I'd tinted the deflector and warp grills using a mix of blue ink and elmers glue to provide both color and some light diffusion.
However, when I went to attach the LED strip with 5 minute epoxy, I couldn't get things to set right and wound up having to strip the deflector and start over.
After redoing the Elmer's/ink coating, I re-glued the LED strip to the deflector using CA glue. This time, things should work out all right.

I also started working out how the base is going to be set up.
I've got a piece of about 1/2" tubing that I'll be using to support the model.
I have a bowl that I'll mount the support into and house the power pack inside.
A hole has been cut into the seconadry hull to hold the tube and accept the wiring eventually.

Youtube link:
Intrepid Class-USS Odysseus NCC-1978-A-Part 9
ModelMakerMike
"It's Slobberin' time""
- Joined
- May 28, 2011
- Messages
- 1,838
Hey Q!
Looking good. Nice to see you working through the difficulties.
I was thinking your wires look kind of thick. Luckily this kit has a lot of room inside, eh?
Also, I was curious as to the LED tape....How much power can they handle, or how much do they need, and do you have to throw resistors on them anywhere?
Grendels
Active Member
- Joined
- Nov 24, 2009
- Messages
- 9,092
Keep up the good work. Voyager is coming along well, even though there has been some setbacks.
Mike I can answer some of those questions.
The LED tape is resistor ed for 12V but will light up with 9V. Each of those little LED"s will take 20mA of current to light. Since a 9V battery will provide on average about 900mAh of power it can light up ten of the little LED's for about 4 hours or forty of them for one hour. AA batteries will provide much more power than a 9V will, but you will need six of them to get 9V to light up this system.
Quaralane
Well-Known Member
- Joined
- May 22, 2009
- Messages
- 11,263
I hope it lives up to that expectation, Clonegurl.
Okay, after a bit of a lag, we have a new update on the Odysseus.
Ran the fiber optics for the fore and aft photon torpedo tubes. Glued the fibers into small tubes and attached red LEDs to the fiber groups.
The fibers are glues into place with PVA glue.
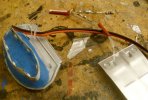
Glued the warp nacelles together after pulling the fibers and wires through the openings.
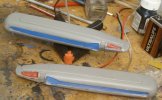
With the starboard nacelle lit
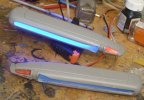
After installing the LEDs for the impulse engines, I pulled all the wiring through and glued the struts together.
At the same time, I attached the struts to the nacelles
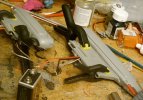
Using five minute epoxy, I attached the supportr rod for the base to the secondary hull
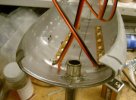
Started to finish up the rear deck by attaching the struts to the top plate of the back section.
Because I'd screwed up and thrown away the original "hinge pins," I improvised with pieces of sprue
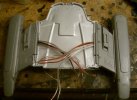
Ran the fiber optic for the central flashing lights in the aft sections.
Set the fibers for the steady lights to either side into a tube that will also provide light for the aft window plate.
Taped the tube down to both hold it in place, and to shield it from the rest of the wiring.
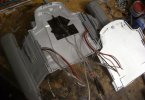
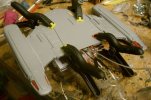
And, now in full clamps, is the assembled aft section
YouTube link:
Intrepid Class-USS Odysseus NCC-1978-A-Part 10
Okay, after a bit of a lag, we have a new update on the Odysseus.
Ran the fiber optics for the fore and aft photon torpedo tubes. Glued the fibers into small tubes and attached red LEDs to the fiber groups.
The fibers are glues into place with PVA glue.

Glued the warp nacelles together after pulling the fibers and wires through the openings.

With the starboard nacelle lit

After installing the LEDs for the impulse engines, I pulled all the wiring through and glued the struts together.
At the same time, I attached the struts to the nacelles

Using five minute epoxy, I attached the supportr rod for the base to the secondary hull

Started to finish up the rear deck by attaching the struts to the top plate of the back section.
Because I'd screwed up and thrown away the original "hinge pins," I improvised with pieces of sprue

Ran the fiber optic for the central flashing lights in the aft sections.
Set the fibers for the steady lights to either side into a tube that will also provide light for the aft window plate.
Taped the tube down to both hold it in place, and to shield it from the rest of the wiring.

And, now in full clamps, is the assembled aft section

YouTube link:
Intrepid Class-USS Odysseus NCC-1978-A-Part 10
Quaralane
Well-Known Member
- Joined
- May 22, 2009
- Messages
- 11,263
All right. Serious work done with this update.
Shuttlebay had been put into place.
Because of the fit in the hull, I had to change my plan for lighting it and add an LED as there was no bleed through from the secondary hull.
On a side note, the kit-supplied shuttle has more issues than its looks. It won't fit into the bay door either.
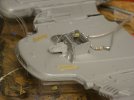
And, showing the shuttlebay lit
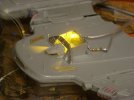
Installed the back section into the secondary hull. Installed the navigational deflector as well.
Also ran a separate power lead for each section into the base tube
I'm doing this to avoid making my connections any larger. There will also be separate leads for the main hull and running light blinking circuit
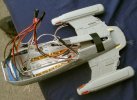
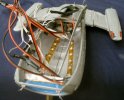
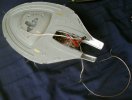
Linked up the blinking running light circuit before joining the two major sections.
Due to an unforseen problem, I had to ad a second blinker LED to the circuit link in order to make it work. As I don't need the light from that LED, though, I went ahead and taped it off along with the leads.
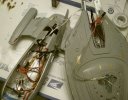
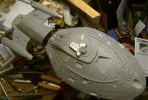
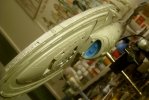
Major construction is completed as I attach the main hull to the secondary hull and blace the back plate on the back.
Youtube link:
Intrepid Class-USS Odysseus NCC-1978-A-Part 11
Shuttlebay had been put into place.
Because of the fit in the hull, I had to change my plan for lighting it and add an LED as there was no bleed through from the secondary hull.
On a side note, the kit-supplied shuttle has more issues than its looks. It won't fit into the bay door either.

And, showing the shuttlebay lit

Installed the back section into the secondary hull. Installed the navigational deflector as well.
Also ran a separate power lead for each section into the base tube
I'm doing this to avoid making my connections any larger. There will also be separate leads for the main hull and running light blinking circuit


Linked up the blinking running light circuit before joining the two major sections.
Due to an unforseen problem, I had to ad a second blinker LED to the circuit link in order to make it work. As I don't need the light from that LED, though, I went ahead and taped it off along with the leads.

Major construction is completed as I attach the main hull to the secondary hull and blace the back plate on the back.


Youtube link:
Intrepid Class-USS Odysseus NCC-1978-A-Part 11
ModelMakerMike
"It's Slobberin' time""
- Joined
- May 28, 2011
- Messages
- 1,838
Q! You are tearing it up!!
Looking great!
So...are you trying to say that the components for a mass produced Star trek model kit may have NOT been in scale with each other?.... LOL.... Was this the Old Monogram kit from the mid-late '90s?
I haven't watched the vid. yet, but I will.
Looking great!
So...are you trying to say that the components for a mass produced Star trek model kit may have NOT been in scale with each other?.... LOL.... Was this the Old Monogram kit from the mid-late '90s?
I haven't watched the vid. yet, but I will.
ModelMakerMike
"It's Slobberin' time""
- Joined
- May 28, 2011
- Messages
- 1,838
SE Kit?
Glorfindel
Active Member
- Joined
- May 2, 2011
- Messages
- 1,504
Your on her now Q. Man I can't wait to see primer on this. I tell you these electrical builds always throw a wrench in to things at some point. But we're modelers....we keep at it until we get it right.
