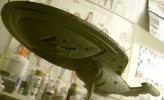
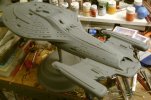
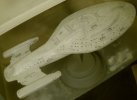
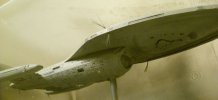
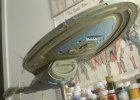
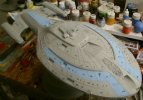
USS Odysseus NCC-1978-A

I'd agree with John, Q, this is probably one of your most impressive works,and what You're doing with this bird is totaly outstanding! I'm going to use this build of your's as a how-to-do-it-perfect step-by-step guiede when I start mine Voy.
Can't actually believe after looking once again through the thread that You don't like the Intrepid-class design as You've mentioned once before, this is really a labor of love here :)
 
Thanks a lot guys. :D

Solander, I'm flattered that I can be a pattern for your stuff.
And, it's not so much the Intrepid class I disliked as the show in general.

This one is definitely teaching me a few things, though
 
Work progresses a small pace.
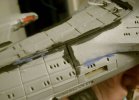
Working first on light-blocking and seam-filling
For the minor leaks, I simply brush a light layer of old tube-style model glue over the seam and smooth it over with an old brush.
Once dry, I paint over the glue with black to see how well it's working.
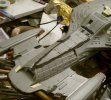
odysseus-1978-a-65.jpg
odysseus-1978-a-66.jpg

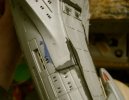
There were some gaps too large to be filled with that method, as well as some seams that needed attention.
For those, I used trusty Aves Apoxie Sculpt
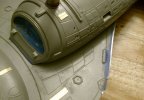
odysseus-1978-a-67.jpg
odysseus-1978-a-68.jpg
odysseus-1978-a-69.jpg

Turning my attention to the Aeroshuttle bay, I used my Dremel to carve channels for a pair of magnet strips that I'd salvaged from other things. I also carved channels to simulate other detail in the bay.
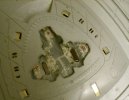
odysseus-1978-a-70.jpg

The magnet strips didn't prove strong enough, so I opted for a set of rare earth magnets in both the bay and the aeroshuttle.
I deliberately placed them in the nacelles of the shuttle where I would actually lose the least detail.
I also carved out a larger section for the nose of the aeroshuttle to better fit into the bay and repaired some of my conduit detail.
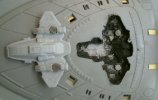
odysseus-1978-a-71.jpg

The aeroshuttle doesn't fit flush into the bay, but I'll take that as a small price to pay for being able to remove it.
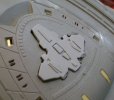
odysseus-1978-a-72.jpg

I finished the bay itself by giving it a black light-blocking coat, followed by a base coat of camouflage gray.
The grey was given a black wash and then sealed with a matte clear coat before I went in and painted the conduit details in copper.
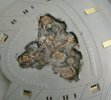
odysseus-1978-a-73.jpg

YouTube link:
Intrepid Class-USS Odysseus NCC-1978-A-Part 12
 
Looking great Q!! Something I need to add to my list....Aves! So versatile! Keep it coming!!
 
Actually, Mike,
Most of the gaps were the fault of how I wound up assembling her for lighting.
The kit actually fits together fairly well.
 
Oh, that's good to know. Have you ever built one of the original releases, and if so, how does this one compare?
 
Going to be honest, Mike.
I really couldn't tell you that one because I built the original release about fourteen years ago.
And, like this one, I lit it up.

Of course, the old one was with regular lights, and took some work to get the deflector going
 
Major update time.

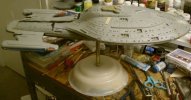
Strengthened the base and mounted the ship into place
odysseus-1978-a-74.jpg

WE HAVE PRIMER!
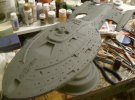
Primered the ship and base with Krylon grey primer after masking off the nacelles and deflector
odysseus-1978-a-75.jpg
odysseus-1978-a-76.jpg
odysseus-1978-a-77.jpg

Using an airbrush for the first time in years, I gave the whole model a coat of Badger Camouflage Grey
odysseus-1978-a-78.jpg
odysseus-1978-a-79.jpg

Now, after masking of the areas I wanted, I mixed up a light blue to add some accent color sections aking to what I'd done on the previous Odysseus model.
Sadly, likely due to how I thinned it, it clogged the airbrush completely, and I wound up having to hand paint these areas.

Still, though, I think it looks pretty good.
odysseus-1978-a-80.jpg
odysseus-1978-a-81.jpg

Youtube link:
Intrepid Class-USS Odysseus NCC-1978-A-Part 13
 
Looking good! Glad you liked the compressor. If your airbrush is gummed up, try lacquer thinner on it. That usually cleans anything out.
 
Q that looks awesome! I like the undertones of the primer, nice airbrushing! You could also try some cellulose thinners through it. What paints are you spraying?
 
She is looking good, Q, very good!
Keep up the good work.
Do you put in a lot of late nights on her?
 
Looking Good Q glad to see some paint on her....bet you
thought it would never happen with all that building
I know the feeling! LOL :p
 
Thanks for the comments, guys.

@ModelMakerMike,
No late nights, just a lot of weekends.

@JohnSimmons,
It was more likely the thinner, rather than the paint that did the damage.
It was even trying to gum up the regular brush

@Grendels,
Sadly, I'm positive I've killed the brush now.
Some things came apart when I was trying to clean her, and they won't go back together right
 
Don't give up on the brush Q it's quite hard to completely ruin one. Be patient take everything apart an let it soak in thinners or airbrush cleaner, clean every part carefully with a q tip and just see if that works. I've revived two of my airbrushe's that I'd thought I'd killed with Vallejo Model Colour paint.
 
--chuckles softly--
Okay, the airbrush was working today. At least long enough for me to get some paint on the smaller craft (shuttles, Flyer, Aerowing)

Got it soaking again in the lacquer thinner as it still wasn't working well
 

Latest posts

Back
Top