Wood Grain Decals ... How to ...

Chris S

Its a bit like being handcuffed to a lunatic !
Joined
Feb 14, 2011
Messages
4,573
woodgrain.jpg


Hi all ,

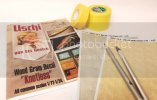
In this Step By Step I will take a close look at how to use Uschi van der Rosten's 'Knotless wood effect ' Decals .
DSCF1830.jpg

Uschi van der Rosten has procduced some very nice Decal 'effects' as well as some really useful paint masks ,and also supply some other very handy modelling products .
Check out his site to find out where your nearest supplier is .... www.uschivdr.com

On with the show !

For this SBS I am using Eduards 1/48 scale Albatross D III , The wood decals are suitable for all scales from 1/72nd to 1/32nd So I chose a subject in the middle range .
Before we get to the decals the the aircraft needs painted and glossed to set the tone of the wood and ensure a good gloss suface on which to place the decals .
As the whole fuselage is going to be covered in decal I thought it would be best to first paint all the metal parts around the front of the fuselage rather than trying to mask up the decals later !
(Please note the tail fin is not fixed in place throughout this sbs ,its only set in place for the pics as it will be getting worked on too )

Here the fuselage was masked and the panels ,vents and inspection hatches are painted and coated with Klear / Future.
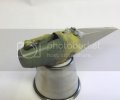
DSCF1816.jpg

Those painted panels were then masked up ,the vents & hatches on the sides were masked with liquid mask .
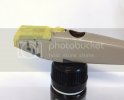
DSCF1819.jpg


continued.jpg

Thanks for looking.

Chris.
 
Mr.S- How are Ya? looks to be another great SBS in store :eek: Thanks for taking the time and sharing :)
 
I'm sat waiting eagerly for the next installment. As I have three bi-planes in my stash that this will be quite informative for
DB88
 
Thanks for looking in guys :) DB & Dagger , go visit Uschi's site ,the decals are very reasonably priced and well worth it :)

Chris.
 
Hi guys :) ....Part two !

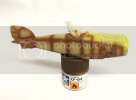
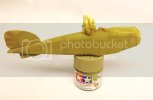
Now we are ready to start preparing the fuselage for the decals . For my subject I wanted to aim for a reasonably clean varnished finish , A nice light golden brown colour . I dont want this one heavily weathered ,so after a bit of trial I decided to use Tamiya XF64 Red Brown for the pre shade ,this will show through just enough to darken the edge of each panel a little .

DSCF1821.jpg

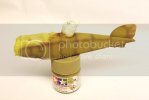
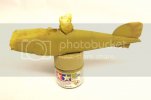
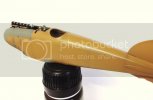
I also decided that Tamiya XF59 Desert Yellow would be a good base colour for the effect I want , it looks a bit too Yellow in the pics ,but that changes once the Klear goes on .
I start as usual by spraying in each seperate panel ,this lets you pick and choose how much preshade shows through on each individual panel and helps break up the monotone .

DSCF1823.jpg

Once each panel is painted I then mist on a few overall coats until Im happy with the base colour .

DSCF1824.jpg

DSCF1825.jpg

At this point it is crucial to make sure there is no dust or dirt in your paint as once the Klear is applied it will be stuck there ,and as the wood effect is printed on a clear carrier any dirt will show through ,also dirt will cause silvering as the decal wont sit down tight in the surrounding area .
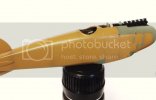
So with that in mind ,the fuselage is cleaned and the clearcoat applied .
My chosen weapon for this is Klear / Future ,it can be misted on in light coats and dries very quickly leaving a nice smooth glossy surface .....Smooth & Glossy being the key here ;)

DSCF1826.jpg

DSCF1827.jpg

contin2.jpg


Thanks for looking .

Chris.
 
Chris this is just beautiful.
Yes...it is your fault. I would like you to recommend a Wingnut kit and these decals for me to begin with...I'm hooked.
 
This is Awesome Chris,

But how many did ya Ferk up before you got to this point :D
 
Very cool Chris. :)


This is not for the magazine. This is a Facebook and SMA website article. Yes, it is used to help promote the magazine however this is a 'freebie'.
 
ahhhh...thought we were getting a 'sneak peak'...a kind of "man behind the curtin" thing...whatever it is it is awesome and I'm liking it a lot!!
 
Thanks guys ,Glad yer liking this little walkthrough :)

Dagger ,As Scott said ,this is not for the mag ,but you might see the finished article soon ;) I would recommend any of the WnW kits ,but if you want to have a go at the wood effect ,then you'll need an Albatross ,or LVG ,something like that :)

More soon .

Chris.
 
OK .... So now we have a nice clean smooth glossy surface to work on ,its time to start playing with the decals :)
You need a few basic tools for this . A new blade , A straight edge ,A pencil and some low tack masking tape . I tried several types of tape for this and Tamiya came out the best ,not harming the decal in any way . I have various sizes of Tamiya tape to hand and I used 18mm & 40mm on this job .

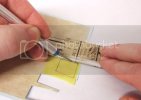
The first thing we do is take a bit of Tape and apply it to the fuselage over one of the panels ,You can start anywhere ,but I found it better to do the two sides first ,then the top and bottom . So working on the first side the tape is applied ,A pencil is then used to mark out the panel lines on the tape (make sure your pencil is sharp ) .....

DSCF1833.jpg

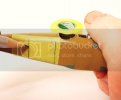
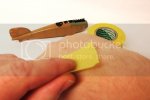
Now carefully peel the tape of the fuselage and by placing it on the back of your hand a few times you can reduce the tackiness even further ....

DSCF1831.jpg

The tape is then placed on the decal sheet ,Try to vary this for each panel ,that way you can get a different grain effect for each one . Using the straight edge on a hard surface the decal is then cut to shape .Make sure to cut to the outside of your pencil line ,it doesnt matter if its slightly oversized as it can be trimmed once in place ,but if you cut to small its no use ;) ...

DSCF1834.jpg

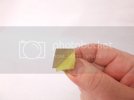
Now gently peel the tape off and your decal is ready to use ....

DSCF1835.jpg

The decal is used in just the same way as every other waterslide , simply placed in water until loose ,then slid into place ,taking care to make sure it is lined up correctly .....

DSCF1837.jpg

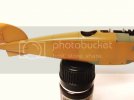
If you need to trim , Once the decal is set and the water squeezed out ,simply run a new blade along the panel line and the excess will lift off leaving a nice neat panel ,You can see in the picture above how the wood grain darkens the colour a bit ,so be careful when choosing your base ;)

contin3.jpg

Thanks for looking .

Chris.
 

Latest posts

Back
Top