Wood Grain Decals ... How to ...
- Thread starter Chris S
- Start date
JohnSimmons
For Spud: I was once Merseajohn
- Joined
- Jan 4, 2011
- Messages
- 5,645
Yeah man this is great! And easy to understand to, I can imagine doing it. Hope your not snowed in yet, I'm cold but have had hardly any snowfall to speak of.
Chris S
Its a bit like being handcuffed to a lunatic !
- Joined
- Feb 14, 2011
- Messages
- 4,573
Thanks guys 
John .... Yes mate ,snowed in ,had a snow drift up the front of the house ! Bit of shoveling,lost the power lastnight and got it on again 11am this morning ,....yey for the big open coal fire
Chris.
John .... Yes mate ,snowed in ,had a snow drift up the front of the house ! Bit of shoveling,lost the power lastnight and got it on again 11am this morning ,....yey for the big open coal fire
Chris.
Dagger6actual
New Member
- Joined
- Sep 3, 2012
- Messages
- 122
WOW...can't wait for my Albatross to get here!! Very sweet work Chris....
Glorfindel
Active Member
- Joined
- May 2, 2011
- Messages
- 1,504
Chris this is some great stuff. Is this your first go round with wood decals or have you done this before? It looks like you've got the technique down perfectly. Just looks amazing.
Chris S
Its a bit like being handcuffed to a lunatic !
- Joined
- Feb 14, 2011
- Messages
- 4,573
Dagger6actual said:WOW...can't wait for my Albatross to get here!! Very sweet work Chris....
Nice ;D ...Dont forget to order some Wood decals for it
Anthony ,Thanks mate , Nope havent tried it before this is the first time . Obviously i played with a few bits on different coloured background to find a colour I was happy with .But its really easy to use
Chris.
Chris S
Its a bit like being handcuffed to a lunatic !
- Joined
- Feb 14, 2011
- Messages
- 4,573
Thanks Geegad 
Continuing to work along one side I place the edge of the tape along the edge of the first finished panel , then draw it out the same way ......
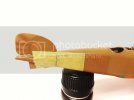
Its just a matter of repating the proccess the whole way along the side ......
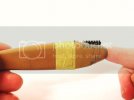
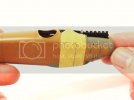
When it comes to the complicated area around the front of the fuselage ,this is handled in just the same way .What I did was to take a 'Brass rubbing ' of the vents & hatches onto the tape ,I then cut to the inside of those marks to help the decal lay down over the raised parts ,The remainder was then trimmed with a blade once the decal is in place .....
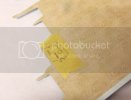
One side complete .......
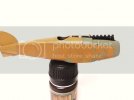
Thanks for looking.
Chris.
Continuing to work along one side I place the edge of the tape along the edge of the first finished panel , then draw it out the same way ......

Its just a matter of repating the proccess the whole way along the side ......


When it comes to the complicated area around the front of the fuselage ,this is handled in just the same way .What I did was to take a 'Brass rubbing ' of the vents & hatches onto the tape ,I then cut to the inside of those marks to help the decal lay down over the raised parts ,The remainder was then trimmed with a blade once the decal is in place .....

One side complete .......


Thanks for looking.
Chris.
JohnSimmons
For Spud: I was once Merseajohn
- Joined
- Jan 4, 2011
- Messages
- 5,645
Yeah very sharp work! 
Glorfindel
Active Member
- Joined
- May 2, 2011
- Messages
- 1,504
Wow Chris that's some great wood paneling. Like you said I think the right color base coat is key to these wood decals popping out. Just awesome.
Chris S
Its a bit like being handcuffed to a lunatic !
- Joined
- Feb 14, 2011
- Messages
- 4,573
Thanks guys ,sorry about the slight delay 
I done the opposite side next then sealed both sides up with Klear ,this helps to protect the decal while handling and also helps to avoid the tape lifting it in the next stage .....
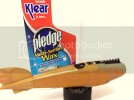
The top & bottom of the fuselage were done next along with the tail fin and the tail skid mount ,just remember to vary the grain in the panels by taking each one of a different area on the decal sheet .
The rest of the panels are done in exactly the same way as described above .
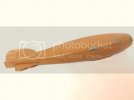
Awkward areas such as around the cockpit are done in the same way too , I found it easier to make the decal a little over sized here and trim in place with the new blade .....
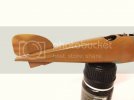
Again ,the whole fuselage needs sealed ,I sprayed on several coats of Klear and once dry I gave it a gentle buff with a soft cloth (klear is a polish and reacts well to a light buff )
)
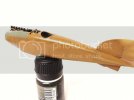
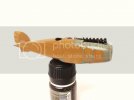
And thats it ! ....Simples ,but very effective .The decal certainly takes a lot of work out of the job ,its very time consuming trying to create wood effects with oil paints ,more so when you need to do individual panels like on this aircraft .
You can of course experiment with different base colours and washes over the decal will also change the tone , something like clear orange or yellow over the top could be quite effective ,as could washes of Burnt umber or the like ...the choice is yours
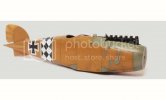
I was very happy with the finished colour and effect on my fuselage ,so once sealed I went on to apply the markings ,these were again sealed and then a dark wash added to the panel lines ,but I will look at that more in another article .
But for now ,a few pics of the fuselage ready for detailing and some light weathering
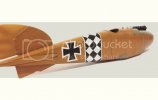
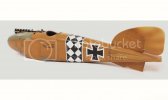
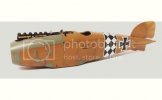
Thanks for looking , please feel free to ask any questions
Chris.
I done the opposite side next then sealed both sides up with Klear ,this helps to protect the decal while handling and also helps to avoid the tape lifting it in the next stage .....

The top & bottom of the fuselage were done next along with the tail fin and the tail skid mount ,just remember to vary the grain in the panels by taking each one of a different area on the decal sheet .
The rest of the panels are done in exactly the same way as described above .

Awkward areas such as around the cockpit are done in the same way too , I found it easier to make the decal a little over sized here and trim in place with the new blade .....

Again ,the whole fuselage needs sealed ,I sprayed on several coats of Klear and once dry I gave it a gentle buff with a soft cloth (klear is a polish and reacts well to a light buff


And thats it ! ....Simples ,but very effective .The decal certainly takes a lot of work out of the job ,its very time consuming trying to create wood effects with oil paints ,more so when you need to do individual panels like on this aircraft .
You can of course experiment with different base colours and washes over the decal will also change the tone , something like clear orange or yellow over the top could be quite effective ,as could washes of Burnt umber or the like ...the choice is yours
I was very happy with the finished colour and effect on my fuselage ,so once sealed I went on to apply the markings ,these were again sealed and then a dark wash added to the panel lines ,but I will look at that more in another article .
But for now ,a few pics of the fuselage ready for detailing and some light weathering


Thanks for looking , please feel free to ask any questions
Chris.
JohnSimmons
For Spud: I was once Merseajohn
- Joined
- Jan 4, 2011
- Messages
- 5,645
Chris this is a real beauty and very easy to understand. It really looks the part.
Glorfindel
Active Member
- Joined
- May 2, 2011
- Messages
- 1,504
I'm blown away at how great that looks. Love that wicked talent you possess.
Similar threads
- Replies
- 11
- Views
- 2K
