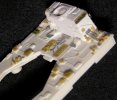
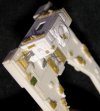
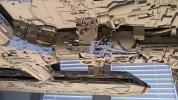
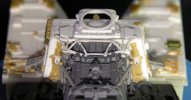
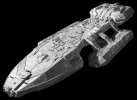
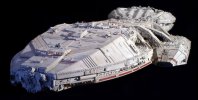
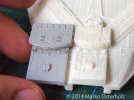
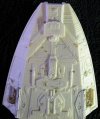
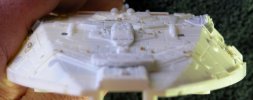
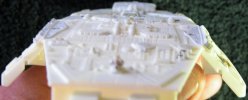
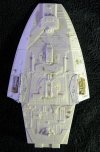
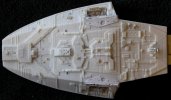
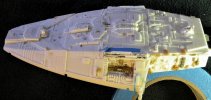
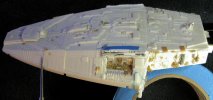
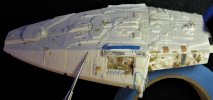
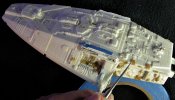
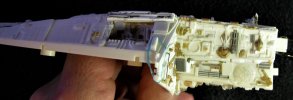
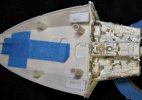
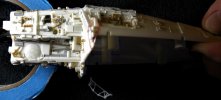
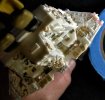
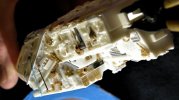
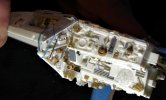
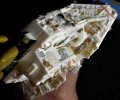
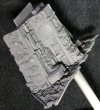
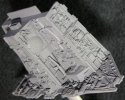
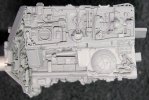
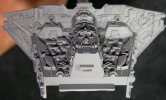
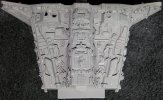
The Battlestar Galactica Moebius should have made!

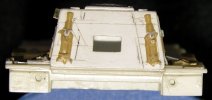
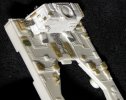
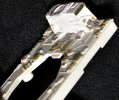
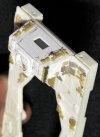
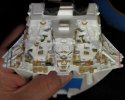
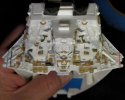
Mr. Greg, that ramp up the nose on your UN-modified head is where your drop is. Mine, although the same size off as your bridge is, has had that nose ramp raised, so sits fairly level on mine. The nose ramp on the studio model goes completely under the bridge and stops just at the forward edge of the bridge on the Moebius kit. In fact, that nose, as you've seen I cut out now, is the part I'm modifying next and then see where that bridge falls.

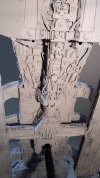
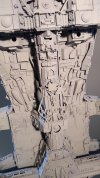
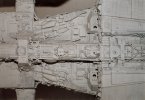
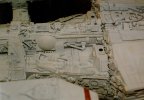
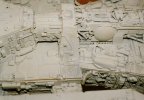
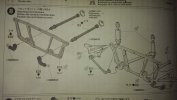
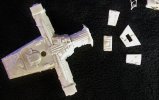
I sure do THANK YOU for looking at this with me! Most folks either never got one of these kits or have LONG since moved on after building it.MM8.jpgMM10.jpgfront.jpg
 
Last edited:
You're welcome. It is nice to discuss this, since others who have build it just used the parts it came with. The Paragraphix part comes with PE bands to go around the perimiter of the kit's part, but I think it doesn't accomodate for lighting. My own build began in January 2018 with the intention to do it as a "buddy build" with another YouTube modeler, but we lost sight of that. My plans are more grandiose while his plan was to just build it out of the box. He's been pretty busy at work though, and he mostly does those Deagostini-type builds anymore.

It would be nice if 308 Bits would have provided information on how to get his part to sit well. He apparently got rid of the first bridge he made, which was even thinner than the one we have. Some instructions would've been nice, and even nicer if he had shaped it in such a way that it wouldn't just slant downward the way it does. I do not have the confidence to rearrange the entire nose like you are doing. I think I will just sand the kit's part down and place the 3D-printed bridge on top.

I agree Mr. Greg, it is nice to discuss and work along with others! I apologize for the delay here, but for some reason, I don't get every notification in e-mail OR the little red number when I visit the home page? About half of them, so this one didn't show up.

I apologize.

Sounds like you and I may have the same problem with building things straight outta the box. I've never been able to just do that myself. If I know somethings not right, I can't leave it alone.

As you'll see in this next update, I have modified things nine ways from Sunday and this bridge is STILL just too big. Looking at some others builds from years ago, there WAS another fella that seems to have nailed this and his parts looked spot on. Marko Osterholz (Marko@rockvoice on the RPF). I haven't dug deep, but he mentioned he had 3D printed his parts too and maybe they're available?

I'll see what I can come up with on that. He once said they would be for sale, but hasn't seemed to maybe followed through?

Here was a test print he showed.

moebius-tos-gal41.jpg

For THIS model, THAT looks VERY good.
 
Alright y'all! I didn't fall into no hole or nuthin', as I'm certain some of you all musta thunked I did.

I have made this bridge, although it's STILL a little too big for this model, fit just about as close as I can get it and it seems to look closer to me.

dscn0415-jpg.jpg


What I ended up doing here, and some of the pictures won't be very clear trying to show some of this, I removed the rear ramp from the bridge and I shaved that rear ramp down on all 4 sides. As y'all saw earlier, I removed the nose again and sliced off AT LEAST 2 MM from the front edge. I went all the way up (for those with this kit) to the first scribed panel line from the tip and removed all that. This ended up being the biggest help. Then, I removed the rear wall from the bridge and moved it forward just a tad. This ended up not being much at all because I didn't want to go deep into the detail on it, but I did shave just a bit and added the rear wall back in.

Worst fix on this whole thing was, right in the middle of all that foolin' around with that rear ramp, I broke off those tiny guns. That didn't look good at all, so I had to make some more.

Please forgive some of these bad pictures. The old NIKON seems to want to focus exactly where it wants to and it's not ideal sometimes.

dscn0412-jpg.jpg


dscn0413-jpg.jpg

dscn0414-jpg.jpg


Now, as I'm showing with these next pictures, I've also added little details as seen on the original (to the best I can, of course) in the form of springs, hinges, doo-hickeys, thingamajigs, snozewankers and greeblies. Still in the middle of some of this as we speak.

dscn0411-jpg.jpg


dscn0416-jpg.jpg

dscn0417-jpg.jpg

dscn0418-jpg.jpg


It won't be long we gone see if I can't ruin ALL this. It's about to get primed.

Y'all cross your fingers.

¯\_(ツ)_/¯
 
Never apologize for delays, my dear. We all have lives. What you're doing is really fantastic. I haven't touched my own kit for a while now, though. Yesterday we celebrated my wife's 45th birthday. When I asked my daughter to close our car's hatchback, she reacted too quickly and as my wife suddenly stuck her head underneath, it hit her head and by the time we got to our front door she was dripping blood on the floor. We finished the night in the emergency room determining if she required stitches (she did not). Everything was fine in the end, and she actually wasn't injured too terribly. Life just gets in the way of our hobbies and crap though, doesn't it?
 
Never apologize for delays, my dear. We all have lives. What you're doing is really fantastic. I haven't touched my own kit for a while now, though.

I absolutely understand. I do this model stuff when and if.

Yesterday we celebrated my wife's 45th birthday. When I asked my daughter to close our car's hatchback, she reacted too quickly and as my wife suddenly stuck her head underneath, it hit her head and by the time we got to our front door she was dripping blood on the floor. We finished the night in the emergency room determining if she required stitches (she did not). Everything was fine in the end, and she actually wasn't injured too terribly. Life just gets in the way of our hobbies and crap though, doesn't it?

OWWWWW!!!!!!! Thank goodness that wasn't worse, but then again, she may not forget what your daughter gave her for her birthday!

Tell her Happy Birthday and many more from me.
 
Hey everyone!!!

Well. Here's the next couple "what I did was's"...

There was a nub-ule towards the front of the head that I scraped off. Wasn't showing up on reference, so, gone.

dscn0442-jpg.jpg


There seemed to be quite a spot along that same side that has scribe lines on the studio model, but weren't on the Moebius, so I scratched some of them in there too. The forward pointer shows where that nub was.

dscn0443-jpg.jpg

dscn0444-jpg.jpg


Next up on the modifications was to the walls along the neck of this thing, including the rear wall of the head and all the walls of the neck. Before I moved on to that, there are a couple porches... or lean-to's... on one side of the neck of the studio model, so I added them as well.

dscn0445-jpg.jpg


The next few pictures will show what I've ended up with on these neck walls and rear wall. I sorta cheated here a little. I have been, as I've shown, completely removing parts that I plan to replace. With these next mods, I didn't remove as many of the original Moebius lumps that I normally would and just added to many that were already there. Didn't come out too bad?

dscn0446-jpg.jpg


As y'all can see in this bottom mod, there had to be ANOTHER one of those JPS parts made. Before y'all ask, it weren't NO funner to make this one than it was the first one. You woulda thought it would be, but nope. Just nope.

dscn0448-jpg.jpg

dscn0449-jpg.jpg

dscn0450-jpg.jpg

dscn0451-jpg.jpg

dscn0453-jpg.jpg

dscn0454-jpg.jpg

dscn0455-jpg.jpg

dscn0455-jpg.jpg


All this was taking a little extra time because on this one, much like the side head holes, I had to make practically every one of these bits. There isn't much small enough to use straight out of these HO/1-72/1-76 kits that I can stick straight on. I had to work on each one of them to varying degrees to get something close enough.

If y'all wanna know anything about anything I've done, SPEAK UP.
 
For those backward-facing holes on the bottom rear of the head, do you plan to put LEDs in those? I thought I would do so. They seem like there should be lights in there.
 
The ones on that back head wall, right? It certainly does look like they were put there just for lights, I agree! Thinking the same thing, I have called myself looking....

and looking...

and I can't see ANYTHING showing a light in those. I do have some of the same reference as most everyone else and I do see HOLES all the way into the head, but I have not found evidence of the obvious yet.

Rob.
 
With these last additions I run smack dab into 'nother problem. Most of the time, just like we've all said, this kit seems fairly spot on. Everytime things added line up just like they seem to suppose to. This observation seemed to really be the case on that engine section. Every part I needed to add went just about where you see it on the original studio model and all I've had to do is make something similar in a smaller scale and it seems to fall just about exactly where it should, which to me, shows that most things and dimensions about this kit are pretty much there. The inconsistencies I saw during that bridge alignment were bridge, NOT model as an example.

Here's some pictures I used to aid in the construction of what I last posted:
11a.jpg31.jpgkg-tos_battlestar-studio_model_reference-076.jpg

I have found, what I consider to be a part of the actual kit that's just wrong. Two words best describe it and those would be MAL and FUNCTION. As y'all can see in those actual studio Galactica pictures, that second TAMIYA 1/12 John Player Special part I had to make for the engine section, strapped across this area too.

Once again, in case someone hasn't seen the 1/12 piece:
_IMAG3430.jpg
DSC_0599.JPG

As I modify things, of course, I try to be conscience of how it will still fit as a model. By that, I want to make sure what I'm doing doesn't make things all wrong later and that "Part A" will still fit into "Part B" later down the road, so I attached the next sections under belly piece to the rear of the modified neck walls to make sure that new JPS piece went where it was suppose to. It did, on the forward section of the piece. The piece is SUPPOSE to span that block on the next section of the model and it is way short, as seen in the next picture.

DSCN0458.jpg

So, what's taking place at the moment, of course, is that block has got to be chopped off and remade into something else. What else you ask? Well, I don't know yet. A circle? A triangle? A chipmunk? Or perhaps, same as it is now, just a little wider. I really can't say just yet, but I am committed to making something change.

DSCN0459.jpg

It's gotta be done. It's just gotta.
 
Last edited:
Alrighty y'all!

As I said, all these details are tiny. Very tiny in some cases as anyone with this kit knows. I have been concerned with whether or not primer would ruin some of this work, simply because of the itty bitty teeny tiny parts.

I picked up some "STYNYLREZ", gritted my tooth, loaded up the old Chinese air brush and squirted it towards this thing with my eyes closed 'cause I didn't want to see all the detail go away until I opened my eyes later. Slowly, I squinted and HEY!!! That went alright!!!

DSCN0461.jpg
DSCN0462.jpg
DSCN0463.jpg
DSCN0464.jpg
DSCN0466.jpg
DSCN0467.jpg

So far, after only about an hour curing time and no attempt to sand anything yet, I say STYNYLREZ is worth a try, if y'all been holding out.
 
I'm still wanting to finish up on a few other models before getting back to my own Galactica. I still need to come up with a way to fit the bridge onto the head with some sort of styrene pedestal. I'll have to measure everything to make it look good.
 
Hey again y'all!! Here's what I've been up to.

With this one, as y'all know, I decided to make a new box at the transition just rear of the head/neck section. It seemed that box may have been slightly out of size (and I certainly could be wrong about that) when I tried to make that same size John Player 1/12 part span across it. This piece is identical to what I made for the engine section earlier and it didn't fit where it should across that box, but seemed just fine on the engine section? Like I say, NEITHER could be 100% correct, but I decided the box may be out of proportion, so I made a new one.

Here's what we see on the original Galactica.
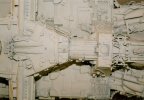
68-jpg.jpg

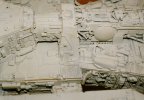
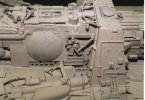
Using those same pictures I've been using as reference, I made that new box. It took a couple tries because there is an angle one both sides that has to fit just right or there is a gap. This actually took a couple tries, with one try having to be removed simply because I forgot to add the scribe lines.
hhh-jpg.jpg
279-jpg.jpg

Using those same usual pictures, it seemed as though a few things may have fallen off over the years between filming and the taking of these photos. I started doing a little digging around and found a few pictures of a replica that someone built. It's the one I asked earlier if anyone knew about.
This replica seems to show a few of those missing pieces? After speaking with an interested member of another forum, WE decided this replica was a fairly good reference.

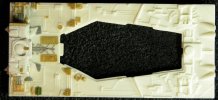
What I'm showing next will be the results of what I think should be in this area of the studio model and my attempts to recreate this. At best, this has been an exercise in compromise.

Here's what I came up with using a combination of the usual reference AND this replica. I don't know if y'all will agree this is what it should look like but PLEASE, let me know if y'all think I've gone way wrong here?
dscn0473-jpg.jpg
dscn0474-jpg.jpg
dscn0475-jpg.jpg
dscn0476-jpg.jpg
dscn0478-jpg.jpg
dscn0479-jpg.jpg
dscn0480-jpg.jpg

Now, just as an aside note here, I DO NOT see those small noodly parts between those tan rectangles just behind that new box. You'll also notice that there are several things on TOP of that box that hasn't shown up in the usual reference.

Here's the replica I decided to trust AND a couple of the model as it was being built that shows I can't be that far off.

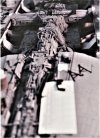
Studio model being built and the only picture I've found that verifies all this WAS on the original:
bsg241a-jpg.jpg

Here's the replica I found:

img_20200313_172448536_burst000_cover-jpg.jpg
img_20200313_172455953-jpg.jpg
img_20200313_172600892-jpg.jpg

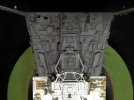
Here... is what I've ended up with:
dscn0481-jpg.jpg
dscn0482-jpg.jpg
dscn0483-jpg.jpg
dscn0484-jpg.jpg
dscn0485-jpg.jpg

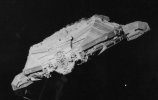
Well... that's about where I've gotten to.

Opinions? Y'all think all that was suppose to be there?
 
That is insane work man.

This thing will like 10 times as big when photographed, ones it's done.

Very impressive.
 
That is insane work man.

This thing will like 10 times as big when photographed, ones it's done.

Very impressive.

Thank you BLT!

Hmmm? That makes it unfortunate then since my models look best 4 feet away.

;)
 
I don't know what happened to Boyd's "The Model Shop" forum since it seems to have disappeared, but I was following this one guy's work on the Zvezda Star Destroyer and holy crap, that guy's work was AMAZING. It wasn't about being screen accurate, but rather super-detailing the crap out of that model and he was making it his own creation. I see you doing the same style of work and what you are doing is incredible!

I am spotting what looks like battleship guns were used as struts between different sections of the ship that formed at 90 degree angles or so. That was on the original filming model? Incredible.

Instead of going all out to try to make a model as screen accurate as possible with details that most won't even notice, I'd like to try to make mine my own as I see fit. I saw a guy on YT who opened up holes to go along the inside trench of the Galactica's head with flood lights and I think that this is a cool-looking idea. It wasn't shown in the show, but it's an excuse to add MOAR lights and it looks neat. And having some experience working in the model industry several years back and talking with people, I know that, for example, R&D guys at Bandai would strive for accuracy for, say, their Star Wars models but yet also add some unique detail to make it their own unique design. Then the "rivet counters" find the inaccuracies and complain.

Don't get me wrong, I like accurizing stuff too and I'm not at all accusing you of being a rivet counter. Just don't discount the fun that can be had for improvising and making it more of a personal creation. If you can't find proper reference for an area, make it your own!
 
I don't know what happened to Boyd's "The Model Shop" forum since it seems to have disappeared, but I was following this one guy's work on the Zvezda Star Destroyer and holy crap, that guy's work was AMAZING. It wasn't about being screen accurate, but rather super-detailing the crap out of that model and he was making it his own creation. I see you doing the same style of work and what you are doing is incredible!

Thank you! I too would like to see his Zvezda, I have one with plans to fiddle with it some too. Bought that one years ago when you could get them from Russia through a fella in Florida. I can't say much about it because it was suppose to be hush-hush! At least that's the way it was advertised. "Mum's the word." "Say no more". ;)

I am spotting what looks like battleship guns were used as struts between different sections of the ship that formed at 90 degree angles or so. That was on the original filming model? Incredible.

I believe that's what they were too and I was actually able to use the turrets from the Scharnhorst I've been using, heavily modified.

Instead of going all out to try to make a model as screen accurate as possible with details that most won't even notice, I'd like to try to make mine my own as I see fit. I saw a guy on YT who opened up holes to go along the inside trench of the Galactica's head with flood lights and I think that this is a cool-looking idea. It wasn't shown in the show, but it's an excuse to add MOAR lights and it looks neat. And having some experience working in the model industry several years back and talking with people, I know that, for example, R&D guys at Bandai would strive for accuracy for, say, their Star Wars models but yet also add some unique detail to make it their own unique design. Then the "rivet counters" find the inaccuracies and complain.

I've seen your work and I'm positive it will look very good! I anticipate seeing what you come up with!

Don't get me wrong, I like accurizing stuff too and I'm not at all accusing you of being a rivet counter. Just don't discount the fun that can be had for improvising and making it more of a personal creation. If you can't find proper reference for an area, make it your own!


Hmm...

Well, this is in NO WAY something that can be considered as anything that could be rivet counted by any means and I certainly haven't meant to seem as though that's what's happening here? I apologize if I'm making anyone feel that way and my hope would be that someone would feel more comfortable in following what I'm doing and see that it is in no way complicated? That old adage really is applicable here with me, that if I can do it with the very few skills I have ANY of y'all certainly can too! There is no way I can match the studio model anyway because I haven't found any models smaller than these 1/72-1/76-HO-OO kits I've been cannibalizing. I'm using several kits that have parts that very closely match the details I can see on the original, but even at that, they're ALL way over sized. Every part you've seen me stick on this thing has been modified in some way or scratch built to as close to that actual kit part as I can. That rack of turrets I mentioned earlier from the 1/700 Scharnhorst had to be heavily modified before I could use it and make it fit where you see it. All I can hope for is to find something that looks close to what we see in the reference OR... as has been most of the case... make something. Most of the bits you see are 3 to 5 MM max in size. I honestly thought I was making it my own?
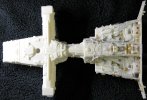
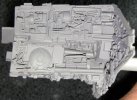
My Magnifying lamp has been my buddy.
 
Although I don't think you're a rivet counter, I just put that out there because I was once accused of such on a modeling forum. A "sanctimonious rivet counter" IIRC, only because I had dared to have conversations with Bandai's team lead on the Star Wars model effort. That came out of the blue and took me by surprise. But because I had mentioned rivet counters complaining on accuracy, I just wanted to be sure that it could not be construed as an accusation because you are wanting to spruce up your own kit. TBH, I think the guy probably had me confused with someone else. He's just neurotic and others have seen him go off on people out of the blue on several occasions
 
Well, didn't intend to imply anything like that or brag or anything at all?

I appreciate the heads up.

Good luck with your build Mr. Steve.
 

Latest posts

Back
Top