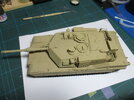
Andy's Tamiya 1/35 M1A2 Operation Iraqi Freedom

Joined
Oct 7, 2024
Messages
14
I am building the first kit out of three a friend gave me when he decided he wasn't modelling anymore; the other 2 kits are, respectively, a Tamiya 1/48 F16C Aggressor and a ICM 1/32 C 42.
Now that he passed away (he was 91), I'm going to build his kits as a memorial.
I began with the easiest one, the 1/35 Abrams M1A2 Op Iraqi Freedom by Tamiya. Absolutely an OOB build, rubber band tracks included.
Paint is going to be mainly AK Real Sand (FS 30277). Other small parts, including transparencies, were painted with Tamiya acrylics while the tracks were dabbed with a mixture of old Humbrol enamels (mainly gun metal, rust and brown) and A-MIG 0191 Steel for the polished parts.
Like most of Tamiya products, there's nothing that went wrong up to now, so I'll just publish some pics to illustrate the progresses and show where I'm now after a week from the beginning.

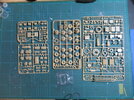
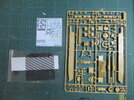
First the sprue shots
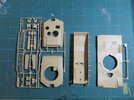
IMG_1712.JPGIMG_1713.JPGIMG_1714.JPG
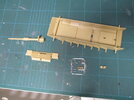
then the first sub assemblies
IMG_1716.JPG

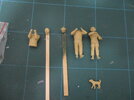
including my "Three men and a half" (to say nothing of the dog)... :rolleyes::p
IMG_1717.JPG

Turret taking shape
IMG_1722.JPG

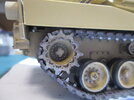
... and finally it begins to look like an Abrams with some initial weathering of the lower hull before gluing the huge side skirts (panel liner still wet on the sprocket wheel, rubber parts will require some touch up).IMG_1744.JPGIMG_1740.JPG
Comments, suggestions and abuse, when directly referred to the model(er) are all welcome.:D

Andrea

IMG_1733.JPG
 
I'm in, having read the book 'Heavy Metal' A tank company's battle to Baghdad. by Capt Jason Conroy USA, and 'Thunder Run' by David Zucchino have the kit on the bench now ready to go in the next few weeks...
But I will watch and learn from you, and steal any ideas and solutions...
Will you be providing tea and cookies or is it bring your own ....
 
I am always amazed at how well you all put things together with details creating realism. Just amazing! Your late friend would be amazed and honored at the work you are doing...
 
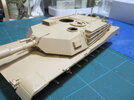
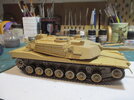
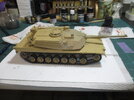
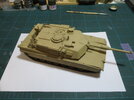
Main paint coat is on

IMG_1749.JPGIMG_1758.JPG

As announced I used the AK Real Sand with just a drop of Zinc Chromate Yellow as the original hue was a little too brown, to my eyes at least.
Then I tried to create some variations adding 2 drops of White and some thinner to what remained in the airbrush cup, but it seems I was too shy and the difference is hardly visible. A final mist of Mr Color levelling thinner added to the "dirt" in the cup was the final touch.

Tomorrow clear gloss coat, then some days away from the bench for a family travel to our old home town, Turin.
This will allow the gloss coat to dry thoroughly and be ready for the weathering phase.

A public mention to Mike aka "Scratchbuilder" for the precious references he provided me; those will be precious for the final phases of this build.

Comments and abuses are welcome as usual.

Andrea
 
I am always amazed at how well you all put things together with details creating realism. Just amazing! Your late friend would be amazed and honored at the work you are doing...
Too kind of you. To be honest, Tamiya helps a lot; Takom or Trumpeter would have caused more troubles, to me at least.
 
I'm in, having read the book 'Heavy Metal' A tank company's battle to Baghdad. by Capt Jason Conroy USA, and 'Thunder Run' by David Zucchino have the kit on the bench now ready to go in the next few weeks...
But I will watch and learn from you, and steal any ideas and solutions...
Will you be providing tea and cookies or is it bring your own ....
Steve is bringing them this time !
 
Then I tried to create some variations adding 2 drops of White and some thinner to what remained in the airbrush cup, but it seems I was too shy and the difference is hardly visible.
My experience is that you need to mix (or take) a colour that's a fair amount lighter for it to show up well, especially if you intend to put washes for shading and/or weathering over it.
 
Making your departed friend proud!

Then I tried to create some variations adding 2 drops of White and some thinner to what remained in the airbrush cup, but it seems I was too shy and the difference is hardly visible.

I recently painted US-Army desert color with Tamiya XF and had similar issues getting the right shade. I ended up using three different colors not counting lighter and darker versions of each, so at least nine colors. I looked at a LOT of pictures, and seeing three our six vehicles side by side you could see they did not match each other! I can only assume that the desert sun was really hard on whatever FS# the contractors put on to begin with.

A lot of words to say, fuggitabootit, you're close enough to real life in my opinion.
 
Great work so far a great tribute to your departed friend. As for colour iv never worried if thats what the pot says it it is and your happy good enough ,working with a mono tone kit is extremely hard ,very hard to achieve a good representation of the real thing and not a coloured blob of plastic even harder in 72nd I think it looks fine ,a lot of these companies claim to have adjusted the colour/hue to scale cant see it my self ,how many times have you been dragged around the decorating shop by the missus with her colour card/swatches she chooses the paint you paint the room only to be told its nothing like what she thought it would be? Bash on beauty is in the eye of the beholder thats all that matters. Dave
 
Thank you for the helpful and kind comments and suggestions.
I tried to highlight the flat areas adding a bit more of white in the mixture; the old eye mk1 can perceive the light difference attained but not the camera, so... sorry no pics.
I rely on the weathering phase to bring some contrast in that lump of sand yellow.
See you in a week (more or less) time.

Andrea
 
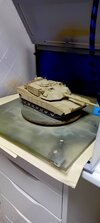
An update: after a week the highlighting is visible even if the picture is as bad as possible :rolleyes:

20241031_162913.jpg

Next steps: decals, external loads and weathering.
 
Back
Top