- Joined
- Jan 27, 2011
- Messages
- 192
Another Gerry Anderson themed kit on the work bench, the Aoshima non-scale Super Oversize Thunderbird 2.
After doing a dry fit, it measures 13" in length (nose to tail), 10" wide (wing tip to wing tip) and 3.5" in height (base to top of tailplane), with that being said, the kit is a real dog of a kit, misalignment's all over, fit issues, seams the size of the grand canyon, sink marks the depth of san andreas fault just to name a few.
My approach to this will be focused on fixing most of the exterior details as the pod will be in a fix position inside the main fuselage which presents problems in itself.
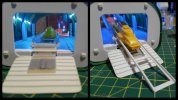
The pod is held in place simply by pressure from the forward and rear sections of the main fuselage which are slightly tapered inward, the fit is tight and a bit on the worrisome side because of this vice grip like pressure when the pod is in place it creates warping of the main fuselage causing misalignment's of the little nub inserts, it raises the question how difficult the pod would be to mount after it's been painted.
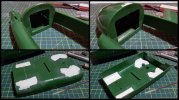
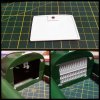
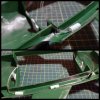
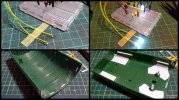
First photo's show the gap between the side of the pod and the twin-boom fuselage and the sink mark pits.
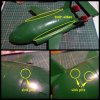
The lower part of the pod has openings for wheels? yes, I guess it's suppose to be a toy. I'll fill them in with some styrene.
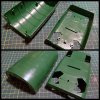
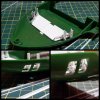
And then there's the raised detail of the numbers on the tail piece's, the wings and above and below the cockpit.
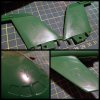
Easily solved simply by sanding it away and rescribing in the panel lines
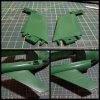
I turned my attention to the cockpit, firstly by sanding away the raised number 2.
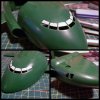
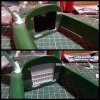
The cockpit windows are set too high and too large on the forward fuselage so I filled in the top quarters with a bit of styrene strip and putty, I'll work on this area a little more and add a second thin layer of putty.
Filled in the noticeably large sink pit along one side of the pod.
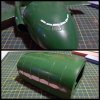
I've started the time consuming task of sanding away the inner sections to relieve some of the stress and even sanding the pod itself which is slowly starting to become much easier to mount with less force.
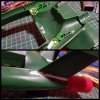
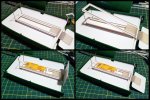
The pod fit is misaligned, there's a noticeable 'step' along the sides when the top and lower halves are in place, it seems the top half is about a millimetre narrower than the bottom half.
Tried a couple of techniques with each of them failing, the warm water trick and heat gun treatment only heated the areas and since the upper half is a solid piece of plastic, it wouldn't keep it's modified position and kept returning to it's original shape.
The misalignment is only around the middle section of the pod so I used a couple of piece's of wooden dowels acting like braces mounted on the inside to push the wall of the pods to the same width of the lower half.
I had to be careful that I didn't add to any further warpage to both the pod and the main fuselage and it would still be easy to mount.
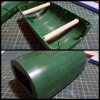
The dowels worked out fine and the pins now line up. Still a ton of work to be done on this mostly all to do with alignment.
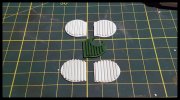
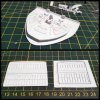
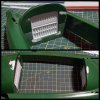
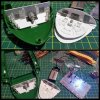
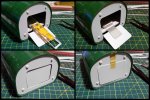
Scratch built some replacement intakes, the originals have holes in them for firing missiles, ummm, yeah, I think it was a random addon to further enhance the toyish factor of the kit? but anyway, GONE are those silly things
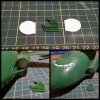
The kit has presented a nice challenge for me for it is riddled with little surprises... well, back to sanding.
After doing a dry fit, it measures 13" in length (nose to tail), 10" wide (wing tip to wing tip) and 3.5" in height (base to top of tailplane), with that being said, the kit is a real dog of a kit, misalignment's all over, fit issues, seams the size of the grand canyon, sink marks the depth of san andreas fault just to name a few.
My approach to this will be focused on fixing most of the exterior details as the pod will be in a fix position inside the main fuselage which presents problems in itself.
The pod is held in place simply by pressure from the forward and rear sections of the main fuselage which are slightly tapered inward, the fit is tight and a bit on the worrisome side because of this vice grip like pressure when the pod is in place it creates warping of the main fuselage causing misalignment's of the little nub inserts, it raises the question how difficult the pod would be to mount after it's been painted.
First photo's show the gap between the side of the pod and the twin-boom fuselage and the sink mark pits.

The lower part of the pod has openings for wheels? yes, I guess it's suppose to be a toy. I'll fill them in with some styrene.

And then there's the raised detail of the numbers on the tail piece's, the wings and above and below the cockpit.

Easily solved simply by sanding it away and rescribing in the panel lines

I turned my attention to the cockpit, firstly by sanding away the raised number 2.
The cockpit windows are set too high and too large on the forward fuselage so I filled in the top quarters with a bit of styrene strip and putty, I'll work on this area a little more and add a second thin layer of putty.
Filled in the noticeably large sink pit along one side of the pod.

I've started the time consuming task of sanding away the inner sections to relieve some of the stress and even sanding the pod itself which is slowly starting to become much easier to mount with less force.
The pod fit is misaligned, there's a noticeable 'step' along the sides when the top and lower halves are in place, it seems the top half is about a millimetre narrower than the bottom half.
Tried a couple of techniques with each of them failing, the warm water trick and heat gun treatment only heated the areas and since the upper half is a solid piece of plastic, it wouldn't keep it's modified position and kept returning to it's original shape.
The misalignment is only around the middle section of the pod so I used a couple of piece's of wooden dowels acting like braces mounted on the inside to push the wall of the pods to the same width of the lower half.
I had to be careful that I didn't add to any further warpage to both the pod and the main fuselage and it would still be easy to mount.

The dowels worked out fine and the pins now line up. Still a ton of work to be done on this mostly all to do with alignment.
Scratch built some replacement intakes, the originals have holes in them for firing missiles, ummm, yeah, I think it was a random addon to further enhance the toyish factor of the kit? but anyway, GONE are those silly things

The kit has presented a nice challenge for me for it is riddled with little surprises... well, back to sanding.
Last edited:

