You are using an out of date browser. It may not display this or other websites correctly.
You should upgrade or use an alternative browser.
You should upgrade or use an alternative browser.
Aoshima Super Oversize Thunderbird 2 (Completed)
- Thread starter rastanz
- Start date
- Joined
- Jan 27, 2011
- Messages
- 193
Thank you, I'm getting back into the swing of things as I was busy over the festival holidays with work.Looking good. Nice Eagle in the background, too.
Update:
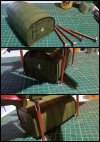
Spent the day cleaning up some bits and placing the decals, since my last painting attempt went south with the masking tape pulling up my paint work I thought I'd may as well try the decals.
Decals went on quite good with only one tear with the stripe on the undercarriage which was easily fixable, everything was going fine with no hiccups until dun dun dunnnnn... I had placed one of the 2's on upside downside
After fixing that I ran into another issue with the decals, the 'Thunderbird' lettering is out of scale, way too big as a matter of fact and I don't like it, I think I'll remove it and try printing my own.
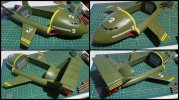
Had a quick test of the legs and the pod in position.
Thanks for looking
- Joined
- Jan 27, 2011
- Messages
- 193
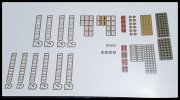
Hey guys, small and simple update with my bird, my printer ink arrived and after setup and alignment yadda yadda I did a couple of test runs (about 6 sheets of A4) for scale sizing, when I was finally happy with the sizes I printed out my designs which I've set aside to dry for 48hrs.
I printed on white decal sheet and since my inkjet doesn't print the color white I outlined my lettering with the base color of my TB2, the print come out better than I expected and the green outline is a very close match to my base color, my question is, has any one used Microscale Decal Film to seal decals? do you guys have any favorites or recommendations that will seal decals and prevent ink from running or smearing?
I have a spray can of Testors clear gloss lacquer top coat which I was going to use but Microscale Decal Film kept popping up in the conversation in the Gerry Anderson Facebook group.
I'm in the final stages of this beast and I've actually been sitting back admiring how much I've put into this particular kit with scratch building and lighting it's interior and the many modifications, I'm honestly going to miss messing around with this model.
Thanks for looking.
I printed on white decal sheet and since my inkjet doesn't print the color white I outlined my lettering with the base color of my TB2, the print come out better than I expected and the green outline is a very close match to my base color, my question is, has any one used Microscale Decal Film to seal decals? do you guys have any favorites or recommendations that will seal decals and prevent ink from running or smearing?
I have a spray can of Testors clear gloss lacquer top coat which I was going to use but Microscale Decal Film kept popping up in the conversation in the Gerry Anderson Facebook group.
I'm in the final stages of this beast and I've actually been sitting back admiring how much I've put into this particular kit with scratch building and lighting it's interior and the many modifications, I'm honestly going to miss messing around with this model.

Thanks for looking.
- Joined
- Jan 27, 2011
- Messages
- 193
- Joined
- Jan 27, 2011
- Messages
- 193
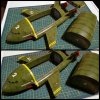
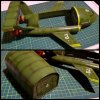
Home stretch... My resized decals turned out better than hoped for with minimum ink run, I used a green sharpie around the edges before I soaked the decals just so they weren't left with a white outline, speaking of colors, the color match on the decal sheet wasn't perfect but it was a close match, I'm hoping a flat coat will even that out a bit.
I used two scale sized sets of decals, one slightly smaller than the main set, I followed reference for the main placements and also applied some extra decals in places I thought looked cool.
A couple more things to do then I can call this project complete.
Thanks for looking.
I used two scale sized sets of decals, one slightly smaller than the main set, I followed reference for the main placements and also applied some extra decals in places I thought looked cool.
A couple more things to do then I can call this project complete.


Thanks for looking.
BeebleBrox
Well-Known Member
- Joined
- Apr 9, 2012
- Messages
- 365
Awesome sauce!
- Joined
- Jan 27, 2011
- Messages
- 193
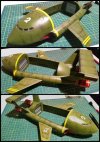
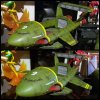
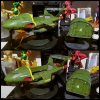
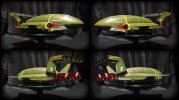
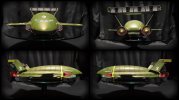
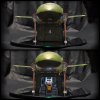
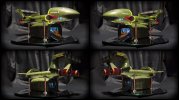
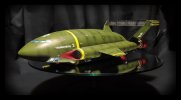
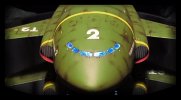
Finally calling this project done, it's been a challenge in both the kit and the time itself to complete it.
I'm happy how this turned out considering it was only meant to be an out of box build but gradually developed into something else, I'm pleased with how the lighting turned out but it could've been better if I spent more time with the wiring and electrics.
The paint turned out well but could've been better in some area's and I did get a little impatient with rushing the job as I peeled the paint off during one of the masking stages... the replacement decals did the job nicely but I could've printed the non white pieces on clear decal sheet but instead I chose not too only because I wanted to save time and not waste decal paper.
Been a fun and frustrating model to modify and detail and would I ever think of building another of the same kit? that'll be a no no.
Well, enough talk, here's some pics, and again excuse my shite smartphone camera photo's.
Thanks for your guys support and commenting during this project, cheers.


Last edited:
- Joined
- Jan 27, 2011
- Messages
- 193
Sure, I don't mind at all, share awayI just love the weathering!!!!!
Do you mind if I share some of your pics in a FB French sci-fi modelers group?
Thanks for all your kind comments, it's been very satisfying seeing this build come to fruition, I'm happy how she has turned out.
I have a stash of Gerry Anderson kits that require special attention, I think I'll start my Thunderbird 5 as my next project as I've already gone through the sprues and she looks like an easy oob build but in saying that, you all know by now that I never do stick to the plan and I'll probably end up detailing that kit too, I think it'll look awesome with lighting
Cheers guys and happy modelling!
ssgteverett
Active Member
- Joined
- Feb 7, 2014
- Messages
- 114
A very nice build - And thanks for sharing.

