Battlewagon: M4A3E8 ETO

errains

New Member
Joined
Apr 10, 2011
Messages
288
Part 1-Concept

Ok here we GO!!!

This is my current build. I'm about half way through the build however. I’ll be posting the different updates over the next few weeks while I’m unpacking from a recent move into a new house.

With out further adieu…Enjoy
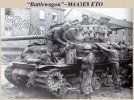
P1a.jpg


This Photo has always been one of my favorites of a Sherman in wartime action. The wear of combat shown both by the vehicle and crew epitomizes the harsh conditions endured by man and material. Additionally the configuration of the supplemental armor utilizing the combination of both sandbags and gas cans making this somewhat unique from other Shermans using field added armor.

Prior to starting the build I spent several hours analyzing the photo and deciding which features I wanted to include. The idea is to not build an exact replica but serve more as an inspiration, with some artistic license.
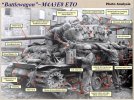
P1b.jpg

The base kit will be the older Dragon M4A3E8 “Aibin F Irzyk” kit 6283. However for this build a turret with the larger round loaders hatch was needed. Recently I picked up Dragons new E8 “Thunderbolt VII” kit which comes with a spare turret which fits the bill. As a bonus the “Thunderbolt VII” kit also comes with the T66 magic tracks, which are needed as well. I decided early on to keep the use of aftermarket items to a minimum. I was able to locate, fairly cheaply, RB Models from Poland the 76mm main gun barrel and 30cal bow machine gun barrel. All additional details will be made from scratch, savaged from the spare parts bin or previously owned aftermarket items, mostly storage…maybe.
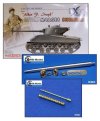
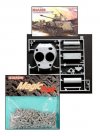
P1c.jpg P1d.jpg

For the finial display I’ll stick to a somewhat simple layout as shown below with one figure, on the left, from an old Jaguar set.
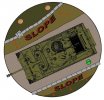
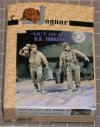
P1e.jpg P1f1.jpg

Well thats it for the part-1. I hope you all will enjoy following along as I make slow but steady progress.
 
Wow you've got it all planned out! I like the first picture. You are right, it is a little out of the ordinary. Should be fun.
 
Hi Eric,

I've seen this over at Armorama and it looks sharp. I don't normally log in or post over there very much but I do lurk around from time to time. Its great to see you've brought it over here as well.

I don't recall if you ever got an answer on those angled brackets on the bogies but I believe they were used to secure the tank during shipping via rail car. Judging by common photographs, I would venture a guess that most of the time they were removed and for some reason, these weren't.

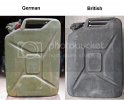
Secondly if I may, those 'German' fuel cans in the picture may not be German at all. I see this a lot and unless the photo is really close up and clear, you can't tell. While it seems that it would be easy to judge by the embossed pattern, you can't use that as a reference.

Early British War Department five gallon cans were exact copies of German five gallon cans. In fact, I believe Tamiya include some in one of there equipment sets. Before one was 'captured' and copied, the Allies didn't have a good five gallon can. It wasn't until a little later that the embossing changed over to the more common X pattern that we are more accustom to.

8)

Here are some examples of what I'm talking about:


Side by side comparison

Fuel-cans.jpg


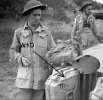
War Department can in use with the Canadians

canadian-fuelcan-1.jpg
 
Parts 2 & 3: Upper/Lower Hull Fitting and HVSS Suspension Assemblies

I'm combining two previous posting this time as they were on the short side.

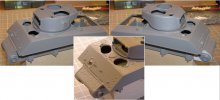
I started by fitting the upper and lower hulls along with the transmission and rear engine plate. I textured the transmission and the cast area around the driver and co-driver hatches with a small burring bit and dermal tool. One technique I’ll be using is what I call exaggerated details. The idea here is to slightly overstate certain aspects in the hopes of enhancing the appearance, but not to the level of absurdity. For this build that will be the cast texture and weld lines, which will be covered later. Finally I attached the mounting brackets for the HVSS suspension components and a few bolt details.

P2b.jpg

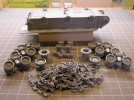
Mostly built the HVSS suspension subassemblies OOTB with only a few detail additions. This biggest are the angled sheet metal attached to the center of each suspension, I have since found out these where tie down points for long distance shipping, such as across the Atlantic. Next up will be the mounting of the suspension to the lower hull and start laying the tracks….oh the fun!!

P3a.jpg

That’s it for this post.

@Ken, if I may call you by your first name. Thanks for info on the jerry cans. I’m a bit bummed that they are not German. :-[
I was planning on the gray to provide some interest within the color pallet of the finished model. I’ll keep the info you provided on file for my future builds. Do you think anyone will notice if I still paint them gray?? ::)
 
Coming along nicely. Seems your thinking the whole way. Should be fun to watch it come together.
 
Wow. Going to be ambitious.
Armor work can be challenging, from what I've seen of it
 
Re: Battlewagon: M4A3E8 ETO Photo Spam

I was going to build a sherman of my own Using the same Dragon M4A3E8 but I intended to build a model of this tank on Display at a PA National Guard armory in Carlisle. Below is photo spam of my references. If you need something more specific let me know, the only exception to this is I probably will not be allowed to climb on or inside this tank, (it may be a runner!) On of the neatest thing about a M4A3E8 is the extra armor that is welded on, this extra armor has noticeable extra weld seems that are layered on at the joints and OTHER places. Hopefully these images will help you detail your model.


ERIC,

Also lookin at th pix that were posted above. ARCHER makes a set of decals that are Raised Casting marks that are specific to this Sherman ... a lil' FYI
 
@Jeremy- Thanks for posting the above pixz, one never has enough reference material. I always see new details that can be add to my current build or a future one. I really liked the close-ups of the turret with the casting effects and the machined lower ring. One question, it's hard to tell from the pixz but does the turret have the small oval hatch or the large split round hatch? my guess is the smaller one based on the late model
Exhaust deflectors, just curious.

@Erik â€" If your referring to Archer’s excellent raised casting details I do have a couple of sets and plan on using them. However I’ll be applying them later in the build, that being said I’ll run over to their wed site and check out the new releases and see if I’ve missed something. But thanks for the heads-up.
 
Part 4: What a Bloody Mess!!


Actually that would be a muddy mess!!
Since I’m basing this build off of a photo that shows heavy accumulation of mud I decided to give my Sherman a heavy coat of mud in the suspension areas. I understand many builders prefer not to do this feeling that inclusion of such a heavy effect is meant to hide poor building technique. For myself I follow the idea that armored vehicles move more through terrain, then over it and therefore becoming caked in mud and dirt. After reading about this technique in the recently published book I figured I would give it a shot.

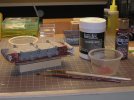
The picture below shows the materials used for applying a coat of mud. Both the Liquitex and paint are acrylic and therefore easy to use and was purchased at local craft store (Michael’s). The Liquitex ran about twenty dollars for the size shown and should last a lifetime. When applied it is white in color then dries more on the clear side making it hard to see when adding layers. By adding just a drop or two of the Heritage Brick acrylic paint makes it easier to see, but any color will work.

P5a.jpg

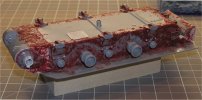
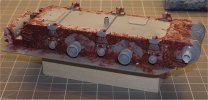
This Mud was applied in three layers. The first layer was to see how workable the Liquitex would be on the plastic of the kit, which was quite easy. One good thing about using this is that once dry, after about 24 hours, you can sand it and carve it with a hobby knife to further shape it. The second layer was applied before attaching the bogy assemblies.

P5b.jpg
P5c.jpg

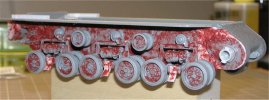
Once the second layer was dry and the bogies were attached, the third layer was applied. Attention was paid to adding accumulation on the upper surfaces of the bogies as shown in the reference photo.

P5d.jpg
P5e.jpg

Once the tracks are assembled and attached, a fourth layer will be applied for final effect. This mud effect will be painted and weathered accordingly during the finishing process. Also built during this process was the exhaust deflector with styrene details added.

While it looks like the model is ruined, once painted it should look quite realistic…I hope. Like with all new techniques, first practice this on a throw away kit to get the feel for it, but it is really quite easy to effectively accomplish.

Lastly not to confuse folks, I have been posting this build on another web site since June of last year and currently on Part-10. I don’t want people to think that I can crank this stuff out, haven’t even stated on turret yet! I’m a S-L-O-W builder.
 
Interesting method. Will this stuff stick to a already painted model? Also whats the base color of that material?

Greg
 
TEXAS,

This stuff is Great !! I have some of the Matte Gel from Liquitex & I mixed it with ModelMakerZ pigments( European & Russian Dirt) & applied it to an already painted model & it came out lookin' Goot !! So, Yes Texas, you can tint & apply it to an already painted model & when this stuff dries ... It's on there for life. Also ... remember it's an Acrylic matt medium, so it will thin & wash away with water if you get it in/on some undesirable places.

Another good one to try is the Textured Gels. These have a really good texture & all they really need is to be tinted with an Acrylic paint. You can find these at a really good price at Michael's Craft stores.... Most any craft store really - th truth be told !

Matte Medium Gel is also great as an Adhesive !! I now use it to glue headlights & windshields in( thin it slightly with water) & it dries invisible !! I've even used it to "glue" tanks to their bases - Dries Flat ... dead flat !! No Glue marks on the base !!

Liquitex is also on Face Book .... just sayin'

Hope this helps TL !
 
Errains, I've heard of that business before to about using mud to hide poor craftsmanship. I think it's silly. Wouldn't it be boring if all our tanks looked alike? Weathering adds realism.
 
errains said:
@Ken, if I may call you by your first name.

Please do. 8)


errains said:
Thanks for info on the jerry cans. I’m a bit bummed that they are not German. :-[ I was planning on the gray to provide some interest within the color pallet of the finished model. I’ll keep the info you provided on file for my future builds. Do you think anyone will notice if I still paint them gray?? ::)

Well,

I didn't mean to say they positively weren't German, they certainly could be and painting them in gray to add some interest is a great idea.

Besides, it's your model, build it how you like. ;)
 

Latest posts

Back
Top