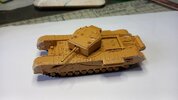
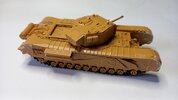
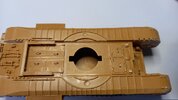
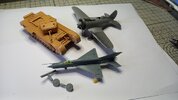
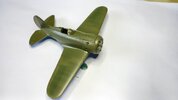
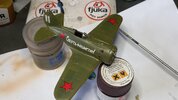
Chirchill Mk111 1/72 Italeri

dave

Member
Joined
Sep 22, 2024
Messages
20
As promised went to the stash and pulled this one out
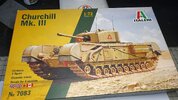
20241002_102738.jpg
It was opened so I probably took one look thought thats a load of and put it in the stash ,but on the back of the box is a rather intresting russian winter camo scheme.
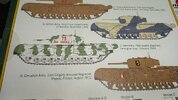
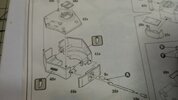
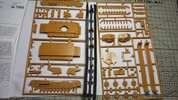
20241002_102721.jpg Rather disappointed with the mouldings
20241002_102926.jpg
I've a feeling this is quite a old moulding but my biggest hate at any scale is moulded on tools and cables ,grab/hatch handles reducing the whole thing to a kiddie toy ,will continue with this tomorrow fingers crossed but must go streaming the speedway live from Poole come on you pirates.
Dave
 
As mentioned above my pet hates well this one has the whole gambit the front plate what I presume is a tow loop I drilled out and cleaned up
20241002_153944.jpg
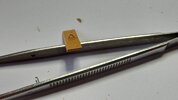
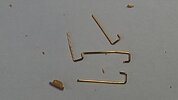
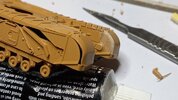
Then thoes hatch handles i foolishly tried drilling one out wich of course meant that replace one replace them all ,first off I bent some brass wire to form the new ones these were cut with one long leg you can also see one of the offending handles.
20241002_111943.jpg
No pattern or former was used bent with some flat nose pliers my thought /method being only one hole to drill dam site easier than drilling two only to find holes too close to each other or handle made too big ,these are probably way over scale and should have had right angled feet welded to the hatches but hey ho ,I try and do a little bit of scratchery to most builds im not that good but it does help I hope to make me a better modler/builder and improve the model. The long leg lets you adjust and position from below ,for some time time now ive used Rocket CA the blue lable one that gives 15seconds? Wriggle time also replaced the hinges on the front hatches once again probably totally wrong but hey ho its all about enjoying yourself .
20241002_150657.jpg
Have done a bit more but will catch up with that later. Dave
 
My only thought to your post is the 1/72 scale for armor is a bit small. I am currently building a 1/35 Tamiya Sherman Easy Eight and too many parts are way too small and fiddly for my liking. I can't imagine a 1/72 scale tank. If I decide to build another armor piece, I would have to move up to a 1/16 scale to make it enjoyable and not frustrating. I will go back to motorcycle builds after this.
 
My only thought to your post is the 1/72 scale for armor is a bit small. I am currently building a 1/35 Tamiya Sherman Easy Eight and too many parts are way too small and fiddly for my liking. I can't imagine a 1/72 scale tank. If I decide to build another armor piece, I would have to move up to a 1/16 scale to make it enjoyable and not frustrating. I will go back to motorcycle builds after this.
Hi Dminor9: unfortunately the call for more and more detailed models means usualy six or seven parts just to make one ,72nd stuff seems to carry this myth about miniscule parts look at the spru shot there's probably only half a dozen pieces smaller than 35th small parts I always say bit like 35er small stuff just a few more in the end its what you enjoy doing the most that counts where you feel most at home ,me I suppose I just enjoy the challenge of 72nd dont they call it braille scale.Dave
 
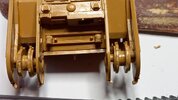
So got a little more done ,as with a lot of 72nd what I call rubber band tracks the holes for the sprocket teeth have nothing to do with each other my favorite fix for this is a simple piece of dentistry
20241003_182028.jpg


The patient never complained once ,I did once see the same problem overcome in 35th where the chap carefully removed the sprocket teeth fitted the tracks and then glued the teeth back in the appropriate holes in the track not for me I'm afraid. The tracks were tacked around using CA
20241003_183157.jpg
20241003_183213.jpg

I know you can see through the little gap but thats because there's no top track guard fitted yet to make it all dark and invisible ,why bother joining the ends when you can't see half the track anyway ,spent a good hour fettleing trying to make said top bit fit ,very poor fit but more on that next time. Dave
 
Nice updates. Last couple years I've really started enjoying these 1/72 Italeri kits. Thanks for sharing
 
Well stay away from this one Lee ,that fettleing I mentioned
20241004_192801.jpg
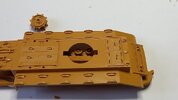
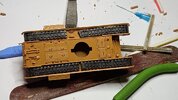
Pretty much the same on all four corners you can see the opposite fender decided that ordinary filler might not be up to it so used some tamiya two part stuff blimy came back next day it was like concrete won't be using that again probably ok for weld beads etc but needed a grinder almost to sand it down.
Haven't been very impressed so far with this kit not the quality I was expecting or thought it would be but hey ho its all part of the hobbiestupid things like having to remove these two nibs from the turret because I don't want to use the badly moulded tarps
20241005_061237.jpg
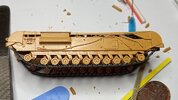
Still all built up hoping to get some primer down tomorrow ,oh and as per the instructions the barrel end bit was a deformed pile of so bodged a bit of brass tube on the end totally wrong but kinda looks the part except the bore is massive but you've probably guessed by now I dont care to much its all about just enjoying it
20241005_122956.jpg
20241005_123017.jpg
Oh the kit that keeps giving just noticed
20241005_123028.jpg
Two bloody great knock out marks can't see there part of the real thing. Thoes here that know me had best sit down because look what else I've got up to primer as I said hopefully tomorrow thats Sunday our side of the pond many thanks all
20241005_123159.jpg
Dave
 
about just enjoying it
Yes that's the key my friend. Some of these old kits are Esci molds I wonder if this one is. I've learned you have to be careful about Italeri Kits they put lips stick on pigs. But I will says this in my opinion they have the best customer service I've ever seen. Had a deformed link track set in their 1/72 Jagdpanther kit they sent one right out from there got it in not time.
 
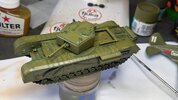
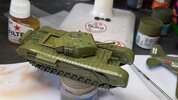
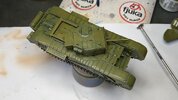
Blimy primer primer everywhere ,been a while since I've had a go with the old airbrush not that I've packed it away . So should be good to start squirting some colour in the week
20241006_162401.jpg
20241006_162417.jpg
And the wingy things but IFand WHEN I'll dare to put them in the wingy bit
20241006_162436.jpg
20241006_162431.jpg
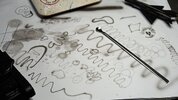
Back to the old printer paper I always test what I've mixed/thinned on the paper before I even go near my hard work ,I never change the air pressure on the compressor easier I find to thin the paint to suit ,always mixed in the airbrush cup one mans meat another ones poison I cant see the point of all that decanting also any little bit left is used just practicing/ mucking about better to mess up on a piece of paper than your hard work
20241006_162605.jpg
I've also got a 1/48 scale KV turret that is subjected to experimenting camo patterns with left overs but hey onwards and up wards ill be back when the colour goes down. Dave
 
If anybody is interested the primer used was mr hobby aqueous surfacer 1000 thinned with their own aqueous hobby colour thinner airbrush used was a sparmax something or the other with a .3 needle ,this was always my go to primer for ages but recently I'd been using mig one shot with no problems straight from the bottle no thinning as per the instructions but started to have problems laying colour over it the paint was almost pooling of in places as if the surface was oily couldn't have been the kit else the primer would have done the same do wonder if it was gone off still were see when I put some colour down. I'm going back to mr hobby aqueous as well at least you can stick a proper mixer (badger) in the jar ,ive a lacquer shaker for the mig type bottles but beginning to think their never one hundred percent mixed still were see if this rears its ugly head again. Dave
 
Nice work on the Churchill Dave.

I couldn't remember if I'd built that kit but when I saw the gaps on the fender I do remember building it.
It's one of them old school proper models where you need to fart arse about cutting out some bits and maybe bung some filler in here and there…..all part of the charm :p
 
Back
Top