You are using an out of date browser. It may not display this or other websites correctly.
You should upgrade or use an alternative browser.
You should upgrade or use an alternative browser.
D9R - Meng 1/35 Armored Bulldozer
- Thread starter TRM
- Start date
TRM
New Member
- Joined
- Mar 18, 2011
- Messages
- 5,024
Mfun said:Great detail, very clean construction.
Thank you my friend!! Cabin walls and doors are next!! Cleaning as I type...sort of
Alex Benvenuti
New Member
- Joined
- Aug 19, 2013
- Messages
- 10
Excellent work so far!
That baby is going to be a killer!

Alex!
That baby is going to be a killer!
Alex!
TRM
New Member
- Joined
- Mar 18, 2011
- Messages
- 5,024
Scott Girvan said:Nice. Love the detail in the cab.
Thanks Scott! I was cleaning and assembling wall section last night!! Starting to get nice and busy in the office now!! ;D
Bonjour Alex!!! Welcome aboard my friend!! Thanks a bunch for the kind words!!! Just trying to stay in the game with you!! Looking forward to seeing you get some builds posted here soon!!
JohnSimmons
For Spud: I was once Merseajohn
- Joined
- Jan 4, 2011
- Messages
- 5,645
Lovely clean work as always mate.
TRM
New Member
- Joined
- Mar 18, 2011
- Messages
- 5,024
OK, another update. For not actually being a huge update there are a few pics just to show what is going on.
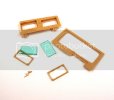
I alluded earlier to cleaning the office walls in preparation to installation. I was not to happy with the interior pin marks on the walls, but I also realize the EPM's need to go somewhere...might as well been inside. Here are the cleaned up parts as I work the walls.
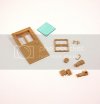
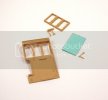
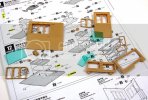
In keeping the SBS with the instructions these are the parts for step 11.
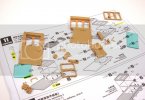
Moving onto step 12...
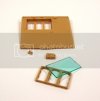
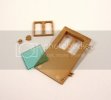
While dry fitting everything I came across this little one. You can see the back of the communications equipment through the window here.
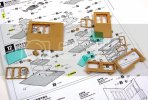
When complete this can be seen but if painted the same as the rest of the equipment, a dark color, it will be seen but look like it is just what it is suppose to be. You could take the time to cut a small piece of card stock and cover the back.
I am actually going to paint up the interior soon as I work my way through the build...this means I need to do it now as I cannot attach certain pieces until I attache the cabin walls... Heading to the booth some night this week!
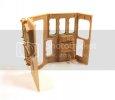
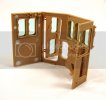
I have to let you know...half of the EPM's are not even seen since they are obscured by the equipment there will be some that need attention. I used a combination of two methods...simple sanding and filling and sanding...both the same in my eyes...both tedious but need to get done.
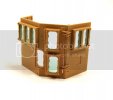
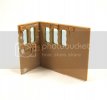
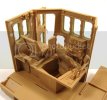
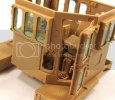
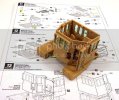
There you have steps 11, 12 and 13. I have not glued the interior window parts as well as a couple of parts that need to stay off so the window can be installed after painting.
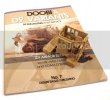
And finally...this was in the mailbox today!!! Straight from Dessert Eagle Publishing, the DOOBI D9 Variants: D9 Bulldozers in IDF Service book!!! I have begun reading through it, not only to gain more knowledge of what I am working on but I will have a full review of this book real soon as well.
As always, thanks for tuning in!!!
[attachment deleted by admin]
I alluded earlier to cleaning the office walls in preparation to installation. I was not to happy with the interior pin marks on the walls, but I also realize the EPM's need to go somewhere...might as well been inside. Here are the cleaned up parts as I work the walls.


In keeping the SBS with the instructions these are the parts for step 11.

Moving onto step 12...


While dry fitting everything I came across this little one. You can see the back of the communications equipment through the window here.

When complete this can be seen but if painted the same as the rest of the equipment, a dark color, it will be seen but look like it is just what it is suppose to be. You could take the time to cut a small piece of card stock and cover the back.
I am actually going to paint up the interior soon as I work my way through the build...this means I need to do it now as I cannot attach certain pieces until I attache the cabin walls... Heading to the booth some night this week!


I have to let you know...half of the EPM's are not even seen since they are obscured by the equipment there will be some that need attention. I used a combination of two methods...simple sanding and filling and sanding...both the same in my eyes...both tedious but need to get done.


There you have steps 11, 12 and 13. I have not glued the interior window parts as well as a couple of parts that need to stay off so the window can be installed after painting.

And finally...this was in the mailbox today!!! Straight from Dessert Eagle Publishing, the DOOBI D9 Variants: D9 Bulldozers in IDF Service book!!! I have begun reading through it, not only to gain more knowledge of what I am working on but I will have a full review of this book real soon as well.

As always, thanks for tuning in!!!
[attachment deleted by admin]
JohnSimmons
For Spud: I was once Merseajohn
- Joined
- Jan 4, 2011
- Messages
- 5,645
Wow looking great T, and I like the sound of paint ;D
TRM
New Member
- Joined
- Mar 18, 2011
- Messages
- 5,024
thanks bud! I'm sure you'll do fine with the Ripper! Remember about the bolts on the hydraulics. I use the bowl that was for the lower hydraulics on the back of the top hydraulics as per the instructions. Not a big deal since it is an added details but just giving you a heads up.
you'll do fine in the cabin is well make sure you dry fit the walls and see where all of the ejector pin marks are that way you know which ones you need to fix in which ones you do not. Most of the lower ones on the back and sides are behind something and will not be seen. Looking forward to seeing your progress good luck
you'll do fine in the cabin is well make sure you dry fit the walls and see where all of the ejector pin marks are that way you know which ones you need to fix in which ones you do not. Most of the lower ones on the back and sides are behind something and will not be seen. Looking forward to seeing your progress good luck
adampolo13
New Member
- Joined
- Dec 7, 2011
- Messages
- 2,633
Office is looking good dude!
TRM
New Member
- Joined
- Mar 18, 2011
- Messages
- 5,024
adampolo13 said:Office is looking good dude!
Thanks Bro!! Fun times there!! ;D
spud said:i saw those bolts and it took me a while to figure it outill get pics later tonight.
In the step that calls for them the picture is the likeness of the rear of the top hydraulic cylinders, not the bottom...LOL!! Live and learn ey? I have some nuts bolts and washers by Tichy coming from Celticwerks!! Steve is a good man and is packing an assortment for me to have around for other things...will straighten mine out in a day or so!!! ;D
spud
Irish and proud of it :)
- Joined
- Jun 29, 2011
- Messages
- 6,918
TRM said:In the step that calls for them the picture is the likeness of the rear of the top hydraulic cylinders, not the bottom...LOL!! Live and learn ey? I have some nuts bolts and washers by Tichy coming from Celticwerks!! Steve is a good man and is packing an assortment for me to have around for other things...will straighten mine out in a day or so!!! ;D
oh nice, i need to get some of those sometime.
I did firyre out what they were and where they go but ill leave them off untill i begin painting.
TRM
New Member
- Joined
- Mar 18, 2011
- Messages
- 5,024
Mfun said:Good way to start my modeling night: seeing the great work that you have been doing in this beast
LOL...thanks!
spud said:TRM said:In the step that calls for them the picture is the likeness of the rear of the top hydraulic cylinders, not the bottom...LOL!! Live and learn ey? I have some nuts bolts and washers by Tichy coming from Celticwerks!! Steve is a good man and is packing an assortment for me to have around for other things...will straighten mine out in a day or so!!! ;D
oh nice, i need to get some of those sometime.
I did firyre out what they were and where they go but ill leave them off untill i begin painting.
Sounds like a plan spud! Pretty cool how the ripper works huh? I had to play with it watching the hydraulics go in and out!! LOL!!! No sound effects though... :
Similar threads
- Replies
- 11
- Views
- 714
