You are using an out of date browser. It may not display this or other websites correctly.
You should upgrade or use an alternative browser.
You should upgrade or use an alternative browser.
D9R - Meng 1/35 Armored Bulldozer
- Thread starter TRM
- Start date
TRM
New Member
- Joined
- Mar 18, 2011
- Messages
- 5,024
spud said:well mine WILL be here this after noon..... awesome so far Todd
Is it there yet? Is it there yet? ;D
Scott Girvan said:That looks like a good fit - no gaps. I wouldn't expect less from a state of the art kit.
Are you thinking ground...work for this Todd?
Not too bad at all on the fit. Couple little bits of flash on a joint here or there but nothing a quick sand doen't handle! I have a few thoughts on the ground "work"...waiting until the bulk of the body "work" is together so I can judge the size..."work"!! :
TRM
New Member
- Joined
- Mar 18, 2011
- Messages
- 5,024
spud said:thats a big Review. so ima just take yer word for it
LOL...Sure spud...just some words!! :
adampolo13
New Member
- Joined
- Dec 7, 2011
- Messages
- 2,633
Looks like a pretty sweet kit you got there dude!
TRM
New Member
- Joined
- Mar 18, 2011
- Messages
- 5,024
adampolo13 said:Looks like a pretty sweet kit you got there dude!
Thanks again Adam!! Hoping to have a couple more pics a bit later!!
Mfun said:What well and clean construction !!
Keep the good work, i will follow 8)
Thanks a bunch MF...I will give it my best!!
TRM
New Member
- Joined
- Mar 18, 2011
- Messages
- 5,024
bdr65 said:Excellent man -Got ya build bookmarked for reference ;D
Awesome brotha'...glad to have you along for the ride!!
TRM
New Member
- Joined
- Mar 18, 2011
- Messages
- 5,024
spud said:cool. im going to go with the US version and load it on my Hett
That sounds awesome Spud!! I seen a great pic of one of these loaded on one...Bad A$$!! I am hitting the IDF for mine so this is good to see a couple variants of the same build!!
Since I ran out of time last night to give and update...it will have to be now! :-H
The top of the undercarriage section went down with no issues at all.
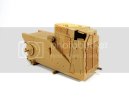
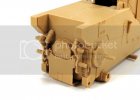
Next up was steps 3 & 4; The Ripper
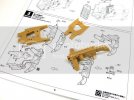
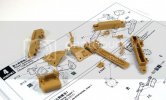
Again, this part is fairly straight forward. a little clean up and the parts fell together!
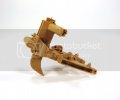
The Ripper and its frame get installed with no glue to the undercarriage.
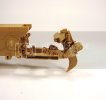
Step 5 & 6 came and went quickly with the construction and installation of the hydraulics for the ripper. These are movable parts; both on the ends of the rods and the rods in the cylinders.
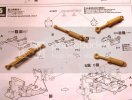
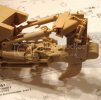
I am onto step 7 which is the second part of the Ripper installation. I should have an easy go of this as well.
Thanks for stopping by!!!
[attachment deleted by admin]
Similar threads
Latest posts
-
-
-
-
-
ready to throw away the testors "orange tube"
- Latest: OldManModeller
-
-
