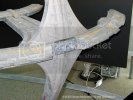
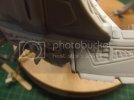
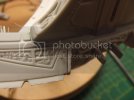
Deep Space 9 - Lighting her up!

Ok, heres the big update I promised.
First, a little back story. Way back when I started building this I wanted to be lit in sections and I even dreamed of being done in a certain way. My investigations then made me think it was just a dream but I built the model with the lights in sections thinking I could one day do what I wanted with it.
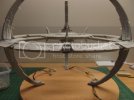
Well, a few weeks ago, after getting her assembled, I re-visited the lighting issue, this time with more determination, and this time with success. Heres what I was wanting to do from the start. The model has 11 LED strings for different parts of the station, power core, Promenade, Ops, etc. I'm having this so that each section can be turned on separately from each other and in any order, but also I'm able to turn the whole station on with one switch. Thats the easy part. The hard part was what I most wanted, and what I finished up working on tonight. I wanted the station to light up in a sequence of my choosing all to the Deep Space 9 theme. I know the station never did this on the show, but I wanted my DS9 to be a little different.
Ok, heres a video of her doing her thing. By the way, the theme playing in the video is coming from the lighting circuit, it isn't dubbed over the video.
http://s454.photobucket.com/albums/qq268/Kila2000/Test%20vids/?action=view&current=Fullsequencetestvid.mp4

I still have alot of detailing to do and of course painting but with the electronics out of the way I now know what size the base needs to be.
 
What he said... awesomely awesome in the most awesome way.
I love all the electronics.
Brilliant execution.
I had one of these kits years ago but gave it away to my nephew.
Your work makes me wish I'd kept it now.
 
It is indeed, truly magnificent sir! Loved that video. I knew you were gonna switch those lights on, but I wasn't prepared for how cool it was going to be!
 
Thanks guys.
I'm really pleased with how the circuit turned out. I've played with the sequence a bit last night and got it more in time with the music. Still a little tweaking to do but I think I can get back to some plastic work now. I'm dreading painting her though as I'm not as good as I'd like to be.
 
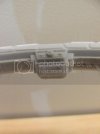
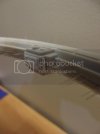
Got back into the plastic work today. I can't eliminate the some of the seams as I'd hoped to do as the fibres make it pretty much impossible, for me at. I'm glad I put some seam work in before threading the fibres though or else I would have alot more to deal with now. Anyway, the other main thing that bugged me with this model was the horribly molded detail of what I think is the cargo holds. Its a box shape structure directly behind each of the 9 smaller docking ports.
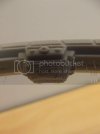
Heres the kit detail:
Cargobay-kitdetail-front.jpg
Cargobay-kitdetail-side.jpg

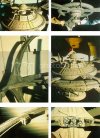
Pretty bad like I said, and pretty much looking nothing like it should. You can see them in the bottom two pics on the left hand side of this:
B_MODELL_DS9LQ_007-1.jpg

So, firstly, get rid of the kit detail:
Cargobay-smoothedoff.jpg
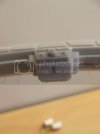
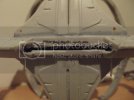
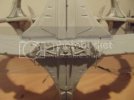
And add in my own:
Cargobay-newdetail-front.jpg
Cargobay-newdetail-side.jpg
Not perfect but a dam site better than it was. I might change the front panel though. Its hard to see in the pics I have as to whether theres two flat panels before the T shaped one or if theres just one. Some angles look like two, others like one and seeing it on the model it sorta looks too bulky.
Anyway, thats one down, 8 to go.

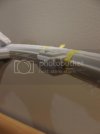
Oh, and did I mention I had to fix a couple of the yellow lights on the main docking ports. It seems when I was assembling her two of the fibres slipped out of their light cans and so their ends were dark. It was an easy enough fix though, just need to cut into the docking port area and re-thread them, hardest part was getting the 1mm fibre to curve away after entering the hull. Best part is, the docking port piece covers over the gash left behind.
Fixingdockinglights-A.jpg
Fixingdockinglights-B.jpg

Also got the horrible gaps that run alongside the middle docking port on each section of the outer ring started. I have no before pics and I'm still working on them but you could get the point of a toothpick into them quite easily. Had a similar gap on the bottom half of the ring which was alot easier to fill. I'll get pics of the completed patch when I'm satisfied.

Well, back at it, got ships waited to dock!!
 
I agree with Quaralane. I cant wait to see the finished product.
A true lesson in attention to detail.


Well done so far


gav
 
Keep up the good work. I did a lot of fiber repair this weekend on one of my projects and I know what you went through.
 
Thanks guys for the awesome comments, it really is an encouragement to me to read your comments.
I'm a slow builder so not alot of progress to show I'm afraid, but slow progress is better no progress right? ;D
Anyhoo, Photobucket was being a pig lately as the pics I uploaded didn't want to show in the album. Finally got it sorted so here we go.

I mentioned in the previous post the details I'm replacing on the cargo bays. I had the one 'prototype' done and was happy so went ahead and made up all the parts needed. Its all from 0.3mm sheet styrene which I love as its sooo easy to cut.
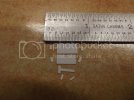
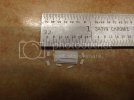
Heres all the little pieces:
CargobaypiecesA.jpg
CargobaypiecesB.jpg

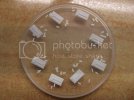
Thats one set of course, I needed 7 more after that making a total of 9 (one already in place)
Cargobaypieces-8sets.jpg

Fiddly stuff, and I've already lost one of the little rectangles, no worries, easily replaced.

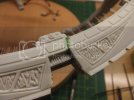
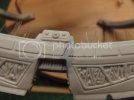
To get them in place on the middle bay of each section I first need to sort out the gaps between the two pieces of the upper half of the docking ring. The lower half was sorted way back when I assembled those parts. Anyway, the gap is ugly to say the least. Anyone whos built this would know what I mean. I didn't get a before shot but the filler tells the story. Got one gap finished:
Dockingringgapinprogress.jpg
Dockingringgapfilled.jpg

And so the docking ports and cargo bay details can be added. So, thats one section down, two to go:
Secondarydockingports-onesectioncomplete.jpg
Cargobays-onesectioncomplete.jpg

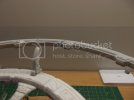
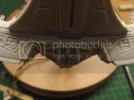
I'm working on a section at a time so as not to get ahead of myself. That means the ring gap, cargo bay details, seam work on the habitat ring and central core as well as gaps around the pylons. I'm still working on the first pylon but I've done enough to allow me to add the first of the main docking ports. Man what a bad fit!!
Maindockingport.jpg

This means that some detail will be lost because as the studio pic shows...
B_MODELL_DS9_006.jpg
... there should be no gap between the port piece and the surrounding ring segment.
Maindockingport-gapA.jpg
Maindockingport-gapB.jpg

So, those gaps are getting filled in. Not much room for sanding though as I have some fibres right next to the ports. Should work out ok though, I hope, lol. I haven't a pic of it yet, but the gap from the bottom of the port is just as bad and will require a more creative approach. I won't tackle them till I have all three in place though as it means I need to have the model upside down and theres really nothing for it to stand on when positioned that way.

Right, back to work!! Got filler to sand back and details to correct. Still need to tackle the power core too.

Thanks for stopping by guys.
 
I think that's terrific progress Kila! Those seams are not to be trifled with. You're doing an awesome job with them!
 

Latest posts

Back
Top