Dragon 1/32 P-51

Interesting MP. I'll keep an eye out for that. I have no doubts that a company that can turn out PE that at that rate and volume doesn't have some accuracy issues.
There were a few issues with my BlackHawk that I had to deal with in the BigEd set, but it was more in the form of extra or unnecessary pieces than in the accuracy of them.

You mention the B-1..., did you build the 1/48 scale version of that? MONSTER
 
Oh did I!

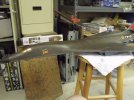
Still got a couple of decals to go.

It's sort of a What if, or what the hey...

DSCF0004%7E0.jpg

Then there were the F4F-4 Flaps issue where I took the time to write Eduard and got a pretty quick reply, basically they said, "yeah, we know, can we offer you something else?".

Didn't mean to hijack your thread. ;)
 
Not sure if I still have that B1....? But I remember it being a beast! Nice job on those seams...

Mike! Great work on that lady! keep the good work coming!
 
Thanks Norm!

No worries MP. That thing is awesome! I'd love to build that beast. That should fit just nicely in my living room and I'm sure with little to no complaints from my wife.
 
I can't believe I let the latest update slip on me!

Really great job on the painting of the engine.

Oh! The cut you made on the gunbays are so clean! If I may be so bold, what was your tool of destruction for that area? Pray it not be a #11 blade, I'm guessing something closer to a saw or chisel blade.

Looking forward to more updates!
 
Nope, nothing fancy I'm afraid. In fact I rarely use my #11 blades. It's all in the cheap knife. I kinda follow the Phil Flory Philosophy on knives.

My cutting implement of choice.

IMG_20110715_221333.jpg
 
With the engine painted and the weathering on that drying, I jumped into the cockpit area. The more I clean up this kit (parts and such) the more problems I find and the more I am not liking this kit.

The Engine had (I think) 28 parts..., the cockpit, a paltry 44. Some of the part are just insanely small. Here is everything cleaned up.

IMG_20110718_142019.jpg


I'll limit my frustrations to the cockpit area.

Moaning complaint #1:

The instrument panel, for some RIDICULOUS reason, is all individual dials. Where is the benefit to this? SERIOUSLY! They also provide you with a PE replacement that looks like crap. It's utter rubish, along with the rest of the photoetch as you'll see soon enough. The clear part instrument panel is much better and what i'll but using.

IMG_20110718_155321.jpg


IMG_20110718_155815.jpg


So if that isn't bad enough, I shall redirect your attention to the air intake. The PE for this part...., doesn't even fit, and for some reason, they provide two pieces, but don't instruct you how to use both.

IMG_20110718_155401.jpg


It's been a while since I've had a bad day at the bench, and it's been even longer since I've complained about a kit so I guess I was due.

Moon Puppy..., are you seeing this too in your kit??

I'll have some more (and hopefully much more positive) updates later.
 
Looking good Myke, the cockpit looks promising.

Shame about those three pieces though, however, I think this might prove to be useful -

http://www.scalespot.com/onthebench/p51d/build.htm

I'm not sure if anyone's posted it here, but reading from that link, it looks like you got a lot of work ahead of you! It even tells about your intake problem, so I suggest reading up on it.
 
Yes it does!

I read the article that Fruit gave the link to !

Myke, Do yourself a favor! Build the kit!

Don't go as far as the other guy did! If it is a dog of a kit? Build as is!

If you try to correct it all, you will never finish it! The article was nice but i found it extreme !

If it was the only kit on the market..... Maybe!

Your work will pay off.... But pick your battle wisely !

Your work on the Chopper was Awesome! If you want to go that way with the Stang I'll stand behind you.... But I will expect a lot of cursing.

Anyway Myke, good luck, you will need it!
 
I have to agree with Norm on this about the previous article. The rivets are over done if you're going to apply silver paint right to the plastic as he did. I intend to prime the surface then a couple of gloss coats before Alclad. I think that will fill in most of the oh so offensive rivets and panel lines. The wings will be sealed though, I have seen in several references where some sort of putty was used on the real aircraft to seal in panel lines to make the surface smooth as possible. In the same document I saw the technical order of how to fill in those panels in the field when the factory applied putty fails...So..panel lines or no panel lines or some panel lines...it's up the modeler I think.

About the IP, i'm using Eduards (at risk of being called a hypocrite for my previous Eduard bash here)color Zoom product. But honestly. I like the individual dial decals, if they were a single piece you would have a lot of carrier film to deal with over the bezel relief detail on that IP.

Norm is right, your work is going to pay off, keep at it, this kit is not that bad out of box. You're building for yourself, this will look great sitting up on the shelf once finished, at least till you get that Tamiya Mustang sitting next to it...
 
AOS: Wait for the Tamiya kit. HAHA Trust me.

Fruit: Thanks for the link to that build. I read through that and things don't seem that bad actually. A lot of what he is doing I can't due to the fact that I'm building this OOB for contest.

Norm: Thanks for the encouragement Norm. I appreciate it. I'm not frustrated really just disappointed at some of the kits qualites, or lack there of. Since this is OOB, then I'm not going to have as many problems as he did with the resin fits and things like that. I just have to make it look as good as possible with what I have to work with. The only thing that's really going to be modified is the rivet and panel line detail. Not quite to his level with the stretched spru and all, but just filling in the wings and shallowing out the detail on the fuselage. Thanks again, and thanks for following along.

MP: That's was exactly what I was planning to do with the fuselage. Two coats of primer and two good gloss coats, alclad, then another gloss coat before weathering. I've read the same thing about the wing rivets about how there were puttied over.
You're right, it is a good OOB kit. Lots to work with, just need a bit of patience really. Tomorrow should yield some good results.

Cheers everyone! You guys rock.
 
Good luck with it.
Sounds like you've already gotten some of the best advice you could here.

I saw what you did with the heli'. You can rock this.
 
DX holy cow... yea... that is not exactly a good score for them, i still want the kit, but now if i can find a better one thats what i am going for. lots of little issues, which would take up a lot of time! yes the mustangs wing and Fusolage surfaces where extremely smooth, the Mustang was perhaps the most Aerodynamic piston fighter of the war, what i was thinking of doing was punching a few coats of Mr surfacer over those excessively deep rivets in the wings, and taking some Aves Apoxiesculpt, and filling in what MR surfacer does not.

keep up the work bud! keep going!
 
Now that the Tamiya kit is out, my ambitions for this have dwindled signicantly. So from here on out, this build is going to go pretty darn quick.

Jumping right into things...

Radiator with the added photo etch, and some pin marks filled in at the roof of the intake.

IMG_20110721_095903.jpg


Remnants of the engine frame. I'm going to close up the engine now (change of plans), and so i'm not going to finish this area. There are no washes, filters, or further weathing aside from some paint chipping.

IMG_20110721_095918.jpg


Seat assembled with the PE straps

IMG_20110721_100943.jpg


Console with PE part behind the clear part. I only added this because the clear part fit better (more flush to the surface)


IMG_20110721_112652.jpg


Frame assembled

IMG_20110721_112703.jpg


This middle piece is a HORRIBLE fit. I'm surprised no one has mentioned it in other build logs. Or maybe they have, haven't read them all ;-).

IMG_20110722_141306.jpg


Engine and frame all glued up. This all went together pretty nicely. No complaints really. The parts need a lot of clean up, but aside from that, this builds up to a really nice engine OOB.

IMG_20110722_165007.jpg


Time to spray some Green Zinc Chromate

IMG_20110722_172747.jpg


IMG_20110722_172848.jpg


Sorry, my photos are rubbish. Working with natural light only. That's added to the list of things to improve on. Perhaps I should start using my camera and not my phone.

Back to work.
 
Hey Myke.

You're making tons of progress. It might not be a perfect kit, but you will be happy when you finish it, and you'll have all that experience built up for the righteous Tamiya kit everyone is drooling over.

JMac.
 

Latest posts

Back
Top