HIMMELSFALKE --- Ma.K. Falke XL
- Thread starter urumomo
- Start date
urumomo
Well-Known Member
- Joined
- Mar 18, 2013
- Messages
- 7,426
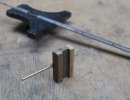
To plot points on the underside I made this little attachment .
Held on magnetically . The dimple in the center of the tube holds the rod nice and snug .
I just measure the amount the rod extends and then extend it that distance out the opposite side to transfer the plot - but I've just been leaving the rod centered so I'm just dealing with the one scale on the bridge .


It was also necessary to slenderize the end of the vertical scale further :

Held on magnetically . The dimple in the center of the tube holds the rod nice and snug .
I just measure the amount the rod extends and then extend it that distance out the opposite side to transfer the plot - but I've just been leaving the rod centered so I'm just dealing with the one scale on the bridge .


It was also necessary to slenderize the end of the vertical scale further :

Last edited:
struschie
Strahl Demokratische Republik
- Joined
- Mar 28, 2011
- Messages
- 32
Amazing job!
I love everytime someone modifies something. That's what modelling for me is about, too
sourcing parts, kitbashibg, scratchbuilding, molding and casting - great to see this project
It reminds me to finish some of mine and not getting distracted by new opportunities
I love everytime someone modifies something. That's what modelling for me is about, too
sourcing parts, kitbashibg, scratchbuilding, molding and casting - great to see this project
It reminds me to finish some of mine and not getting distracted by new opportunities
trekriffic
Well-Known Member
- Joined
- Jan 6, 2012
- Messages
- 1,020
Wow! you have really put a lot of work into this. How much AVES have you used?
urumomo
Well-Known Member
- Joined
- Mar 18, 2013
- Messages
- 7,426
Aight - the right duct is 95 % ,, I'm fine-tuning both sides now with Tamiya White Putty .
I've finally decided on the design of the laser package .
It will slide into place using these channels -- cut from the leftover piece from the vertical scale attachment .
Drilled for a mechanical bond with the Aves


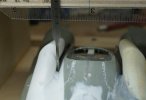
You can see below how far the Aves extends into each nacelle's upper half .
That was originally absent but the nacelles wanted to twist slightly when the build was first removed from the assembly deck :

.... looks like some-kinda space-frog
I've finally decided on the design of the laser package .
It will slide into place using these channels -- cut from the leftover piece from the vertical scale attachment .
Drilled for a mechanical bond with the Aves


You can see below how far the Aves extends into each nacelle's upper half .
That was originally absent but the nacelles wanted to twist slightly when the build was first removed from the assembly deck :

.... looks like some-kinda space-frog
Last edited:
urumomo
Well-Known Member
- Joined
- Mar 18, 2013
- Messages
- 7,426
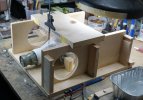
This plank will be the spine of the laser package .
It will get chopped back to probably less than half that length ( although now seeing the whole length in there makes me think maybe making the assembly longer than originally planned ,, ,.. hmmm -- naww. well , maybe ..)

It will get chopped back to probably less than half that length ( although now seeing the whole length in there makes me think maybe making the assembly longer than originally planned ,, ,.. hmmm -- naww. well , maybe ..)

Last edited:


