You are using an out of date browser. It may not display this or other websites correctly.
You should upgrade or use an alternative browser.
You should upgrade or use an alternative browser.
M4A1 (76) SHERMAN
- Thread starter MrT
- Start date
MrT
New Member
- Joined
- Apr 25, 2011
- Messages
- 1,490
dogfish7 said:It seems ashamed to cover up all that awesome detail with stowage, but haven't seen it yet.
Oh don't worry I'm not going to use all of that. There is enough there for several Shermans.
Terry
JohnSimmons
For Spud: I was once Merseajohn
- Joined
- Jan 4, 2011
- Messages
- 5,645
Lovely!
MrT
New Member
- Joined
- Apr 25, 2011
- Messages
- 1,490
JohnSimmons said:Lovely!
Thanks John!
MrT
New Member
- Joined
- Apr 25, 2011
- Messages
- 1,490
Subhuman1 said:Nice work! I love your work on the greens that make up the base of your paint job, ties together beautifully with the weathering! one to be proud of!
Thanks Dan!
MrT
New Member
- Joined
- Apr 25, 2011
- Messages
- 1,490
spud said:ohh very nice, i like teh damp effect along the bottom
That's why I love oil paints!
Thanks spud!
;D
MrT
New Member
- Joined
- Apr 25, 2011
- Messages
- 1,490
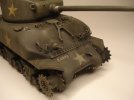
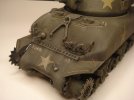
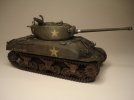
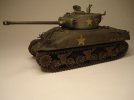
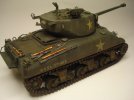
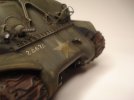
Ok last night I worked on some of the details one of which was the grating that protects the exhaust. The kit part is just a solid hunk of plastic. The Mk1 PE set provides one, but all that bending and tiny parts. I wasn't sure I could do it, but guess what it wasn't as hard as I thought. Looks good when done.
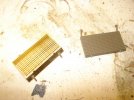
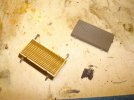
Next I painted the the tools and finished the fron fenders.
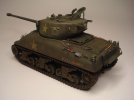
Last I tightened up the track. They probably don't need that much sag, but I think it gives the tank a little style.
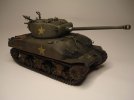
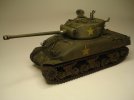
Next comes the tow cable and stowage.
Comments welcome.
Terry


Next I painted the the tools and finished the fron fenders.


Last I tightened up the track. They probably don't need that much sag, but I think it gives the tank a little style.


Next comes the tow cable and stowage.
Comments welcome.
Terry
myhobbyroom
Member
- Joined
- May 14, 2009
- Messages
- 187
Nice detailing. Keep up the good work.
MrT
New Member
- Joined
- Apr 25, 2011
- Messages
- 1,490
myhobbyroom said:Nice detailing. Keep up the good work.
Thank you!
errains
New Member
- Joined
- Apr 10, 2011
- Messages
- 288
Hey Mr.T vary nice Sherman man!!!
I "pity that fool" on ML who suggested you rework the tide line on your hull. I totally don't agree with that. I thought it look kind of Kool and depending on the effect you where going after it would be there. But it looks in these latest photos you did do some work on it.....Still looks KILLER 8)
Also your a brave person to post on ML...good on you!!
MrT
New Member
- Joined
- Apr 25, 2011
- Messages
- 1,490
errains said:Hey Mr.T vary nice Sherman man!!!
I "pity that fool" on ML who suggested you rework the tide line on your hull. I totally don't agree with that. I thought it look kind of Kool and depending on the effect you where going after it would be there. But it looks in these latest photos you did do some work on it.....Still looks KILLER 8)
Also your a brave person to post on ML...good on you!!
Thanks!
I'm still working on that wet line. What I'm doing is changing the color to make it look darker or more damp. So keep watching.
Terry
MrT
New Member
- Joined
- Apr 25, 2011
- Messages
- 1,490
dogfish7 said:Putting the color on the tools made it really come together. 8)
Thanks Bruce! I thought they were just a little too orange.
Terry ;D
Lurcher Two
Hurdy, Gurdy.....
- Joined
- Oct 24, 2013
- Messages
- 46
Yikes, your metal work is inspirational. I'm doing a Sturmtiger build and I hope to make my own wire mesh grills for the rear deck. I hope they turn out as well as your work..........
MrT
New Member
- Joined
- Apr 25, 2011
- Messages
- 1,490
Lurcher Two said:Yikes, your metal work is inspirational. I'm doing a Sturmtiger build and I hope to make my own wire mesh grills for the rear deck. I hope they turn out as well as your work..........
Thanks! I didn't know it would work out until it was done. I'll be pulling for you.
Terry ;D
MrT
New Member
- Joined
- Apr 25, 2011
- Messages
- 1,490
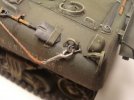
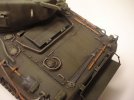
I have done two things tonight. The tow cable and a board. A board you ask. Most Sherman crews mounted a board between the fender braces on the transmission cover to stow items like spare road wheels and the like. To replicate this feature I used a piece of strip styrene. I drilled holes in each end to simulate nail/bolt holes in the board. I also make a notch in the board to allow it to fit around the tow cable bracket. I painted the board desert yellow then with red brown I made the wood grain.
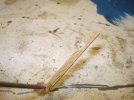
I then gave the board a wash of raw umber.
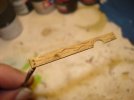
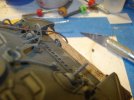
I made the tow cable out of the string provided with the kit. It was painted with Model Master Gun Metal and then a pigment wash rust. The tow ends are painted flat aluminum.
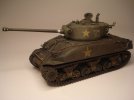
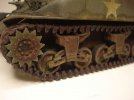
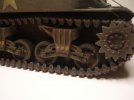
I did a little more pigment work to the running gear as well.
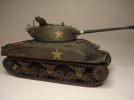
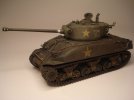
Questions and comments welcome
Terry

I then gave the board a wash of raw umber.


I made the tow cable out of the string provided with the kit. It was painted with Model Master Gun Metal and then a pigment wash rust. The tow ends are painted flat aluminum.


I did a little more pigment work to the running gear as well.


Questions and comments welcome
Terry

