Chuck Beemans
Member
- Joined
- Aug 3, 2024
- Messages
- 40
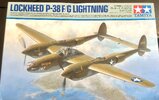
I was excited to start this build after seeing all of the rave reviews about it. The fit is everything they said it would be and it's been a pure joy.
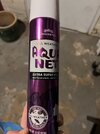
I experimented with hairspray chipping which I now prefer over other the chipping fluids I've tried, in case anyone is wondering about what brand/type of hairspray works I can say this worked well for me. By price/volume I don't really see myself ever using AK's stuff again. I do recommend decanting first and using an airbrush vs. spraying straight out of the can as the nozzle doesn't spray evenly and you risk puddling and over spraying.
I primed the model with Vallejo's grey surface primer straight from the bottle. once it was dry I went over it VERY lightly with a piece of Mr clean sponge to remove any dust and dog hair that might have collected (I have a golden retriever. dog hair is just a fact of life here and invariably finds it way into everything we do). Then went over most of the model with Alclad Aluminum followed by a few coats of the hairspray.
Unfortunately I didn't take pictures of the steps between there and where I'm at now which is some post shading, chipping decals etc etc.
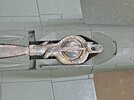
I did get pics of the turbochargers which I did experimenting with some new products and techniques I've seen out there. Overall I'm happy with how they turned out.
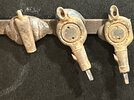
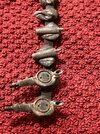
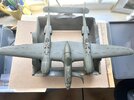
I couldn't help myself. Just had to put them in place for a test fit to see how they looked.
I think I need to blend a few areas out a little bit to make the wear more realistic, but I'm afraid I'll overwork them even more than I have already. Best to just put a matt coat over them and see iwhat that does for them if anything.

I experimented with hairspray chipping which I now prefer over other the chipping fluids I've tried, in case anyone is wondering about what brand/type of hairspray works I can say this worked well for me. By price/volume I don't really see myself ever using AK's stuff again. I do recommend decanting first and using an airbrush vs. spraying straight out of the can as the nozzle doesn't spray evenly and you risk puddling and over spraying.

I primed the model with Vallejo's grey surface primer straight from the bottle. once it was dry I went over it VERY lightly with a piece of Mr clean sponge to remove any dust and dog hair that might have collected (I have a golden retriever. dog hair is just a fact of life here and invariably finds it way into everything we do). Then went over most of the model with Alclad Aluminum followed by a few coats of the hairspray.
Unfortunately I didn't take pictures of the steps between there and where I'm at now which is some post shading, chipping decals etc etc.
I did get pics of the turbochargers which I did experimenting with some new products and techniques I've seen out there. Overall I'm happy with how they turned out.


I couldn't help myself. Just had to put them in place for a test fit to see how they looked.
I think I need to blend a few areas out a little bit to make the wear more realistic, but I'm afraid I'll overwork them even more than I have already. Best to just put a matt coat over them and see iwhat that does for them if anything.


