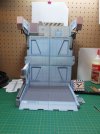
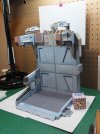
Patlabor Maintenance Facility

Paper builds realy leave me in awe and this is no exception.

Its paper, friggin paper.

Great stuff, thanks for sharing

Gag
 
Thank you TheDeadRumors.

Yes this is a papercraft ( card modeling ).

Jim
 
HI Mike.
This model was a free download.
There are many designers that offer all or some of their creations for free. As well there are commercial kits and templates that one can purchase. The one thing one always have to be wary of, are the pirates, that either offer free copies of commercial products, or try to sell you products that are available for free or that they do not have permission to sell.

Jim
 
Hi, short update.
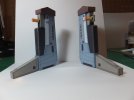
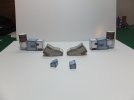
Spent the last couple of days building the two booms for the top of the back wall.
Again ran in to that overhang problem and had to make a filler for the end caps.
The main sections of the booms are built and am working on the two caution lights at the moment.

Booms1_zpsa58a6015.jpg

These booms will soon be able to attached to the maintenance station.
Next up are two manipulators for the top of the booms.

Thank you for watching.
Questions and comments are always welcome.

Jim
 
Another Update.
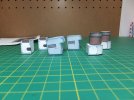
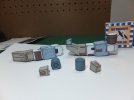
Finished those two lamps for the booms.

Booms2_zps97695882.jpg

These were then installed on to the booms.

Booms3_zps7a1a968b.jpg

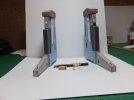
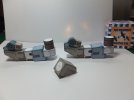
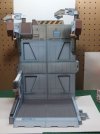
With this part of the sub assembly done. The booms were then attached to the top of the back wall of the maintenance station.
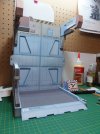
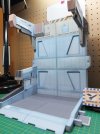
This is how it looks at this moment.

Booms4_zps44b2d134.jpg

Booms5_zps137181e3.jpg

Booms6_zpsd86ad115.jpg

Starting to fill in all those white spots.
I'm not sure if I will do it or not, but as this build progresses, I have noticed a lot of opportunity to add more 3D effects to this build. There are so many service panels and lights that can be easily greebled.

Have a good evening.

Jim
 
Hi Mike.
Difficulty varies with the model. Just as in plastic models they can range from simple to very complex and difficult.

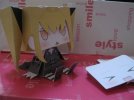
Examples: Simple: A Cubie

1369169876054_zps9e81f2f6.jpg

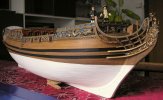
Extreme Scale : A Masters Work : Doris's Royal Caroline.

20130310105105-198699-full_zps572d9ae5.jpg

Also difficulty varies with your skill set, knife skills, dexterity and patience, are examples. But again you don't know unless you try.
As with any hobby it is best to start with something simple then work your way up. We all want to do the super model, especially when starting out, then pick something beyond our abilities and usually make a mess. For some this will frustrate them to the point where they leave a hobby and not give it a proper chance.
Do give it a try Mike. You might like it.

Jim
 
Hi Grendels.
The Royal Caroline is a build I have been following for a few months. It is a scratch build from Admiralty prints.
I can assure you it is all card except for the figures and the gilding that she sculpted by hand. The Kings stateroom is complete down to the paneling on the walls, rugs and fully lit. The planking is a wood like paper foil that she cut into planks and even added markings for the pegging.

Jim
 
Good evening all. Time for an update.
I have been working the last couple of days on the two manipulator arms that attach to the top of the assembly.
Other than four cylinders, most of the pieces were box structures that are fairly simple to construct. The only part that gave me some trouble were the pivots, as they are a box with half a cylinder. It was more finding an assembly technique that would work properly. What took the time was more waiting for the glue to dry at each stage.

Booms7_zpsa989d87b.jpg

Booms8_zpsdbfc8d5f.jpg

Booms9_zps31374678.jpg

The last thing to assemble in this section was the mount to the right boom.

Booms10_zps87af5149.jpg

This was then glued to the right boom. Then the manipulators could then be mounted.

Booms11_zps600ef061.jpg

Booms12_zps3597c657.jpg

The next section of the maintenance facility, will be the construction of the service gantry.
This aught to be interesting, as it is movable. The platform can be raised and lowered.
Back to more cutting and gluing.

I hope you have enjoyed following along?

Jim
 
Just as a side note.
I'm sitting here at my computer desk looking over to my bench.
This thing looks more and more like a prop from a Gary Anderson production.

Jim
 
Papermodder said:
Just as a side note.
I'm sitting here at my computer desk looking over to my bench.
This thing looks more and more like a prop from a Gary Anderson production.

Jim

And that is a good thing!
 
Hello all.
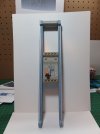
So far this weekend I have been working on the Gantry. Mostly the lift mechanism for the platform.
This has generated it's own problems. First, on the printouts for the outside rails, they had two left sides and not a left and right. The same was for the inside rails, but that was an easy workaround. I had to import an image of the outside rail into the computer and create a mirror image, scale up to the correct size then print.
Construction of all those channel pieces was very tedious. Made a spacing jig so that when the rails were glued together, the sliding mechanism on the lift would work properly.
The lift it self had it's own issues. The slider box had to be installed into the lift before it could be closed up, and this created it's set of problems in gluing and aligning the parts.
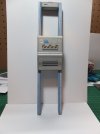
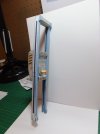
After the rails were all assembled, a bit of fine tuning on the lift and it went together fine. The lift moves fine on the rails.

The rails are clamped into position to dry after being spaced properly.
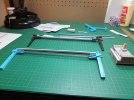
Gantry1_zpsd9024d03.jpg

This is the completed lift.

Gantry2_zps15200eaf.jpg

Gantry3_zps61400330.jpg

Gantry4_zps28e783af.jpg

Next up is the construction of the platform.

Have a good evening.

Jim
 

Latest posts

Back
Top