Patlabor Maintenance Facility
- Thread starter Papermodder
- Start date
Papermodder
Modeller in both Plastic and Paper Card
- Joined
- Jan 2, 2013
- Messages
- 1,224
Thank you Luis.
Jim
Jim
Papermodder
Modeller in both Plastic and Paper Card
- Joined
- Jan 2, 2013
- Messages
- 1,224
Re: Patlabor Maintenance Facility & AV-98 Ingram
Good evening, Time for another update.
Finished the knee structures. The knee armor has been installed and the knee assembled. I will not install the knee yet, as I want to verify alignment with the upper legs and torso fist.
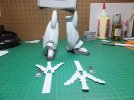
Also worked on the back assembly for the lower legs.
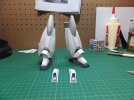
These were then installed. This completes the lower legs.
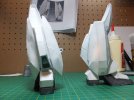
Tonight started on the first part of the upper legs.
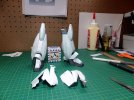
That is where I am at so far tonight.
Have a good evening and thanks for watching.
Questions and comments are always welcome.
Jim
Good evening, Time for another update.
Finished the knee structures. The knee armor has been installed and the knee assembled. I will not install the knee yet, as I want to verify alignment with the upper legs and torso fist.

Also worked on the back assembly for the lower legs.

These were then installed. This completes the lower legs.

Tonight started on the first part of the upper legs.

That is where I am at so far tonight.
Have a good evening and thanks for watching.
Questions and comments are always welcome.
Jim
CTspeedshop
I picked the wrong week to stop sniffing glue. : )
- Joined
- Apr 17, 2011
- Messages
- 1,388
Looking good! ;D
Papermodder
Modeller in both Plastic and Paper Card
- Joined
- Jan 2, 2013
- Messages
- 1,224
Thank you CTspeedshop.
Jim
Jim
Papermodder
Modeller in both Plastic and Paper Card
- Joined
- Jan 2, 2013
- Messages
- 1,224
Hi Luis. Thank you for the support.
No I don't hold the pieces for hours. ;D
I use aleenes clear tacky glue. I've had very good luck with it.
It starts to set between 20 to 30 sec.
Micheal's carries it.
It's quite thick. In fact if you look at my bench in the last pic, you will see that I store it upside-down in a medicine bottle so it's ready to use and don't have to wait for it to drain back to the tip.
Jim
luisito8m
New Member
- Joined
- May 28, 2013
- Messages
- 110
Haha! Yea, I noticed the glue earlier, I got the same brand a few days ago, tacky glue, but its a brownish bottle, still trying to figure out its uses. So far so good, since I am not a big fan of super glue.
Aahh!! Thanks for the great tip! Flipping my bottle right this instant!!
Luis
Aahh!! Thanks for the great tip! Flipping my bottle right this instant!!
Luis
Papermodder
Modeller in both Plastic and Paper Card
- Joined
- Jan 2, 2013
- Messages
- 1,224
Your welcome.
The brown bottle is the white glue version. I have that too. Started using the clear and have not had the desire to try the regular white. The white does dry clear though.
Jim
The brown bottle is the white glue version. I have that too. Started using the clear and have not had the desire to try the regular white. The white does dry clear though.
Jim
Papermodder
Modeller in both Plastic and Paper Card
- Joined
- Jan 2, 2013
- Messages
- 1,224
Hello again, and good evening.
It's been a bit slow on the build this week.I had issues with my bike this week that sort of took priority. That's what happens when your working with a 27 year old Honda Helix. :
Any way, I did get some work done on the construction of the upper legs and hips.
As with the lower legs, there are a lot of complex folds and shaping that just takes time. You can not rush it.
Here are all the piece parts for the upper legs, during assembly.
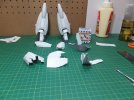
All the parts assembled. Those hips were a bit of a chore. Other than the face that attaches to the torso, there was not a flat surface or straight curve in them. About two and a half days of assembly just with those hips.
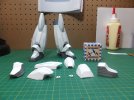
Here are the upper legs assembled, which were finished tonight.
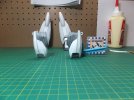
I'm still not going to attach the upper legs to the knees and lower legs yet.
Not until the torso is done. So that any alignment problems with the legs can be dealt with at that time.
The concept for the diorama is evolving, and another piece of this puzzle will have to be built. More on that later.
Thank you for watching and I'm open for any of your comments or questions.
Jim
It's been a bit slow on the build this week.I had issues with my bike this week that sort of took priority. That's what happens when your working with a 27 year old Honda Helix. :
Any way, I did get some work done on the construction of the upper legs and hips.
As with the lower legs, there are a lot of complex folds and shaping that just takes time. You can not rush it.
Here are all the piece parts for the upper legs, during assembly.

All the parts assembled. Those hips were a bit of a chore. Other than the face that attaches to the torso, there was not a flat surface or straight curve in them. About two and a half days of assembly just with those hips.

Here are the upper legs assembled, which were finished tonight.

I'm still not going to attach the upper legs to the knees and lower legs yet.
Not until the torso is done. So that any alignment problems with the legs can be dealt with at that time.
The concept for the diorama is evolving, and another piece of this puzzle will have to be built. More on that later.
Thank you for watching and I'm open for any of your comments or questions.
Jim
Papermodder
Modeller in both Plastic and Paper Card
- Joined
- Jan 2, 2013
- Messages
- 1,224
Thank you Java and Bdr65.
There is so much subject material out there, that it is very easy for this project to grow.
One thing I do not have and I know that there are others out there that have requested it, is one of the two ingram transporters. May be a project for the fall to design one.
Jim
There is so much subject material out there, that it is very easy for this project to grow.
One thing I do not have and I know that there are others out there that have requested it, is one of the two ingram transporters. May be a project for the fall to design one.
Jim
Papermodder
Modeller in both Plastic and Paper Card
- Joined
- Jan 2, 2013
- Messages
- 1,224
Hello all.
Now all the results are in for the BSC, we can settle down to summer mode.
Here is the latest update on my little project. With summer here the time spent on this build slows with other activities.
Just following the instructions along, and the next step that was done was the construction of the Ingram's shield.
Not all that difficult but time consuming and slow to assemble. Especially things like the 2 inserts in the front of the shield, getting the fold angle right and the inserts lined up.
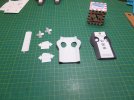
Next was to assemble all of those sub pieces. It has been so humid here that it affects the paper, making it hard to manipulate.
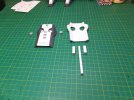
Here is the completed shield.
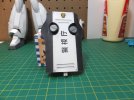
Put this aside and next will be the construction of the lower torso.
When the torso is complete we will be then able to assemble the legs. With that this Ingram will start to take shape.
Thank you for watching.
Questions and comments are always welcome.
Jim
Now all the results are in for the BSC, we can settle down to summer mode.
Here is the latest update on my little project. With summer here the time spent on this build slows with other activities.
Just following the instructions along, and the next step that was done was the construction of the Ingram's shield.
Not all that difficult but time consuming and slow to assemble. Especially things like the 2 inserts in the front of the shield, getting the fold angle right and the inserts lined up.

Next was to assemble all of those sub pieces. It has been so humid here that it affects the paper, making it hard to manipulate.

Here is the completed shield.

Put this aside and next will be the construction of the lower torso.
When the torso is complete we will be then able to assemble the legs. With that this Ingram will start to take shape.
Thank you for watching.
Questions and comments are always welcome.
Jim
Papermodder
Modeller in both Plastic and Paper Card
- Joined
- Jan 2, 2013
- Messages
- 1,224
Hi Luis.
Those slots are an image on the paper. I know, I noticed that to. In the photograph they look like they're actually there.
Those slots are an image on the paper. I know, I noticed that to. In the photograph they look like they're actually there.
Papermodder
Modeller in both Plastic and Paper Card
- Joined
- Jan 2, 2013
- Messages
- 1,224
The slots could have been done for real. Not really that difficult, when thinking about it. Cut out the slots. Duplicate the slot in a 1mm spacer piece and colour dark grey then fill the bottom of the slot with a piece of card coloured light grey.
Mostly I'm building as per the designer, unless there is a problem that needs correction.
Jim
Mostly I'm building as per the designer, unless there is a problem that needs correction.
Jim
Papermodder
Modeller in both Plastic and Paper Card
- Joined
- Jan 2, 2013
- Messages
- 1,224
Good Evening All.
I'm hoping those of us in the Great White North, have been enjoying, or still enjoying this great CANADA DAY holiday. ;D
Time for an update.
I've spent my free time this weekend back to the body of this AV-98 Ingram. Working on the construction of it's torso. Not one piece was a straight box construct. Every sub-assembly was a complex multifold piece.
Started with the main body of the torso, as well as the parts for the front winch.
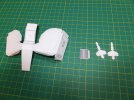
I only assembled the parts for the winch leaving it's full assembly till more of the torso is constructed. The torso itself went together without any hitches. Then cutout more parts, license plates and mount, and two other body assemblies.
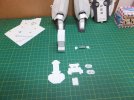
These were assembled and installed on to the torso. When the winch was being installed, I found that cylinder was too long and had to cut it back to fit.
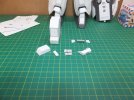
I also started on the parts for the girdle/light-bar.
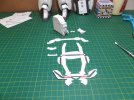
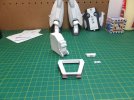
This is the completed Torso assembly.
Front
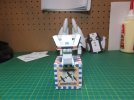
Side
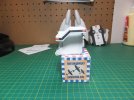
Back
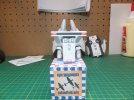
Top Down
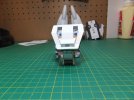
Now we have something that the assembly of the legs can begin and not so much looking like the Scarecrow after the flying monkeys attacked.
Jim
I'm hoping those of us in the Great White North, have been enjoying, or still enjoying this great CANADA DAY holiday. ;D
Time for an update.
I've spent my free time this weekend back to the body of this AV-98 Ingram. Working on the construction of it's torso. Not one piece was a straight box construct. Every sub-assembly was a complex multifold piece.
Started with the main body of the torso, as well as the parts for the front winch.

I only assembled the parts for the winch leaving it's full assembly till more of the torso is constructed. The torso itself went together without any hitches. Then cutout more parts, license plates and mount, and two other body assemblies.

These were assembled and installed on to the torso. When the winch was being installed, I found that cylinder was too long and had to cut it back to fit.

I also started on the parts for the girdle/light-bar.


This is the completed Torso assembly.
Front

Side

Back

Top Down

Now we have something that the assembly of the legs can begin and not so much looking like the Scarecrow after the flying monkeys attacked.
Jim
CTspeedshop
I picked the wrong week to stop sniffing glue. : )
- Joined
- Apr 17, 2011
- Messages
- 1,388
Good stuff!!!
Similar threads
- Replies
- 3
- Views
- 2K
Latest posts
-
-
-
-
-
BSG "War of The Gods" 1/6 Scale Wall Display
- Latest: BattleScale Collectica
-
