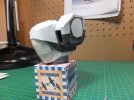
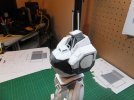
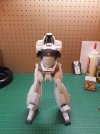
Patlabor Maintenance Facility

Good Morning.

Alphonse is standing on his own two pins.

Well I couldn't leave him alone last night. Just had to start assembling his legs.
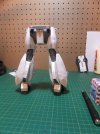
First of all attached the upper legs to the torso.

TorsoampLegs1_zps5ca7409a.jpg

Then dry fitted the knees and lower legs. I found that because of the lower leg angle and the bend in the knees, the arrangement of the legs worked better if the knees were reversed, left to right. This is why I held off assembling the legs till this point.
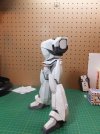
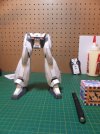
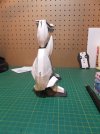
So here is where we are, at this moment.

Front View.

TorsoampLegs2_zps44790f1a.jpg

Side

TorsoampLegs3_zps5edb7e94.jpg

Rear

TorsoampLegs4_zpsefac4284.jpg

Thank you for watching.
Questions and comments are always welcome.

Jim
 
i've been so busy I went in the man-cave for the 1st time this morning....everything is pretty much put aside until i'm done with the giant Sherman :p my friend wants to put it in the Natal Day Parade in a month
 
Good luck with that one Jeff. That's a major project, just because of it's size.

Jim
 
You know what, I really appreciate your work Jim, maybe it's because it's such a familiar process and it really brings nostalgia when I see your builds progress. You really are doing a fantastic job, it really is construction huh, each piece feeling like a labor of love (pardon the cheesy cliche :D), Your work has definitely inspired me to start up again, keep it up! ;D
 
I know i have said it before but this is very impressive work,great stuff.
 
Thank you Fruit, I really appreciate that.
If modelling wasn't a labour of love, we would not be doing it, and to inspire is just the icing on the cake.

Thank you for your support Java.
With every project, we are all still learning. If they were all easy, the endeavor would soon become boring. Myself I like a challenge.

Jim
 
Ok, time for another update.
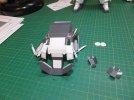
Since last time, I have been working on the upper torso.
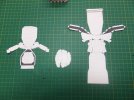
This piece was so complicated, it took 3 days to complete. One tab at a time. The easiest parts were the two inserts in the lower front. The logistics to the assembly of this piece, took a lot of forethought and dry fitting.
The best was to just start at a common point and slowly work one's way around.

UpperTorso1_zps0d6a4796.jpg

Finally got it assembled. ::) With a sigh of relief.

UpperTorso2_zpsadad0e18.jpg

UpperTorso3_zps1e617fc9.jpg

Today worked on some more pieces for the upper torso. These are not so bad.

UpperTorso4_zpsce91dbed.jpg

Still working on these.
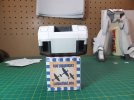
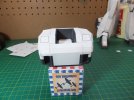
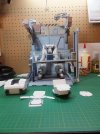
Here is where we are at this moment. I thought I would place what was completed so far in the maintenance station, to see how it looked.

UpperTorso5_zps403ef3cc.jpg

Till next time have a good evening.

Jim
 
Sweet update Jim, with all those cuts and bends it truly looks quite complicated, specially to hold it on the right shape while the glue dries. Flawless work, like always.

Luis
 
Update Time.
I'm still assembling the upper torso.
From last time, those pieces that were unfolded are now assembled. These pieces form the ingram's upper chest, when assembled.

Here are those pieces assembled.
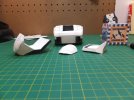
UpperTorso6_zpsf6d128cc.jpg

These were not as much a challenge compared to that last one. which I am very grateful.
They actually attached to the shoulder section quite well. The belly plate did take a bit of dry fitting to figure out the best way to attach it though.
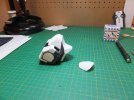
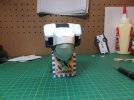
UpperTorso7_zps2a2b3ab7.jpg

UpperTorso8_zps9b354500.jpg

Next the waist joint had to be assembled. This was mostly a straight box type piece.
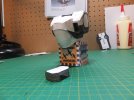
UpperTorso9_zps4445eb9a.jpg

Then attached to the upper torso.

UpperTorso10_zps353dbf32.jpg

The waist slide in between the girdle of the lower torso quite easily, but had to be edge glued in place. No big deal.
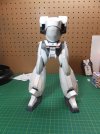
UpperTorso11_zpsf8db0fdc.jpg

Side View.

UpperTorso13_zps72c2cc80.jpg

Slowly this Ingram AV-98 is taking shape.
More pieces to attach to the upper torso, before moving on to the next section.

Thank you for following.
Comments and questions are always welcome.

Jim
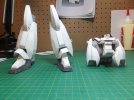
 
Hello all,
A short update tonight.
Assembled today were the breast plate, cockpit canopy and a couple of hatches.

UpperTorso14_zpsa25ddb08.jpg

These were then attached to the upper torso.

UpperTorso15_zpsb19f00ca.jpg

Next up will the neck area and soon the head.

Have a good evening.

Jim
 
Hello again.
After a couple of days, time for an update.
This stage of the upper torso is almost complete, with work on the neck area.
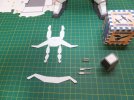
The neck joint is complete along with two hydraulic pistons for the neck, a rear shield for the cockpit and the neck shield.

UpperTorso16_zps87ed7256.jpg

When constructing the pistons, care had to be taken with the diameter of the outer sleeve to make sure it fit the piston and was not too loose or too small. Placing them in position, I found that I had to use two tweezers. One to hold the sleeve and one to hold and position the piston till the glue set. The last part around the neck was the neck shield. It was not a very complicated piece, just took time, but installed fairly easily.

UpperTorso17_zpsd5205526.jpg

UpperTorso18_zpse72aa013.jpg

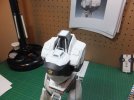
The completed Ingram so far.

UpperTorso19_zpse31cc9a0.jpg

Next up is his backpack.

Thank you for watching.
Always open for comments and questions.

Jim
 

Latest posts

Back
Top