You are using an out of date browser. It may not display this or other websites correctly.
You should upgrade or use an alternative browser.
You should upgrade or use an alternative browser.
peza`s 32" falcon build
- Thread starter peza
- Start date
peza
Member
- Joined
- Jun 27, 2012
- Messages
- 612
peza
Member
- Joined
- Jun 27, 2012
- Messages
- 612
eh up all,sorry for being away so long but i've been racin to get aload of work done on my build for a star wars family fun day in burnley,i did take photos as i was did the work but didn't spend anytime postin and for that im sorry! :-\
well i started to work on doin the backin quarters on the saucer section.I already did the detail on the otherside but this time i only wanted to get it so i could seal it up,so same procedure as before using magnets to join it all up.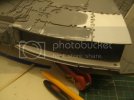
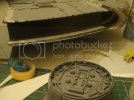
next i started on the the other dockin ring using a mcdonalds beaker as the shape here is the first one finished and primered next to the new one
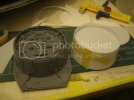
next i had to mount this one different due to the armature so the backin plate had to do cut in half and fixed permanently glued to the top and bottom havles.
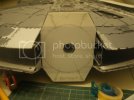
next i put the magnets is and just skinned the sides with the armour plates
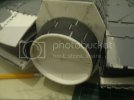
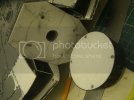
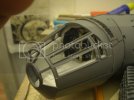
next i started on tidying the engine area so i could put a coloured grill on the back,i say coloured it's just clear styrene with the blue anti scratch backin sheet on,but i will be makin up the proper grill with lights in time.
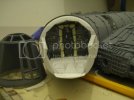
but first i had to make a slot on the top and bottom halves to secure the grill in place without using any glue for the grill,here is an image of the top half.
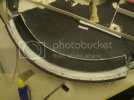
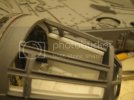
finally i made the a start on the front lights of the inner bottom jaw between the mandibles,i drilled out the holes and got some 2mm fibre optics which i melted the ends to bubble them up,here you can see them from the outside first and then the underneath.
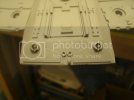
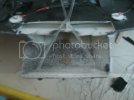
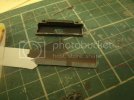
next i lined the F O cables with some black electrical heat shrink sheathing,and made up a little box lined with some aluminum sticky tape to reflect the light down the F O's
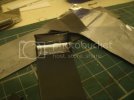
i wanted to do all this before i made the inner jaw detail out of styrene and some odds and sods.
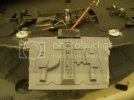
i've used some filler round the edges which i'll sand down once it's gone rock hard.the last image is of the lights working.
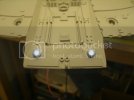
finally i've ripped out all the landing light bulbs as i got them from a few old torches so i remade all of them with new bulbs and i've made a start on the mind ya head lights aswell,but i'll show that bit on my next post.....
thanks all for lookin in...cheers peza ;D
well i started to work on doin the backin quarters on the saucer section.I already did the detail on the otherside but this time i only wanted to get it so i could seal it up,so same procedure as before using magnets to join it all up.


next i started on the the other dockin ring using a mcdonalds beaker as the shape here is the first one finished and primered next to the new one

next i had to mount this one different due to the armature so the backin plate had to do cut in half and fixed permanently glued to the top and bottom havles.

next i put the magnets is and just skinned the sides with the armour plates


next i started on tidying the engine area so i could put a coloured grill on the back,i say coloured it's just clear styrene with the blue anti scratch backin sheet on,but i will be makin up the proper grill with lights in time.
but first i had to make a slot on the top and bottom halves to secure the grill in place without using any glue for the grill,here is an image of the top half.

finally i made the a start on the front lights of the inner bottom jaw between the mandibles,i drilled out the holes and got some 2mm fibre optics which i melted the ends to bubble them up,here you can see them from the outside first and then the underneath.


next i lined the F O cables with some black electrical heat shrink sheathing,and made up a little box lined with some aluminum sticky tape to reflect the light down the F O's

i wanted to do all this before i made the inner jaw detail out of styrene and some odds and sods.

i've used some filler round the edges which i'll sand down once it's gone rock hard.the last image is of the lights working.

finally i've ripped out all the landing light bulbs as i got them from a few old torches so i remade all of them with new bulbs and i've made a start on the mind ya head lights aswell,but i'll show that bit on my next post.....
thanks all for lookin in...cheers peza ;D
peza
Member
- Joined
- Jun 27, 2012
- Messages
- 612
cheers Q,the list of jobs is getting smaller but all time consuming bits.Quaralane said:You're getting there, peza.
Kind of fun watching this evolve
it's been a funny build,loads of ups and downs and f#ck ups but there is light at the end of the tunnel.
cheers buddy....peza
peza
Member
- Joined
- Jun 27, 2012
- Messages
- 612
eh up all,well it's time for another update down here in the dungeons.lol
first off i was doing a bit of tinkerin on the landing lights and snapped off 1 of the wires but i got the bulds off an old torch.so it was time for me to scrap all the old LED's for new 1's,so to start i had to strip out the wiring and remove the bulbs off the model.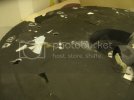 so i replaced all the 16 landing lights,here you can see the lights wiring of the new ones.just a teaser!
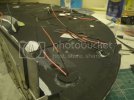 and then thought i'll put the mind ya head lights in which at first i was gonna use some 2mm fibre optics.
but i scrapped that idea,i desided to use some 3mm LED's but they needed filing down and shaping up conical styley.
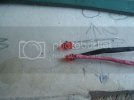
i'm not gonna show you each one going in,i'm gonna show them all in and lite up,landing and mind ya head lights,unfortunately i've run out of red 3mm til i get some more for 2 on the front legs.
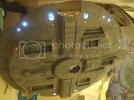
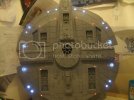
the only 2 that caused me problems was the landing ramp 2.
getting them in no worries but getting the docking ring to fit over was hard to think of an answer and then the answer was so simple,just cut out notches where the lights fit in.
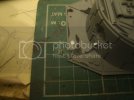
and here the docking ring is fitted on and the LED's look sweet.
well thats it for this update hope ya like......
cheers peza
first off i was doing a bit of tinkerin on the landing lights and snapped off 1 of the wires but i got the bulds off an old torch.so it was time for me to scrap all the old LED's for new 1's,so to start i had to strip out the wiring and remove the bulbs off the model.
 so i replaced all the 16 landing lights,here you can see the lights wiring of the new ones.just a teaser!
  and then thought i'll put the mind ya head lights in which at first i was gonna use some 2mm fibre optics.
but i scrapped that idea,i desided to use some 3mm LED's but they needed filing down and shaping up conical styley.

i'm not gonna show you each one going in,i'm gonna show them all in and lite up,landing and mind ya head lights,unfortunately i've run out of red 3mm til i get some more for 2 on the front legs.


the only 2 that caused me problems was the landing ramp 2.

getting them in no worries but getting the docking ring to fit over was hard to think of an answer and then the answer was so simple,just cut out notches where the lights fit in.

and here the docking ring is fitted on and the LED's look sweet.

well thats it for this update hope ya like......
cheers peza
peza
Member
- Joined
- Jun 27, 2012
- Messages
- 612
cheers Q now that this is done i can get back onto building things!Quaralane said:Looks like a lot of work there, peza.
once again thanks mym8..... Peza
peza
Member
- Joined
- Jun 27, 2012
- Messages
- 612
Quaralane said:Looks like a lot of work there, peza.
Cheers Q I'm glad there done so i can start building stuff again.
once again thanks mym8... Peza
peza
Member
- Joined
- Jun 27, 2012
- Messages
- 612
eh up all,sorry for being away for so long,been busy with work and stuff.
i have been building still and i'll show ya what i've been workin on.
first off i started on the engine vents,i started off making the vents with some 1mm styrene
and using some 2mm styrene for the backing.
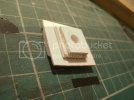
next i drilled out the middle so i could put one LED in as the head light.
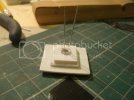
here you can see i've used some half mm fibre optics to add detail but also so the bulb will sshine through
the detail so it wont look out of place if you have the headlights on or off.
next i had to make up the twelve exhaust ports bits,with were very fiddley.
then i primered up the pieces but not before puttin some maskol over where the bulbs are goin.
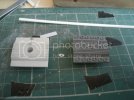
i've not fitted them on yet but that can be done soon.
i have been building still and i'll show ya what i've been workin on.
first off i started on the engine vents,i started off making the vents with some 1mm styrene
and using some 2mm styrene for the backing.

next i drilled out the middle so i could put one LED in as the head light.

here you can see i've used some half mm fibre optics to add detail but also so the bulb will sshine through
the detail so it wont look out of place if you have the headlights on or off.
next i had to make up the twelve exhaust ports bits,with were very fiddley.
then i primered up the pieces but not before puttin some maskol over where the bulbs are goin.

i've not fitted them on yet but that can be done soon.
peza
Member
- Joined
- Jun 27, 2012
- Messages
- 612
well next i started to make up the engine vents the same way as the headlights using 1mm styrene,i started off with the backing piece and started making the 6 vents on the piece.
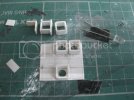
well you can see that i've made a start on the vents,and you can see i've been drilling out the middlle for some more fibre optics to go in each hole which will work out as 76 LEDs to light up the engines(there's some soldering to be done :-\)
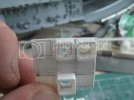
here you can see that the 6 vents are finished and just alittle bit of detail to finish this one off.
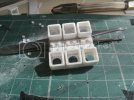
well thats it for this post i have got one more post to show ya


well you can see that i've made a start on the vents,and you can see i've been drilling out the middlle for some more fibre optics to go in each hole which will work out as 76 LEDs to light up the engines(there's some soldering to be done :-\)

here you can see that the 6 vents are finished and just alittle bit of detail to finish this one off.

well thats it for this post i have got one more post to show ya
peza
Member
- Joined
- Jun 27, 2012
- Messages
- 612
well folks this a is the post i've wanted to show ya but didn't want to leave out the other bits i've done.
while i'm waiting for some bits i started on the cockpit.first off i started with a internal frame for the cockpit details as in the back wall and everything else to sit on.
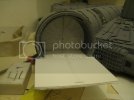
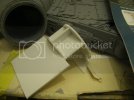
next i made the back wall shape ready for the cabin door to be made and go in.

now i started to make the cabin door.
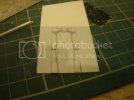
here you can see the frame work for the door and the door it's self all finished and painted up.
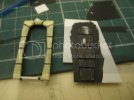
next i started to drill out the backing to put on new panels as detail and you can see the 2 clear panels for the lite areas of the backing plate.
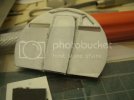
here you see that i've finished the detailed panels and also used my really thin fibre optics to light up the backing.
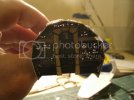
and lite up.
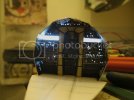
here's how i had to light it up,i used two LEDs for the clear bits and two LEDs for the computer lights i just need to colour the switch lights.
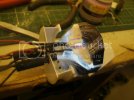
and here you see the cockpit in and workin,
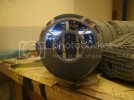
and finally for this post i started to make up the side details well the backin pieces to which i will add lights and details.
well thats it for this post hope ya like the progress,really enjoying the cockpit bit so i'm having fun again..... ;D
cheers peza
while i'm waiting for some bits i started on the cockpit.first off i started with a internal frame for the cockpit details as in the back wall and everything else to sit on.


next i made the back wall shape ready for the cabin door to be made and go in.
now i started to make the cabin door.

here you can see the frame work for the door and the door it's self all finished and painted up.

next i started to drill out the backing to put on new panels as detail and you can see the 2 clear panels for the lite areas of the backing plate.

here you see that i've finished the detailed panels and also used my really thin fibre optics to light up the backing.

and lite up.

here's how i had to light it up,i used two LEDs for the clear bits and two LEDs for the computer lights i just need to colour the switch lights.

and here you see the cockpit in and workin,

and finally for this post i started to make up the side details well the backin pieces to which i will add lights and details.


well thats it for this post hope ya like the progress,really enjoying the cockpit bit so i'm having fun again..... ;D
cheers peza
peza
Member
- Joined
- Jun 27, 2012
- Messages
- 612
eh up all,Happy new year to you all!hope you all had a good'un!
well i've been doin some more work on the cockpit first off i got the centre console made
usin some 1 mm thick styrene for the sides and bottom but some half mm thick for the top
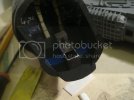
next a got the fibre optics in the base part and the console it's self
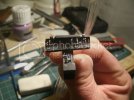
here you can see i've used tamiya clear colours for the base part and the console.
i made some control lever's out of some soldering wire which i used abit of heat from a lighter to
bubble up the ends
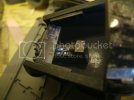
next i started to make up the flight controls out of some old guitar string and brass tube and styrene
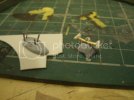
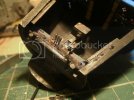
and finally i started on the front seats which the same as before i made out 1mm styrene ans some styrene
tubin sanded down flat on 1 edge.
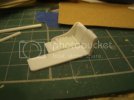
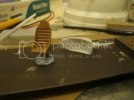
here you can see i've painted up 1 of the seats in a tan colour but i didnt like it so i found some
citidel commando khaki which i think is a better colour,hope you like.
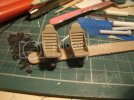
well thats it for this update i've just got the back seats to make before i fit the front ones in.
i'll post again once i get the seats done...thanks for lookin .....peza

well i've been doin some more work on the cockpit first off i got the centre console made
usin some 1 mm thick styrene for the sides and bottom but some half mm thick for the top


next a got the fibre optics in the base part and the console it's self

here you can see i've used tamiya clear colours for the base part and the console.
i made some control lever's out of some soldering wire which i used abit of heat from a lighter to
bubble up the ends

next i started to make up the flight controls out of some old guitar string and brass tube and styrene


and finally i started on the front seats which the same as before i made out 1mm styrene ans some styrene
tubin sanded down flat on 1 edge.


here you can see i've painted up 1 of the seats in a tan colour but i didnt like it so i found some
citidel commando khaki which i think is a better colour,hope you like.

well thats it for this update i've just got the back seats to make before i fit the front ones in.
i'll post again once i get the seats done...thanks for lookin .....peza
Similar threads
- Replies
- 0
- Views
- 983
