You are using an out of date browser. It may not display this or other websites correctly.
You should upgrade or use an alternative browser.
You should upgrade or use an alternative browser.
peza`s 32" falcon build
- Thread starter peza
- Start date
Senorjacob
Member
- Joined
- Mar 23, 2014
- Messages
- 86
Very impressive!
peza
Member
- Joined
- Jun 27, 2012
- Messages
- 612
Cheers J it's getting scarerly close to finishing the outside buildin ,just the inside bits to do then.....cheers again bro....pezaJaitea said:
Brilliant peza
J
peza
Member
- Joined
- Jun 27, 2012
- Messages
- 612
JohnSimmons said:Fantastic mate! I wanna paint it!!!
eh up john...lol...i might just let ya I'm not good enough yet
to do it justice!but it's far far away before it's gonna be finished
buildin all the bits im thinkin of doin....defo keep ya in mind!
peza
Member
- Joined
- Jun 27, 2012
- Messages
- 612
cheers Q,it's getting that close to finishing,that I'm havin to contusionly slow myself downQuaralane said:Definitely a good looking piece
to stop me from rushing it!cheers buddy....peza
peza
Member
- Joined
- Jun 27, 2012
- Messages
- 612
cheers buddy,it's been like climbing Everest,but I'm near the top and the view is mint!Senorjacob said:Very impressive!
big thanks mym8....once again cheers peza ;D
contenderfan
New Member
- Joined
- Nov 29, 2014
- Messages
- 20
This is just amazing work, I wouldnt even know where to begin on something like this. Some of you guys totally amaze me, you should be working in a special effects department somewhere. Very good work Peza!
peza
Member
- Joined
- Jun 27, 2012
- Messages
- 612
why cheers buddy,before i started this build I'd never attempted awt like this.contenderfan said:This is just amazing work, I wouldnt even know where to begin on something like this. Some of you guys totally amaze me, you should be working in a special effects department somewhere. Very good work Peza!
i just took a leap of faith!as for an effects dept....that would be a dream job for me,
i just dig holes for alivin...BIG thanks for the kind words.. ;D. Peza
peza
Member
- Joined
- Jun 27, 2012
- Messages
- 612
Eh up all.hope you all had a good Christmas.
Well it's time for another update, firstly I finished off all the back quarter detailin and gave it a coat of primer.
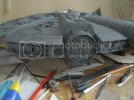
Next i started to make up the gun and mount,but lookin at the window and the armour plates I desided to rip the window out
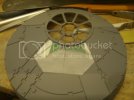
Filler the gaps between the plates and start again,here is the reworked piece
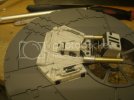
My next job was to make up the gun mount which I wanted to use styrene but the local model shop was out of stock so I had to improvise with some brass and aluminium rods.
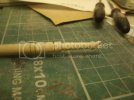
Finally I wanted to make up the barrels for the quad cannons, but lookin through my greeblies box all I had to use was some balsa wood so after an he and a lot of fetlin I came up with this
Jaitea's kindly moldin the barrels for me......top lad!BIG THANKS BRO
And my very last thing I did was to put all the sub sections together apart from the antenna,which I am gonna have to make up
the new one,but as yet I don't know how it's mounted,here are a couple of images of it all together.and to be honest I'm well happy
with the way its lookin,I can see the light at the end of the tunnel.
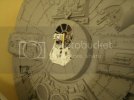
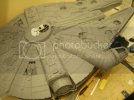
Well that's it for this post hope ya like the progress....... Cheers for lookin....peza
Well it's time for another update, firstly I finished off all the back quarter detailin and gave it a coat of primer.

Next i started to make up the gun and mount,but lookin at the window and the armour plates I desided to rip the window out
Filler the gaps between the plates and start again,here is the reworked piece

My next job was to make up the gun mount which I wanted to use styrene but the local model shop was out of stock so I had to improvise with some brass and aluminium rods.

Finally I wanted to make up the barrels for the quad cannons, but lookin through my greeblies box all I had to use was some balsa wood so after an he and a lot of fetlin I came up with this

Jaitea's kindly moldin the barrels for me......top lad!BIG THANKS BRO
And my very last thing I did was to put all the sub sections together apart from the antenna,which I am gonna have to make up
the new one,but as yet I don't know how it's mounted,here are a couple of images of it all together.and to be honest I'm well happy
with the way its lookin,I can see the light at the end of the tunnel.


Well that's it for this post hope ya like the progress....... Cheers for lookin....peza
peza
Member
- Joined
- Jun 27, 2012
- Messages
- 612
Scott Girvan said:Wow, that's awesome work.
Cheers Scott!thanks mym8
peza
Member
- Joined
- Jun 27, 2012
- Messages
- 612
Jaitea said:Peza....incredible,....a real talent
J
Nar there's lots of people better than me,I've just got the time and patience to eventually get it something like!
Cheers buddy....peza
STILL BIG THANKS ACE!!
JohnSimmons
For Spud: I was once Merseajohn
- Joined
- Jan 4, 2011
- Messages
- 5,645
Dude this rocks, you've built the Falcon!!!!! You should be really proud of this mate.
peza
Member
- Joined
- Jun 27, 2012
- Messages
- 612
JohnSimmons said:Dude this rocks, you've built the Falcon!!!!! You should be really proud of this mate.
cheers john i am really happy with it,I'm glad that i took the scratchin jump....
I've already decided what I'm gonna go for next....
i think I'm gonna make some kits before i go for a big speederbike,I'm thinking 1:6 scale
just need to know if anybody's got the old kit as reference....
once again thanks buddy.....peza
peza
Member
- Joined
- Jun 27, 2012
- Messages
- 612
eh up all.
well it's time for an update,
firstly i got my casts back from jBIG THANKS DUDE...YOU ROCK
while i was mocking them up two things happened,firstly i broke the cannon mounts(arms)again...
and secondly i noticed that the cannons were abit too long,which j had warned me about,so i had to re-size them by losing 4mm,not an easy task with them being detailed and tapered.my solution was to cut the segments at the back of the barrels.
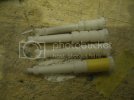
here you can see 2 original sized and 2 cut down versions so i've got the last 2 to do and mount them,i used some 1mm styrene as a backing plate with some evergreen box tube to help articulate the cannon.
my second problem i binned the metal fixings for the mount and bought some styrene rod and tubin....which i should of done the first time! :
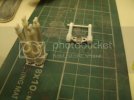
after that i re-made the back of the cannons because i wasn't happy with the quality and detail...
finally i gave it a shot of primer and apart from afew small details its all done.
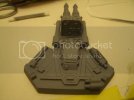
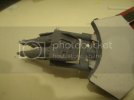
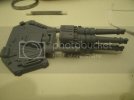
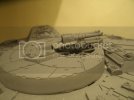
and with the cannons mounted on the turret.
http://[http://i1173.photobucket.com/albums/r596/peza5/GEDC3270.jpg/img]
[ATTACH=full]69119[/ATTACH]
well chaps thats it for this one,hope you like the progress...still not sure as yet what bit to build next
i might just flick a coin and let fate deside....well you can always go best of 3/best of 5.etc til you win!
thanks for lookin cheers peza ;D
well it's time for an update,
firstly i got my casts back from jBIG THANKS DUDE...YOU ROCK
while i was mocking them up two things happened,firstly i broke the cannon mounts(arms)again...
and secondly i noticed that the cannons were abit too long,which j had warned me about,so i had to re-size them by losing 4mm,not an easy task with them being detailed and tapered.my solution was to cut the segments at the back of the barrels.

here you can see 2 original sized and 2 cut down versions so i've got the last 2 to do and mount them,i used some 1mm styrene as a backing plate with some evergreen box tube to help articulate the cannon.
my second problem i binned the metal fixings for the mount and bought some styrene rod and tubin....which i should of done the first time! :

after that i re-made the back of the cannons because i wasn't happy with the quality and detail...
finally i gave it a shot of primer and apart from afew small details its all done.


and with the cannons mounted on the turret.

http://[http://i1173.photobucket.com/albums/r596/peza5/GEDC3270.jpg/img]
[ATTACH=full]69119[/ATTACH]
well chaps thats it for this one,hope you like the progress...still not sure as yet what bit to build next
i might just flick a coin and let fate deside....well you can always go best of 3/best of 5.etc til you win!
thanks for lookin cheers peza ;D
Similar threads
- Replies
- 0
- Views
- 983
