Jakko
Well-Known Member
- Joined
- Oct 9, 2024
- Messages
- 1,139
The model I started most recently is going to be the middle of these three vehicles:
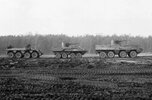
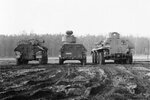
On the left is a YP 408, in the middle a Mowag Piranha 8×8, and on the right the only Fuchs 8×8 ever built — the last two with the same turret as fitted to the YPR 765. This was a trial to find a replacement for the YP 408, but no more than these single vehicles were procured, and temporarily at that.
This model is inspired by a thread on the TWENOT forums in which the Fuchs is being built as a what-if, and somebody else posted the two photos above of the trials. That in turn reminded me that I have the following in my stash:
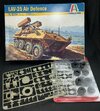
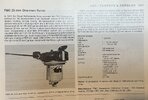
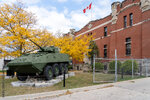
An Italeri LAV-AD, from which I had taken one of the missile launchers to put onto the IDF M247 DIVAD I built earlier this year; the turret from an AFV Club YPR; and a set of LAV wheels from Trumpeter, which I had bought for when I would build the LAV, because the Italeri wheels are pretty poor, and for €3.95 new I could not really pass these up as a quick improvement. The LAV-AD doesn't appeal to me much anyway, so this way I can make something more interesting out of the kit.
In all, this, plus some more bits from my spares boxes, will become a Piranha PWI-GR (Pantser Wiel Infanterie — Groep, "Armour[ed] Wheel[ed] Infantry — Group") of the Netherlands Army, sometime in the late 1980s as it might have appeared had it gone into service.
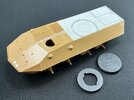
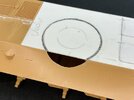
To start, I put the three main hull parts together, and once they were dry, I cut a piece of 1 mm plastic sheet to make a new roof:
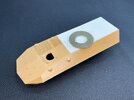
It's still loose here, as is the AFV Club turret ring, but this is the position I will put it in. Piranha turrets tend to be offset to the left because the engine is on the right, and overhang the hull side a little if they're more than very small, so that's what I'll do here too. It won't be as big as on the trials vehicle, because I suspect that's a standard Piranha that Mowag had at hand, fitted with an adapter for the YPR turret. A purpose-built version would probably have a bit smaller adapter ring.
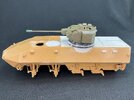
Then with the suspension installed:
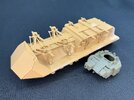
This wasn't too easy, because the part with the suspension arms for the front two axles doesn't fit overly well. I got it nicely in place using some clamps and a bit of wood, but it would probably have been easier if I hadn't glued the hull halves together already, because there would have been a bit more flex in the lower hull then.
The turret is just the main parts, the details still need to be added.
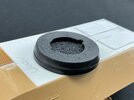
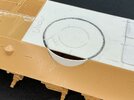
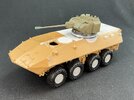
And then the bits I did tonight … After a good deal of searching for a suitable riser for the turret, which I wanted to have a conical shape because that's what you see on Piranhas a lot, I found one:
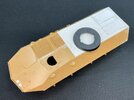
This is a Games Workshop 40 mm wargames base, from which I filed off the texture on top and in which I made a hole for the turret, including the bayonet fitting.
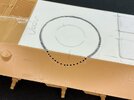
I also scribed a line for the engine deck, between the grilles and the driver's hatch, but you can tell from the putty that I did that wrong on my first attempt
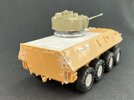
At the back, I added the basic shapes of two passenger hatches:
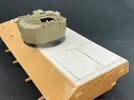
These are just rectangles of 0.5 mm plastic card, 15.5 mm wide and 33 mm long. I took the dimensions from Trumpeter's instructions for the Canadian Grizzly, which are on Scalemates — I just zoomed in on them on my iPad's screen so that the hull width matched that of my model, and measured them up.


On the left is a YP 408, in the middle a Mowag Piranha 8×8, and on the right the only Fuchs 8×8 ever built — the last two with the same turret as fitted to the YPR 765. This was a trial to find a replacement for the YP 408, but no more than these single vehicles were procured, and temporarily at that.
This model is inspired by a thread on the TWENOT forums in which the Fuchs is being built as a what-if, and somebody else posted the two photos above of the trials. That in turn reminded me that I have the following in my stash:

An Italeri LAV-AD, from which I had taken one of the missile launchers to put onto the IDF M247 DIVAD I built earlier this year; the turret from an AFV Club YPR; and a set of LAV wheels from Trumpeter, which I had bought for when I would build the LAV, because the Italeri wheels are pretty poor, and for €3.95 new I could not really pass these up as a quick improvement. The LAV-AD doesn't appeal to me much anyway, so this way I can make something more interesting out of the kit.
In all, this, plus some more bits from my spares boxes, will become a Piranha PWI-GR (Pantser Wiel Infanterie — Groep, "Armour[ed] Wheel[ed] Infantry — Group") of the Netherlands Army, sometime in the late 1980s as it might have appeared had it gone into service.
To start, I put the three main hull parts together, and once they were dry, I cut a piece of 1 mm plastic sheet to make a new roof:

It's still loose here, as is the AFV Club turret ring, but this is the position I will put it in. Piranha turrets tend to be offset to the left because the engine is on the right, and overhang the hull side a little if they're more than very small, so that's what I'll do here too. It won't be as big as on the trials vehicle, because I suspect that's a standard Piranha that Mowag had at hand, fitted with an adapter for the YPR turret. A purpose-built version would probably have a bit smaller adapter ring.
Then with the suspension installed:

This wasn't too easy, because the part with the suspension arms for the front two axles doesn't fit overly well. I got it nicely in place using some clamps and a bit of wood, but it would probably have been easier if I hadn't glued the hull halves together already, because there would have been a bit more flex in the lower hull then.
The turret is just the main parts, the details still need to be added.
And then the bits I did tonight … After a good deal of searching for a suitable riser for the turret, which I wanted to have a conical shape because that's what you see on Piranhas a lot, I found one:

This is a Games Workshop 40 mm wargames base, from which I filed off the texture on top and in which I made a hole for the turret, including the bayonet fitting.
I also scribed a line for the engine deck, between the grilles and the driver's hatch, but you can tell from the putty that I did that wrong on my first attempt
At the back, I added the basic shapes of two passenger hatches:

These are just rectangles of 0.5 mm plastic card, 15.5 mm wide and 33 mm long. I took the dimensions from Trumpeter's instructions for the Canadian Grizzly, which are on Scalemates — I just zoomed in on them on my iPad's screen so that the hull width matched that of my model, and measured them up.

