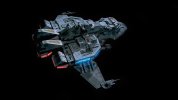
Revell - Maquis Fighter

Thanks, Craig. :)

Well she's primered. There's some good and some bad.

Looks nice enough at the front. Sorry about the bad lighting here. I should've put the model on a dark surface for the pics.

2011-09-11_20-31-58_735.jpg


Looks pretty great from a couple of feet away.

2011-09-11_20-34-11_526.jpg


2011-09-11_20-31-24_126.jpg


However, there are some areas where I found it extremely difficult to fix the seams. They look pretty bad in these areas. I only used Magic Sculp for puttying on this ship. It would have been better to use something easier to sand in these difficult areas. Magic Sculp is just a bit too tough.

This is the port side. Looks awful here.

2011-09-11_20-32-23_417.jpg


SB is not quite as bad, but still not nice.

2011-09-11_20-32-38_681.jpg


Notice how one side is slighty misaligned where the other side is nice and square. Definately a problem with this kit, but I didn't make it easy for myself.

Hope you all liked the update. I'm really stoked about the prospect of painting and weathering soon.
 
She looks great, Igard!
Did You preshade it? I'm asking 'cause all the details and panels look really crisp, love them.
On the problematique spots: these can be covered with details. That would take You applying some more of base coat, yes, but details always draw attention from slight texture fluctuations. (same effect can be also achieved by covering these areas with some extensive weathering)
 
i say screw it. with a good paint job and slight weathering and your lighting, you'd never notice that seam. i havent dealt with a single seam barely i soooo many months. i guess cuz i barely build any styrene kits.
whats this mship look like on film anywayss? OBVIOUSLY i have zero star trek knowledge.
 
Hey igard,
looks good.
What ya might want to do is throw a couple of pieces, roughly the same shape as those little raised areas, of sheet styrene right on top of 'em. That would significantly cut down on people noticing it for sure....At least I think so.
;)
That is, if you want to even mess with it. Like others have said, the average Joe, just looking at this model all built, painted, and lit, wouldn't even notice.
:)
 
Cheers, guys. :)

Sol, didn't preshade. The details on this ship are very nice and deep and the panel lines I scribed are pretty deep too.

Mike, I can't decide that the moment what to do here. In hindsight, I should've sanded these areas right down before construction, then added some styrene details.

Punk, it mostly featured in Deep Space 9, but this particular model is from the Voyager pilot. Revell only have the rights to do the Voyager models.

Val_Jean,_port_ventral.jpg


GPerGenral1.jpg


Maq_main.jpg

You can see that I've not put the lights in the right place. The on screen ship doesn't appear to have blinking lights, but I'm not really concerned with screen accuracy. I'm going to take some creative license and do my own thing in places.

Punk, if you're going to try some Star Trek, try starting with the TNG episode, 'The Best of Both Worlds'. It's pretty dated, but if you watch that, you can then move straight on to DS9. The first season of DS9 was a bit slow, but it gets really good after that.

On a side note, looks like they're remastering TNG to HD! Hopefully with some improved FX. It's not officially confirmed, but it seems like it's happening.

http://www.treknews.net/2011/09/04/levar-burton-confirms-tng-is-coming-to-blu-ray/
 
Yeah!
I say "Heck" to screen accuracy....especially on this one. Mostly because I think the Maquis were kind of a rag-tag sort of outfit, and the ships were probably customized to the operator's likes. Kinda like the Rebel alliance in Star Wars. :)
This reminded me more of a Star Wars design than Star Trek.
 
ModelMakerMike said:
This reminded me more of a Star Wars design than Star Trek.

Totally agree with you there. This is why I picked this kit up. I figured, I've never done a wash before, and my painting and weathering skills need work....

Perfect ship for that. But of course I just had to light it didn't I? ::)
 
Thanks, Mike. You can see I got the long thin piece on the right a bit out of line, but that's OK, I'm happy. The other side looks fine too.

Wasn't sure if I had the time to do this, but didn't take me an hour. It's really late here in the UK, but I'm having a lie-in tomorrow, so this was a good idea I think. ;D
 
Now, that's exactly what I meant!
Excellent job, buddy! In the end You are going to make it a real masterpiece
 
This looks great, and Mike beat me to a good tip!

Can't wait to see her done and lit up!
 
Thanks, Craig, Q, Sol and Grendels.

Grendels, you can't be around all the time. ;)

Sol, I knew exactly what you meant, just thought at the time it would take me far too long, but it didn't!! Cheers, bud. Really appreciate the help.

Just to reflect in hindsight; If I were doing this again and wanted screen accuracy, I would've sanded these raised parts down and replaced them with shaped styrene pieces.

Ok, thanks for reading. Hopefully tonight I'll get the base colour down. 8)
 
Wow missed this thread! This looks great can't wait to see how she's ganna turn out. I'm not really a fan of star trek ships but i'm liking the design of this one. Awesome job so far mate!
 
Thanks, John. Incredibly enough, we've both been working on our current projects at pretty much the same pace. Or at least we started at the same time and we're both now started painting. 1st post of your Outrider was July 19th just a day before my 1st post on this! LOL! ;D

You've been learning about resin, where I've been learning about flashing lights and overpowering my batteries!

It's really cool how we go through these journeys with our builds. I love WIPs and it's great to be doing my own.
 
Going for quite a dark base colour. I'm trying to match what I saw on screen. I'm guessing really how dark it's going to turn out after weathering.

Ventral view.

2011-09-15_00-12-37_938.jpg


Dorsal.

2011-09-15_01-55-13_402.jpg


Beauty shot.

2011-09-15_01-55-37_221.jpg


OK, so first things first. Do I need a paint stand? I get some little nicks here and there. Nothing serious, but I think I should be avoiding that. It never happened when I was painting the USS Spitfire. ???

Secondly, I started masking and airbrushing the panel lines, but realised that just brush painting them worked much faster and easier.

Thirdly, I think I should've pre-painted the grilled areas, then masked them, then put down the base colour. You can see I've done the yellow-brown grills already. Would've been easier if I'd just masked inside them, rather than around them. That make sense?

Overall, it's going really well. Really enjoying painting this. Hope you all enjoy reading my musings. :)
 
nice update! Igard, i never used a rorating painting stand ever. i have that filthy old wood base with a few brass tubes sticking out. halfway through assembley i position the brass tube sliver in the ship and simply mount it on the painting base i made. easily removed etc.. brush painting the panels work just thin out the mix some or it gets cakey, thick or streaky looking. i would tape and mask myself but thats just me.
Lookin good brutha Igard!!
 
I don't have a paint stand, instead I usually just tape a wooden dowel to the model someplace convenient, and then start painting.


Looking good, the baby aztec is great!
 

Latest posts

Back
Top