Revell P61, waiting for the hammer to fall

It's not a bad kit. It's not a Tamiya-style shake-and-bake kit, it requires some experience and work, of course. But you show that it can be built into a nice model of the P-61.
 
I'M STILL IN!!!

Alrighty, I've done a couple things to mine. As said, we're gonna stick to the kit from the box strictly to build the unbuildable.

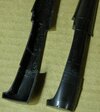
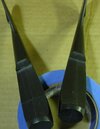
I will, however, be doing a little detail work along the way. NOT changing the assembly of the kit, but things like this:

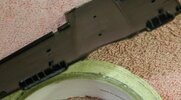
DSCN0695.jpg

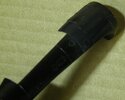
I apologize for the fuzzy pictures here, but anyone in this group build will certainly know these areas I'll be detailing. Stock kit shown, I trimmed out the kit detail shown.

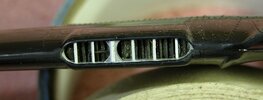
DSCN0696.jpg

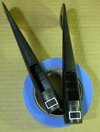
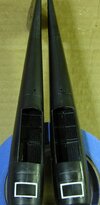
I then added some open wind suckage scoopy type things more like what's seen on the real plane.

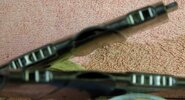
91a.jpg

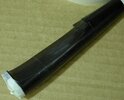
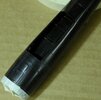
Still box stock built wings, this is the new detail.

DSCN0697.jpg
DSCN0698.jpg
DSCN0699.jpg

The only other couple things I plan will be open engine cowls on the wing pylon that comes closed in the kit. As y'all know, this will mean making several pieces that closely match the pylon engine cowls that are open that the crew can be displayed as working on that engine. Still box stock, just added details to that one engine. I will also be opening the detail on the wheels. The detail comes enclosed in the kit, but I have opened the backs so that the detail can be seen through, more like the real wheels and keeping them otherwise stock.

News at 11.

Rob.
 
I bought the Revell P61 Level 5 from Hobby Lobby on sale. But after reading several posts and additional reviews I returned it. Thank you for the heads up.
 
I bought the Revell P61 Level 5 from Hobby Lobby on sale. But after reading several posts and additional reviews I returned it. Thank you for the heads up.

Hmmm? That's very strange? I've never heard one bad word about this kit myself. So far, it's one of the absolute best fitting and flawless kits I've ever seen. You may have been lied to, perhaps? Haven't even looked around for where my putty is at and I don't see having to use any. It's practically building itself and there is zero putty on those wings I posted.

It seems to be a "Level 2" kit disguised in a "Level 5" box really, so if your reviews were from level 5 guys, that may be the problem.

Go back to Hobby Lobby, grab it and do yourself a favor! You've got to be able to do this WAY more justice than I can, I haven't built an actual kit out of the box in over 30 years or more.

TWO thumbs UP! (FREE "Level 1" review).

Rob.
will do thank you Still need finish B25J Mitchell first kit in about 35 years - did not do a great job
 
Alrighty you all, I did a little more.

As I said before, with one of my alterations, I want two engine sections the same. I don't need the spark plugs changed, so I don't want them fellas workin' on this one. Prolly rather stay in the barracks playin' vidjya games anyhow, we won't bother 'em.

Some may consider this cheating in this group build, but to keep from scratch building an entire matching engine section and keep this box stock, I bought a complete pylon with the open cowlings. I found an eBay auction parting out this kit and got the whole set for $4.00 with free shipping. He wanted $8.99, but I made him an offer and he took it. It puts my build up to $24 bucks, but saves me a fair amount of work.

Once It arrived, I did this:

DSCN0701.jpg
DSCN0700.jpg

I also did this to the one from the kit (first picture) in the exact same location on the engine/pylon being worked on. Using the spare sections, I grafted them onto the kit I'm building and ended up with this:

DSCN0704.jpg
DSCN0705.jpg
DSCN0702.jpg
DSCN0703.jpg

Now, I can make two open cowl engines without scratching so much. It came out identical in length to the original within just a couple .0001", so I'm satisfied with that.

For all our new foreign members who might be checking in, that's within a few millimeters, give or take.

Rob.
 
I've assembled the left/right engine/tail pylons. Still, no putty used yet.

DSCN0707.jpg

Here's also my attempt at making a little better grill/mesh area under the forward section of the engine pylons. One of the other areas I intended to modify as the kit pieces, once assembled, didn't do those grilled openings justice.

DSCN0706.jpg
DSCN0708.jpg

Coming along just as the destructions state!

Will go back and look but looks the same.

Now SAM, I need to update the "Level 1" review. Still worth every penny, but when you get yours, if you do some of what I'm showing, it'll move the kit rating up to a "Level 1-1/2", but still well within the "Ages 8 and up" range.

Rob.
 
I've assembled the left/right engine/tail pylons. Still, no putty used yet.

View attachment 131260

Here's also my attempt at making a little better grill/mesh area under the forward section of the engine pylons. One of the other areas I intended to modify as the kit pieces, once assembled, didn't do those grilled openings justice.

View attachment 131261
View attachment 131262

Coming along just as the destructions state!


Now SAM, I need to update the "Level 1" review. Still worth every penny, but when you get yours, if you do some of what I'm showing, it'll move the kit rating up to a "Level 1-1/2", but still well within the "Ages 8 and up" range.

Rob.
Loving the extra detailing. Pantherman
 
Loving the extra detailing. Pantherman

Thank you, you old "show how it's done" group build buddy! I still say I'm "box stock" because any details are just replacements for what's there and not a complete replacement of anything.

I apologize for being so far behind with this, but it is coming along...

In my usual fashion.

Rob.
 

Latest posts

Back
Top