Jakko
Well-Known Member
- Joined
- Oct 9, 2024
- Messages
- 615
Over on that other forum, there was a D-Day group build this year. I decided to break out the following for that:
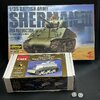
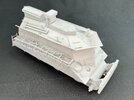
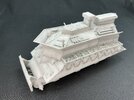
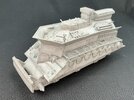
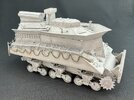
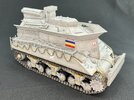
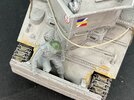
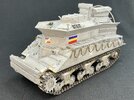
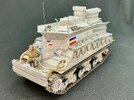
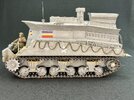
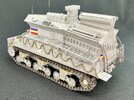
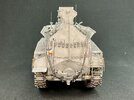
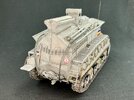
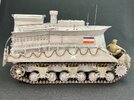
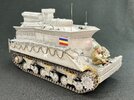
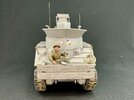
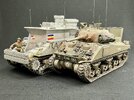
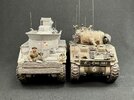
An Asuka Sherman III (M4A2) with the Resicast conversion set to turn it into a Sherman BARV (Beach Armoured Recovery Vehicle) and 3D-printed idler wheels by Robert Lockie, downloadable from Cults 3D and printed for me by my brother on his resin printer.
I won't give a full blow-by-blow account of the build here because that would be quite long, but just the highlights. If you want to read about it in more detail, I'll refer you to Missing-Lynx
Asuka's Shermans are great, but suffer from having a mould line down the centre of the roadwheels. You can scrape them down, which is hard on the fingers unless you clamp the wheel in a modeller's vice, but I decided on a slightly more sophisticated tool this time round:
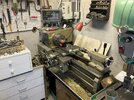

That is to say, my father has a metalworking lathe in his shed, that may be slight overkill but works quite well:
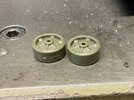
I didn't clamp the wheel directly into the lathe's claw, but instead put an M2 screw through the hole and secured it with a nut, then clamped the screw in the claw. If you want to try this too, then do it before glueing the two wheel halves together, because the separate part that goes in them has a slightly smaller hole, too narrow for an M2 screw. (If you use Asuka's spoked wheels, though, the screw will go through just fine.)
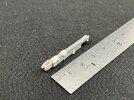
That done, I assembled the bogies:
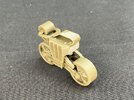
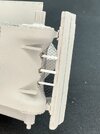
For accuracy, you have to drill four holes in the front face of each (after filing it flat), as well as add some missing bolt heads on the top, which are both shown in the picture above.
The Resicast superstructure didn't fit great and needed a lot of fettling to settle down properly over the plastic upper hull, and once that was done and it was glued down, I still had to fill the gaps all around:
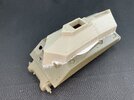
I filled the turret ring by glueing thin plastic card over the opening, oversize, and then trimming it down. At the back, I reworked the armour that has been added over the exhaust:
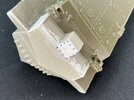
This because Resicast had made that plate too vertical, so after sawing it to a greater angle I rebuilt the plate with plastic card and punched bolt heads. I also needed to add more plastic card to the sides to close them, as there were big gaps there too.
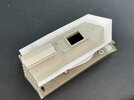
Around the superstructure are splash guards, which you get as resin parts you have to heat-form over a jig supplied in the kit, but that proved just about impossible to do. I instead traced them onto 0.13 mm plastic card, punched the drain holes in the bottom edge, curved the pieces (cold) around a knife handle, and glued them in place. I made the tubes that are welded to the tops of the real ones by adding half-round 1 mm rod to both sides:
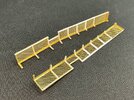
The catwalks on the sides are supplied as etched parts, but they're flat on the underside when the real things were made of T- and L-profile angle iron. Out with the plastic strip:
The conversion also provides etched anti-slip strips for the hull front but omits those on the superstructure, and in any case the parts represent L-profile when on the real thing, it was T-profile welded on its side. Again, plastic strip to the rescue:
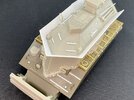
You can also see the welds I added around the superstructure from two-part epoxy putty. They're a bit oversize, but I wasn't about to do them again after all the trouble that the Magic Sculp putty I used, gave me with not wanting to stick. That's why you'll also see green welds, which are Green Stuff instead — that sticks much better, and I should have used it from the start, really. Lesson learned for next time
Along the hull sides, I added rings from copper wire for the rope, which I then tied to them:
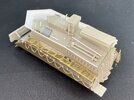
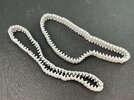
The kit gives you resin rings, but I felt their size was a bit off, and anyway, cleaning up resin rings was more of a chore than making new ones from copper wire. The rope comes with the Resicast kit. The spare tracks are from the recently defunct Panda Plastics, the fire extinguishers are Asuka because Resicast's are noticeably too big in both length and diameter.
On to painting in the next message

An Asuka Sherman III (M4A2) with the Resicast conversion set to turn it into a Sherman BARV (Beach Armoured Recovery Vehicle) and 3D-printed idler wheels by Robert Lockie, downloadable from Cults 3D and printed for me by my brother on his resin printer.
I won't give a full blow-by-blow account of the build here because that would be quite long, but just the highlights. If you want to read about it in more detail, I'll refer you to Missing-Lynx
Asuka's Shermans are great, but suffer from having a mould line down the centre of the roadwheels. You can scrape them down, which is hard on the fingers unless you clamp the wheel in a modeller's vice, but I decided on a slightly more sophisticated tool this time round:

That is to say, my father has a metalworking lathe in his shed, that may be slight overkill but works quite well:

I didn't clamp the wheel directly into the lathe's claw, but instead put an M2 screw through the hole and secured it with a nut, then clamped the screw in the claw. If you want to try this too, then do it before glueing the two wheel halves together, because the separate part that goes in them has a slightly smaller hole, too narrow for an M2 screw. (If you use Asuka's spoked wheels, though, the screw will go through just fine.)
That done, I assembled the bogies:

For accuracy, you have to drill four holes in the front face of each (after filing it flat), as well as add some missing bolt heads on the top, which are both shown in the picture above.
The Resicast superstructure didn't fit great and needed a lot of fettling to settle down properly over the plastic upper hull, and once that was done and it was glued down, I still had to fill the gaps all around:

I filled the turret ring by glueing thin plastic card over the opening, oversize, and then trimming it down. At the back, I reworked the armour that has been added over the exhaust:

This because Resicast had made that plate too vertical, so after sawing it to a greater angle I rebuilt the plate with plastic card and punched bolt heads. I also needed to add more plastic card to the sides to close them, as there were big gaps there too.
Around the superstructure are splash guards, which you get as resin parts you have to heat-form over a jig supplied in the kit, but that proved just about impossible to do. I instead traced them onto 0.13 mm plastic card, punched the drain holes in the bottom edge, curved the pieces (cold) around a knife handle, and glued them in place. I made the tubes that are welded to the tops of the real ones by adding half-round 1 mm rod to both sides:

The catwalks on the sides are supplied as etched parts, but they're flat on the underside when the real things were made of T- and L-profile angle iron. Out with the plastic strip:

The conversion also provides etched anti-slip strips for the hull front but omits those on the superstructure, and in any case the parts represent L-profile when on the real thing, it was T-profile welded on its side. Again, plastic strip to the rescue:

You can also see the welds I added around the superstructure from two-part epoxy putty. They're a bit oversize, but I wasn't about to do them again after all the trouble that the Magic Sculp putty I used, gave me with not wanting to stick. That's why you'll also see green welds, which are Green Stuff instead — that sticks much better, and I should have used it from the start, really. Lesson learned for next time
Along the hull sides, I added rings from copper wire for the rope, which I then tied to them:

The kit gives you resin rings, but I felt their size was a bit off, and anyway, cleaning up resin rings was more of a chore than making new ones from copper wire. The rope comes with the Resicast kit. The spare tracks are from the recently defunct Panda Plastics, the fire extinguishers are Asuka because Resicast's are noticeably too big in both length and diameter.
On to painting in the next message

