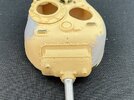
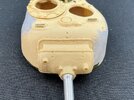
M4 (105 mm) HVSS on Okinawa

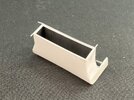
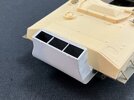
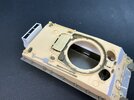
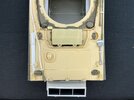
After several days of searching for pictures, looking at them, measuring on the model, making some sketches and finally asking on a forum, I built the lower part of the deep-wading gear.

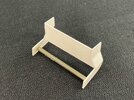
Basic shape:
IMG_1869.jpeg

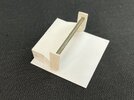
These are seven pieces of plastic card, plus a length of sprue as a brace. I made the large front plate from 0.5 mm card, and also the upper two parts on both sides. The lower ones are 0.75 mm card, to give some extra strength. When this dried, I glued an oversize piece of 0.13 mm card to the back/bottom:
IMG_1871.jpeg

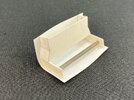
When this had dried enough, I glue it along the bend and underside too, but then discovered that it's better to curve the plate a little here first. So, I took it back off, then pulled the centre area between a ruler and the edge of my work surface a few times, and glued it back on:
IMG_1872.jpeg

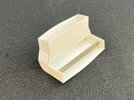
This because the back and undersides bulge outward if you don't make a curve in the plate first. They still do, but a lot less than on the first attempt. The bulge that's still there will get fixed when I add the framework that will go around the top. Once the glue had dried, all I needed to do was trim the plate to size, which is much easier than making it the right size first:
IMG_1873.jpeg

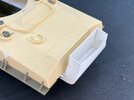
Well, I still need to clean up the seams and do a bunch of other stuff, but it already looks good against the hull:
IMG_1874.jpeg
 
After puttying and sanding the seams, I painted the inside matt black — the duct will have been full of soot from the exhaust, I would imagine — and then started on the edge along the top:

IMG_1875.jpeg

First I put thin strip flat along the upper edge, which also straightened out the bump on the back because it got glued to the strip, and then a narrower strip vertically on top of that, both aligned with the outside of the duct. The top strips still stick out here, because once more it's easier to make it like this and only trim them down after the glue dries than to try and cut everything to the right length first. It will save you having to cut a new strip because you made one slightly too short, for one.
 
Trim down the ends of the strips ;) Then add a bit more detail to the trunk, stick it on the tank, fit a bottom extension to it, and then proceed with adding the details to the hull and turret. I've been holding off on those until the wading trunk is fitted, for fear of damaging them, but I've taken much longer getting round to actually building this trunk than I would have liked.
 
Trim down the ends of the strips ;) Then add a bit more detail to the trunk, stick it on the tank, fit a bottom extension to it, and then proceed with adding the details to the hull and turret. I've been holding off on those until the wading trunk is fitted, for fear of damaging them, but I've taken much longer getting round to actually building this trunk than I would have liked.
Never one to opt out the detail you add is brilliant.
 
This part is now done, I think:

IMG_1878.jpegIMG_1879.jpeg

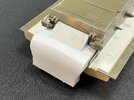
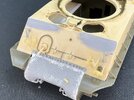
Some strip inside the top opening for the reinforcing bars you can see on the real thing, some more strip for the fittings that the upper trunk hooks into, and an angled piece on the underside to cover the engine access doors in the hull rear. The shape is entirely conjecture because I couldn't find any photos that actually show this part.

The plastic strip along the side of the lower hull is the exhaust for the auxiliary generator, which on late-model Shermans runs on the outside like this. It's just two pieces of strip glued together to a 1.5 × 1 mm cross-section, then the edges rounded off and the end opened up with the tip of a knife.
 
I always think that if I can do this kind of stuff, so can everybody else, though :)
It doesn't always work that way. Everybody has different skill levels . I have mastered conversions over the years for a couple resin casting companies . Just because I can do it doesn't mean everyone can , and there are people who make me look like a monkey using a stick.
With all that said your skill set is very good and is the result of practice and trial to hone that degree of skill. Yours is higher than most so be proud of what you do and share it , also teach whenever you can .
 
It doesn't always work that way.
I know, and also this :) Though I do think that a lot of people who feel that they can't do something like this, are wrong about their own abilities — and because of that, they don't even try. And not trying, of course, leads to not developing the skill to do this at all.

My own limits here are mostly fine detail work, because I can tell my fine motor skills have deteriorated in recent years, and in working truly accurately, which is a problem I've had my whole life :)
Well said my friend. You are 100% correct , if people don't try , they will never know.
 
The details on the front plate are now (almost?) all on:

IMG_1887.jpeg

The guards over the headlight and horn are 3D-printed — they came from the big box of Sherman parts I bought, but once I was cleaning them up I soon began to feel that it would have been easier to just use Asuka plastic parts from my Sherman spares box. These printed ones are no thinner but are a lot more work to remove from the plate they had been printed on. The horn itself is from Asuka, from the aforementioned spares box, the bracket on the nose for holding the tow cable came with the resin M4 hull, as did the periscopes, while the covers over them are from Asuka again :) The lifting eyes are Dragon (I think) and placed "inboard": most M4 (105 mm) HVSS tanks had them "outboard" on the edge of the glacis plate, but very early ones had them as I put them here.

On the back are some tools and more:

IMG_1888.jpeg

All of the green plastic is Asuka once more, both the tools and the air scoops on the back deck, but the gratings in the latter are from the RFM Sherman VC. The grey shovel is as well, I think, but it still needs brackets added over it. I'm not sure if I'll add any more tools, because I'll put sandbags over the engine deck, which can cover some of those tools, and I see no point in putting them on in that case.

The olive drab paint is in areas that will be hard to reach with an airbrush later on. The overhang on the back of the turret also got a coat while I had the paint out.

Talking of the turret:

IMG_1889.jpeg

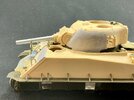
It's still loose here, but sits on the hull so I can work out the angle for the howitzer barrel. I was going to model the tank as "in action" with open hatches and the commander and loader visible inside the turret, but as it fits so poorly on the hull, I'm instead going to build it with the barrel in the travel lock. I attached that with some Blu-Tack so that I could determine how the barrel has to sit and then flow glue into the join between gun shield and turret.

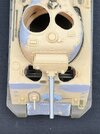
And from above:

IMG_1890.jpeg

This shot is mainly to show that the howitzer isn't on the centreline of the turret.
 
You know that saying, "Be careful what you wish for"? ;)

I have two Sherman spares boxes. It didn't start off that way, but things got a little out of hand through no real fault of my own.

IMG_1891.jpeg

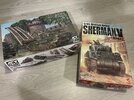
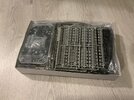
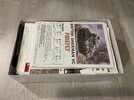
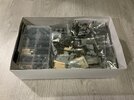
On the right is the box of an Asuka Sherman V, which is of typical size for a tank kit box. The box on the left, from the AFV Club Churchill AVRE with SBG assault bridge, is the same size except for being about twice as tall. The Sherman V box holds the tracks, wheels, and other suspension parts, while the AVRE box has everything else (I only just realised, typing this, how in English that's almost a play on words: AVRE → EVERYthing :) ).

So, what's in them?

IMG_1892.jpeg

That's the suspension box, which is stuffed pretty much full. Taking most of it out:

IMG_1893.jpeg

It's largely full of sprues (mostly in plastic bags to keep them together) with track parts as well as a box full of wheels, sorted by type. That box is one from a hardware store, which originally held screws or something of a number of sizes. I got a few of them from someone who had used up their contents and asked if I had a use for them. Very much so, thank you :) The Panda Plastic bagged items are extended end connectors, of which I bought two bags but not used them yet because they're so fiddly. Most of what's still inside the box is soft-plastic tracks and poly caps.

BTW, the bag with dark sprues to the left of the box is an ancient MP Models HVSS suspension-and-track set. I came across that at a model show not all that many years ago, and bought it for the collection rather than to actually use. It was the bee's knees thirty-plus years ago, but now it's been very much overtaken by modern Sherman kits. Still, it's cool to own, IMHO :) Too bad it came without its box, but it did have its instructions.

Taking the lid off the other box:

IMG_1894.jpeg

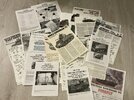
On top is a whole stack that contains one of every 1:35 Sherman and related instruction sheet I own:

IMG_1895.jpeg

I've actually built almost all of the kits these are from, except for two or three that I got earlier this year when a modeller friend gave me a built but unpainted Dragon Sherman plus most of his Sherman spares (which included things like all of the unbagged grey track sprues in the picture of the suspension box contents) and a few instruction sheets. That Tamiya M4A3 sheet in the middle is of the very first 1:35 Sherman kit I ever bought, which must have been about 35 years ago now.

OK, so what's left in the box without those?

IMG_1896.jpeg

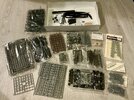
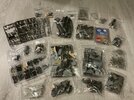
Another screw box, a lot of bagged parts and some loose ones:

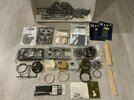
IMG_1897.jpegIMG_1898.jpeg

Originally, I just dumped all of the parts into the box, but because that makes it exceedingly hard to find anything, some years ago I went through it all and sorted the small parts into the screw box and the larger ones into ziplock bags. A bag with main guns, a bag with mudguards, a bag with engine decks and hull rears, a bag with sand shields, a bag with transmission housings, and so on. In the second photo are the larger loose parts, some unopened accessory/conversion sets, as well as the smaller loose parts still inside the box.

Now, I agree this appears a bit excessive. But the thing is, the vast majority of this stuff is what you have left over after building and/or converting four or five Asuka Shermans, two MiniArt M3 medium tanks, one RFM Sherman, and the odd other model with related parts … OK, from a couple of those kits I didn't use major parts like the whole turret or tracks, but just consider that a single Asuka Sherman with VVSS gets you two or three full sets of wheels, and you'll only ever use one of those — not to mention tons of spare parts for the bogies. Add in the big box of parts I bought, from which I'm building the present 105 mm tank, some gift parts (like the tracks I mentioned, or that yellow resin turret that Mike sent me — he actually gave me two, BTW, but one is in a box with an Asuka kit I have yet to build), and some accessory sets that I often picked up for cheap (like the two M10 etched sets: €9 for the two) and it all builds up very quickly.

To be honest, I think I would do well to try and get rid of some of this stuff to other people who can use it better than I can. Full sets of wheels, for example.
 
The tools etc. are now also on:

IMG_1902.jpeg

The white plastic on the left are the gun-cleaning rods for the gun, with under it a bag with the red-and-white aiming stakes that are used for indirect fire. I think the tow cable (thread from another kit) is too thick, so chances are I'll replace it by something thinner.

The front of the turret actually represents a fairly late version:

IMG_1903.jpeg

You can tell by the little blocks around the strip to which the canvas cover for the gun mantlet attaches, so those had to go:

IMG_1904.jpeg

There was also a hood over the gunner's periscope, but I already sawed that off earlier because it's also a feature of the later 105 mm Shermans.
 
Back
Top