You are using an out of date browser. It may not display this or other websites correctly.
You should upgrade or use an alternative browser.
You should upgrade or use an alternative browser.
Tamiya Brewster B 339 Buffalo....Midway style
- Thread starter Glorfindel
- Start date
Glorfindel
Active Member
- Joined
- May 2, 2011
- Messages
- 1,504
letsgobrowns82, yeah the idea of giving you the masks would be novel if they were pre-cut. Can't tell you the hell it was trimming these SOB's to fit.
PANZERMAN they give you two figures in this kit, one seated one standing, but I'm sorry to disappoint you. I'm not seating the pilot. They'll stay sprue huggers.
Bit of work done this week as I'm trying to speed it up to get ready for the BSC. This post is pic heavy as I know the kiddies love their pictures. So lets pony up....
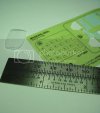
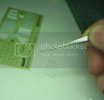
So I started this weeks fun with the masking of the canopy. Tricky work even with a brand new blade. I've never used them but I'm thinking the Eduard masks are probably so much better then the masks offered in this kit.
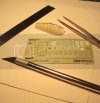
Masked up and dry fitted.
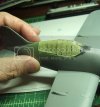
Glued in with that Micro Clear stuff. Man it smells awfully like Elmers Glue.
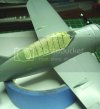
Oh' before I get too far ahead I also did a little more seam work down stairs at the belly button. A little Bondo Spot Putty worked great. Sanded away some panel lines smoothing out the Bondo so I re-scribed some vanquished lines.
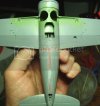
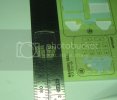
Time to mask the bottom glass. This absolutely s#%*&!
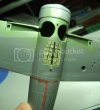
Finished masking! All clear parts installed and ready for primer. I thinned down Mr. Surfacer 1200 about 70% and shot it through the AB roughly around 15 psi.
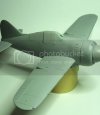
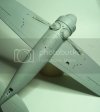
After a light sanding with 2400 grit...I know very high number, but it gives a very nice smooth feel to the primed surface.
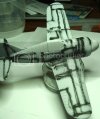
Time for base coat! Okay I forgot to take the base coat pics...my bad. So after researching the colors for this bird I realized I wanted to go off the reservation and use a bit of artistic licensing to achieve the desired effect. I started with the color callouts that Tamiya recommended then tweaked them to my flavor. Tamiya suggests AS-16 Light Grey for the entire plane. I happen to have XF-66 Light Grey but find both greys still not right. Pics of this kit with more of a blue hue is somewhere out there in a Google search so I used the XF-66 in a 4:1 ratio with XF-18 Medium Blue and landed a Grey Blue I like.
I did the same for the belly of the beast as well. Can't remember my source but Medium Grey was what I found the underside of the plane is. This is like a Grey Tan color and seemed too earthy for me. For this I used a 5:3 ratio of XF-20 Medium Grey and X-2 White.
These are my end results with masking removed.
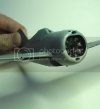
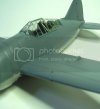
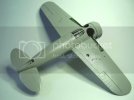
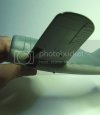
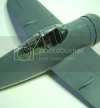
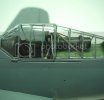
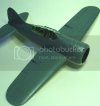
I have a bit of clean up and some touch ups around the canopy's. I had a wee bit of over spray in one spot and a bit of masking pulled off some paint on the canopy. This happened on the bottom glass too. I'll go in with my 00 brush and dab them both to correct them. I'll let this all cure first then clean her up.
Thanks for taking the time to check this out.
PANZERMAN they give you two figures in this kit, one seated one standing, but I'm sorry to disappoint you. I'm not seating the pilot. They'll stay sprue huggers.
Bit of work done this week as I'm trying to speed it up to get ready for the BSC. This post is pic heavy as I know the kiddies love their pictures. So lets pony up....
So I started this weeks fun with the masking of the canopy. Tricky work even with a brand new blade. I've never used them but I'm thinking the Eduard masks are probably so much better then the masks offered in this kit.

Masked up and dry fitted.

Glued in with that Micro Clear stuff. Man it smells awfully like Elmers Glue.

Oh' before I get too far ahead I also did a little more seam work down stairs at the belly button. A little Bondo Spot Putty worked great. Sanded away some panel lines smoothing out the Bondo so I re-scribed some vanquished lines.

Time to mask the bottom glass. This absolutely s#%*&!


Finished masking! All clear parts installed and ready for primer. I thinned down Mr. Surfacer 1200 about 70% and shot it through the AB roughly around 15 psi.


After a light sanding with 2400 grit...I know very high number, but it gives a very nice smooth feel to the primed surface.

Time for base coat! Okay I forgot to take the base coat pics...my bad. So after researching the colors for this bird I realized I wanted to go off the reservation and use a bit of artistic licensing to achieve the desired effect. I started with the color callouts that Tamiya recommended then tweaked them to my flavor. Tamiya suggests AS-16 Light Grey for the entire plane. I happen to have XF-66 Light Grey but find both greys still not right. Pics of this kit with more of a blue hue is somewhere out there in a Google search so I used the XF-66 in a 4:1 ratio with XF-18 Medium Blue and landed a Grey Blue I like.
I did the same for the belly of the beast as well. Can't remember my source but Medium Grey was what I found the underside of the plane is. This is like a Grey Tan color and seemed too earthy for me. For this I used a 5:3 ratio of XF-20 Medium Grey and X-2 White.
These are my end results with masking removed.


I have a bit of clean up and some touch ups around the canopy's. I had a wee bit of over spray in one spot and a bit of masking pulled off some paint on the canopy. This happened on the bottom glass too. I'll go in with my 00 brush and dab them both to correct them. I'll let this all cure first then clean her up.
Thanks for taking the time to check this out.
Chris S
Its a bit like being handcuffed to a lunatic !
- Joined
- Feb 14, 2011
- Messages
- 4,573
WOW ..She's looking good Anthony ,you really upped the pace huh ! Very tidy masking on the glass too buddy . and the paint job looks tops 
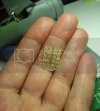
You can see how tiny this aircraft is when you see your hand against it !!
Chris.
You can see how tiny this aircraft is when you see your hand against it !!
Chris.
Glorfindel
Active Member
- Joined
- May 2, 2011
- Messages
- 1,504
Chris my man! Yeah she's 6" long from the end of the tail to the beginning of the cowling. I kid you not....about 3 hours of trimming out those canopy masks and placing them on. They made my eyes water.
adampolo13
New Member
- Joined
- Dec 7, 2011
- Messages
- 2,633
Umm is all i can manage at this point. When I pick my jaw up off the floor I will give you a much better complement.
Howdy Glorfindel,
I must tell you that this bird has become very attractive to me, you´re about to obtain a nice & clean model;
the PE set has added a lot of detail & class...
´
... If I´m lucky tomorrow I colud take a walk to a LHS that I´ve discovered (I´m not near "my" city), and I´ll take a look to see if there´s one of this birds in the shelves ... maybe ... maybe...
Cheers, Glorfindel, I´m following this build
RG
Glorfindel
Active Member
- Joined
- May 2, 2011
- Messages
- 1,504
JMac, adampolo13, Jelly thanks for the comments. Your making me blush. I spent the last few days starting my BSC entry but also touched the glass parts on the Buffalo. One of the new things I'm trying on this build is making my own decals. I managed to recreate the registry numbers with no problem and they look great. The roundels with the white star....well that's something else. My printer doesn't print white and the only thing left to do was to paint a perfectly sized white circle in the appropriate location, then apply my blue roundel with a clear star over the white circle. We're talking a white circle 1/4 of a mm smaller then the blue roundel! I must admit this is far too tiny a margin to accomplish with my developing AB skills. My remaing option, for which I decided upon, was to order up some roundels. So now I wait for those to arrive with little to do. I could work on the landing gear but I need to "feel it" first.
Glorfindel
Active Member
- Joined
- May 2, 2011
- Messages
- 1,504
You know Chris I though of that but couldn't seem to find any. I didn't check online though. It's okay...I'll have some extra's in the spares file for future mishaps. ;D
JMac
cut. glue. paint. repeat.
- Joined
- May 24, 2009
- Messages
- 2,812
Personally, I'd probably paint white circles on before applying your decals. I'd mask, apply a light coat of light grey primer (just to ensure the base colours don't show through) then flat white followed, finally follow up with a clear coat. That's just me - I've tried the plain white decal paper thing and it didn't work for me, but lots of guys have good success with it.
Either way if you are going to paint or decal, you will need to cut accurate circles, here's what I use for just such a job. I've a good quality compass with a draughting pencil/pen attachment, and I just chuck a knife in and away I go. The blade has to be new and sharp, and I don't use a lot of pressure - I just keep scoring the surface until I'm through.
Jason
[attachment deleted by admin]
Glorfindel
Active Member
- Joined
- May 2, 2011
- Messages
- 1,504
Jason if your using that tip at the center of the decal paper aren't you concerned about damaging the decal paper? I have that very same compass for circles but I'd be wary of a hole.
JMac
cut. glue. paint. repeat.
- Joined
- May 24, 2009
- Messages
- 2,812
Glorfindel said:Jason if your using that tip at the center of the decal paper aren't you concerned about damaging the decal paper? I have that very same compass for circles but I'd be wary of a hole.
When I tried the white decal technique, I was covering the center of the white under decal with another decal overtop (a small red circle - the center of a British roundal) - so a very small hole in the white decal wouldn't be visible. I believe that the main problems I had with the white decal idea stemmed from the paper I was using (and likely my own ignorance in how to use the paper properly). The white decal didn't stay in place, didn't adhere to the gloss coated surface and (when I finally got it where I wanted it) after applying Set and Sol it wrinkled up and wasn't round anymore. Unhappy with the result I removed it with some masking tape and replaced it with an after market decal (take a look at my Seahawk build the Navy GB - both of the roundals on the back fuselage are AM because I couldn't get the white decal thing to work).
If the pressure is light the compass point doesn't leave a big hole in the paper - I suppose if I was really concerned I'd just touch up the center with a little white paint before moving to the next step. You can also get foam backed "feet" for under the compass point, I have one at home and forgot to take a picture of it, I never use it anyways.
In the end you got to go with what you think will work the best.
Sorry if I'm running-on with this post. Just wanted to give a complete answer.
Jason
ShutterAce
Active Member
- Joined
- Mar 31, 2011
- Messages
- 1,043
I have the exact same problem with some markings I'm contemplating. Why not use the compass to cut a circle out of some masking material and use that as a mask to spray the white of the circle? That's what I've been contemplating doing myself.
Ummm....
Jason just said this a few posts ago didn't he? :-[
Ummm....
Jason just said this a few posts ago didn't he? :-[
Glorfindel
Active Member
- Joined
- May 2, 2011
- Messages
- 1,504
Yes he did ;D
Glorfindel
Active Member
- Joined
- May 2, 2011
- Messages
- 1,504
Okay so it's been about two, possibly three weeks, since my last update on this. What I've gone and done is make my own decals for the registry numbers for this bird. I'll be going with the MF-15 call out using WWII military font I found on the web (I think on the first page of the thread). Because I'm unsure about my ability to reproduce the properly sized "white" circles under my navy blue stars I decided to order replacement decals from Special Hobby. They have a kit of the "Midway" Buffalo so I ordered decals from them for their model. That was two weeks ago and they arrived at my door this morning....Glory Days!! So I opened the envelope to see not one, but two sets of decals for the Midway Buffalo.....ABSOLUTELY JOYOUS! If I screw up there are plenty of backups.
So now to recap what I have left to do here.
1. decals
2. seal them in with Future
3. Assemble and paint landing gear and other bits and pieces....don't think there is much.
4. Pastel pin wash, then seal that in.
5. Weathering and then a final dull coat finish.
I think that's it. Couple more hours of detail work here and this steed is done.
Glorfindel
Active Member
- Joined
- May 2, 2011
- Messages
- 1,504
So with bench time becoming a premium for me these days I did manage to have a bit of fun yesterday on this bison. I finally got to put decals on...yaaaah! One of the "firsts" for me was making my own decals. Now even though I only made two for this it's still the first time I ever attempted this part of modeling. It was fun I must admit. The decals I made are the registry numbers "MF-15" for both sides of the aircraft. I believe the decal paper I used is a bit thick, but that's OK with me. Here are the results.
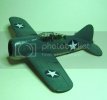
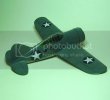
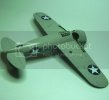
Now for the decals I used "wet Future" as the setting solution instead of Micro Set this time around. Once I made up my mixture of water & Future (50% mix or 1:1 ratio) I brushed it on the area where the decal is to be placed. Slide off, position, then wick up any extra fluid from the model. Done. After all these dried I used a different mix of water and Future for sealing the decals in. I went about 35/40% Future to 65/60% water. Just about a 2:1 ratio here. Also I didn't AB this on....felt lazy yesterday so I hand brushed this solution over the entire model. She completely dried with an hours time. Then it was on to a pastel pin wash.
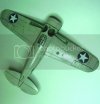
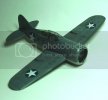
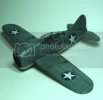
A little bit more clean up from the wash and it's time for some weathering effects. Oh' I did wipe off excess wash with an old sock and Q-Tips (not in that order)
Thanks for checking her out boys. Landing gear and prop soon.


Now for the decals I used "wet Future" as the setting solution instead of Micro Set this time around. Once I made up my mixture of water & Future (50% mix or 1:1 ratio) I brushed it on the area where the decal is to be placed. Slide off, position, then wick up any extra fluid from the model. Done. After all these dried I used a different mix of water and Future for sealing the decals in. I went about 35/40% Future to 65/60% water. Just about a 2:1 ratio here. Also I didn't AB this on....felt lazy yesterday so I hand brushed this solution over the entire model. She completely dried with an hours time. Then it was on to a pastel pin wash.


A little bit more clean up from the wash and it's time for some weathering effects. Oh' I did wipe off excess wash with an old sock and Q-Tips (not in that order)
Thanks for checking her out boys. Landing gear and prop soon.
Chris S
Its a bit like being handcuffed to a lunatic !
- Joined
- Feb 14, 2011
- Messages
- 4,573
(((lol))) I wiped the excess with an old sock ! ;D ;D ;D ...Love it .
Anthony ,she's looking really good mate ...really good . I like the panel lines ,pastel washes seem to work well for you ,nice work .Looking forward to the finish
Chris.
Anthony ,she's looking really good mate ...really good . I like the panel lines ,pastel washes seem to work well for you ,nice work .Looking forward to the finish
Chris.
Glorfindel
Active Member
- Joined
- May 2, 2011
- Messages
- 1,504
Yeah Chris I think I'm really liking the effect with the pastel washes. Once you get that slurry mixed right it's a "homerun" as we say in the states. I weathered a bit yesterday (Sunday morning) but am going to do a bit more....all on the light side as less is more....then looking forward to sealing everything up with some Flat Clear. Banging out landing gear on my next bench day, Thursday I think.
