The One I Have Been Waiting for

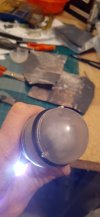
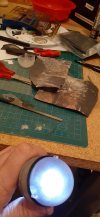
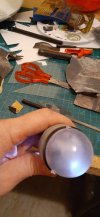
Okay, so here is where the spinner is at...
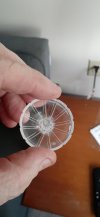
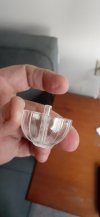
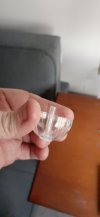
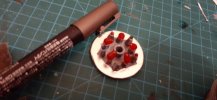
I used my Handy Drill with the smallest bit I currently have for it to dril about 8 holes around the center post. I then CAREFULLY pulled it so it was centered in the spinner. The remaining plastic did break, but because of how I drilled the holes around the post the break wasn't clean through and wedged the post in a centered position.

I then took a circle of clear styrene and superglued it to the outside(there is not gonna be any photoetch on the spinners now due to this. Will paint the fans).
I then let that set, and liberally added super glue to the inside, building up a mound around the post(may need to do this again since some leakage occurred.
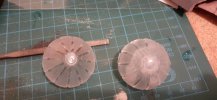
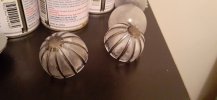
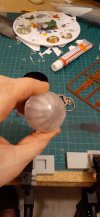
Which leaves me with:20210911_182428.jpg20210911_182432.jpg20210911_182438.jpg20210911_182442.jpg
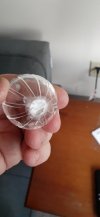
Once the glue has cured fully I will carefully sand down the disk on the outside, and may put more glue inside. I am not terribly concerned with the crazing as I am planning to frost the heck out of the spinners and insides of the outer Bussard domes anyhow.

Hopefully this works. Fingers crossed.
 
Looks pretty brutal but I don't know what all gets covered up .
You said that a motor spins a fan inside ?
Man , for the price of that kit , I would have ordered a replacement part .
 
Looks pretty brutal but I don't know what all gets covered up .
You said that a motor spins a fan inside ?
Man , for the price of that kit , I would have ordered a replacement part .
Once the thing is sanded down and frosted I will make the call on going with it or getting a replacement.
There will be painted blades on this too. Hopefully that will help hide the fix.
 
Well, sanded both spinners down to frost them. 320 to 1200 grit. I am gonna glue a disk onto the good spinner and sand it down so the centers match. 20210911_191733.jpg

I would like to sand the insides too so the frosting from the glue isn't so obvious. But I'd be worried about damaging both spinners.

But hopefully with the outer dome interiors frosted they will be obscured enough that you just see the fans.
 
I cut one of the outer domes from the sprue and sanded the inside to frost it. Then test fit the two domes together in the front piece.20210911_203218.jpg20210911_203222.jpg20210911_203319.jpg
Granted, only one led lighting these for this test, but all I can make out are the suggestion of the fan blades. So the plan is to paint the fans on the spinners and frost the other Bussard's inside. I think between the pulsing colored lights, the spinning of the inner domes and the frosting of both sets of domes the naffness of the repair will be obscured. Barring any incidents I think the dome has been saved.
 
Oh ,that whole clear part you just fixed is what the motor turns ?
I thought it was a PE " fan " that used that stem you straightened as it's axle .
 
Oh ,that whole clear part you just fixed is what the motor turns ?
I thought it was a PE " fan " that used that stem you straightened as it's axle .
Yeah, its that inner dome. The 11 foot model has the exact same part, although it has the domes apparently attached directly to small fans in the engines. But yeah, the motors are turning the inner domes and there is the larger dome overtop them.
 
So, last bits for the day...

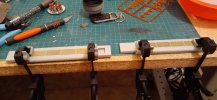
As per the light kit instructions, I glued the pylons together. They were warped, but I used all my clamps on em for about an hour or two. Then once the glue was fairly set, I took the clamps off and checked for warpage. They were at this point only slightly warped, so I simply bent them slightly to get the warps out and now they are clamped to the bench to keep them flat till fully set up.20210912_004515.jpg

I also have painted the insides of the shuttlebay doors, and will prime and paint the exteriors ar some point tomorrow along with the landing control room, then glue the open part of the doors and control room in place.

I installed the intermix bulbs on the reflector plates. I slightly changed it from what the instructions state by adding one small amber bulb and one clear one to each batch of the multicolor bulbs. The clear ones will be painted yellow.20210912_004524.jpg

And the fans have final paint on em. Will brush on my brushable flat only on the fans themselves.20210912_004528.jpg
20210912_005718.jpg
 
kewl-eric-cartman.gif
 
Eager to see it motorized
So am I. But that isn't happening just yet. I have started to rush a bit. I need to step back for a few days at least and take a break from it. The wiring is gonna be fiddly work and I am already worried I could goof up badly as is.
 
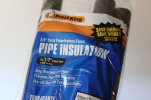
The motors in the old lighting kit were a tad noisy; I heard that the new, improved lighting kit has quieter motors. Hope that's true. If not you may want to try and do some sound dampening. I added a layer of foam around mine and inserted long foam insulating tubes in the nacelles themselves to reduce the sound from the motors; otherwise, the long, empty nacelle tubes will serve to amplify the noise much like organ pipes do.
 
The motors in the old lighting kit were a tad noisy; I heard that the new, improved lighting kit has quieter motors. Hope that's true. If not you may want to try and do some sound dampening. I added a layer of foam around mine and inserted long foam insulating tubes in the nacelles themselves to reduce the sound from the motors; otherwise, the long, empty nacelle tubes will serve to amplify the noise much like organ pipes do.
I may just do that. Any idea how long they can stay on before they start heating up?
 

Latest posts

Back
Top