USMC M4A2 – 2 nd Pt. / C Co. / 1st CTB – “Galvanic” Op.

JELLY ,

Good lookn' Shermie ..... & that's comin' from a German Armor NUTT !! ;D I see where you used th Vallejo Primer. It's a little late for this one .. but you could try Vallejo's O.D. primer as a Pre-Shade & You could "matar dos pájaros de un tiro" . I tried th same thing with My Wittmann's Tiger & Vallejo's Dunkel Primer. I mixed a lighter shade of the Dark Yellow Base & tried a Panel Fade/ Modulation type of thing on th Tiger's Base Coat. Just a thought for next time .....

Keep on Rockin' it !! This one is lookin' Good & almost ready for th PTO weather treatment !! I'm lookin' forward to it !!
 
:) Good mornig / afternoon / wathever time of the day there where you live…
´
;) By heart, mates, thanks a lot for taking your time to watch and for the comments… it is a boost to me to hear from modellers like you that the model has not become by now a “Delta Sierra”.

Don´t laugh at me ( ) but I really get a bit “tense” every time a put my hands over the AB: I openly recognize that I´m not 80% proficient with it: specially when I have in mind to play simultaneously with:

• different proportions between paint / solvent (density of the fluid),
• The best working pressure for : a) the density, b) nozzle diameter (a constant)
• The best shooting distance given: a) the density, b) nozzle diameter, c) working pressure.
´
I know that´s a matter of practice, yeah, but it micro-stresses me (in a modelling context) a little.
´
I have an Iwata (0,3 mm nozzle, I believe), I think it´s really a beautiful piece, but the other day (two or three days ago, just when I was about to prime the Sherman) I found that the needle was jammed !! And when I say jammed, I mean JAMMED. :p
´
I had to fully dismantle and reassembly the AB. No dramas, no troubles, OK…
´
I have a sensible forefinger and I´ve taking care of my hands (I´ve been 15 years in precision shooting) so I clearly have the perception that the trigger is not working exactly as smooth as before in its VERTICAL movement (only in the vertical movement). $H&% ! :mad:
´
Anyway, the AB works really fine, believe, you would say that I´m nuts, but that lil´guy isn´t the same. Just a simple anecdote. It just must be my oddity. ::)
´
Chris, Spud, my Emerald Island mates, thanks a lot, guys, ;)
´
:) Tony, my Old Man (I think it´s the appropriate slang), apart from the advices and the laughs, I must be forever grateful with you for having discovered MIDOL to me. Well, my wife is a pharmacist, so if we do a good calibrating of the fridge, the micro wave, the thermomix, and the dishwasher I believe we´ll be able to make homemade-Midol. ;D Also, I´ve visited to the IKEA web, and we´re gonna buy a HAKVOBCTFDAGSMUNDE (a special cabinet for Midol 20 pounds boxes). ;D
´
:) Oh, Erik, my friend, you truly hit the pot with that slang ! Yeah! That “trick” that you are suggesting (OD Vallejo primer) is one of the lessons learned that I´ve got with this model. Definitely: I´m a rookie, man.
´
Thanks again, guys,
RG
 
Everything is looking good Jelly. Remember, there is always different ways of painting a model. You don't have to use one particular method and you don't have to have all the latest products.

If you are not happy with your first time pre shading, there are other ways to achieve the look of weathered paint and colour variation. Relax, model building is problem solving.

I use to be nervous when I first started to airbrush. I still don't have a paint booth (nor a dedicated painting area), I don't have a pressure regulator and I still don't have the fittings to use my nice Badger. Yet I manage. It's all good. ;D
 
"Jelly" I never thought of using Vallejo primer on any of my armour. Thanks for showing what you used. I can't wate to see you paint work on the tracks.
 
Nice clear worm Spanian!

Happy to see build one of these!

Take care and take all the time you need! It's a hobby. After all!

Well! For some of us it is!
 
Howdy, “GANG” ? :D
´
:) Hope you´re all OK, and that the weekend has been good… here… wind, rain, wind, rain, etc, etc…
´
I´ve gone one more step ahead in this “MODULATION EXPERIMENT”… you´ll see the pics after a few lines… as always… you know…
´
;) First of all, thanks a lot for watching and comments, you´re a good pack; they´re really morale boosting for this reborn-modeller-rookie… yeah, yeah, I´m fully aware that this is a hobby, but you and me know that “sometimes” one is more nervous in either this step or in another one… Erik, my man, you nailed it with Hendrix… next we´ll hear “Purple Haze”, Ok? :D
´
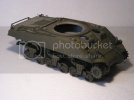
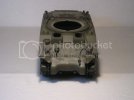
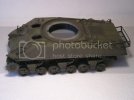
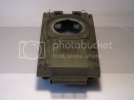
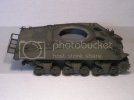
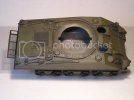
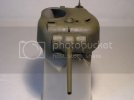
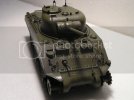
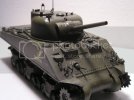
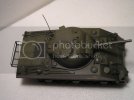
Well, the next pics depict my attempt to follow the Modulation Color Technique…
´
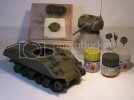
If you remember the last batch of pics, it ended with an OD´ed model, awaiting highlighting… What you´re about to see now is the result of three (03) consecutive highlighting AB´ed layers, so:
´
1st highlight: OD + some yellow drops + Tamiya X22 + Tamiya white cap solvent ; at this stage mix diluted more or less @ 40%; firing the AB @ 17psi aprox @ 1” distance (or less).
´
2nd highlight: the same than 1st highlight plus another 2 or 3 yellow drops, plus 3 or 4 drops of solvent. At this stage more or less the mix is diluted between 50% - 60%. Same pressure than before, maybe I´ve reduced the firing distance.
´
3rd highlight: the same than 2nd highlight plus another 2 or 3 yellow drops, plus 2 or 3 drops of solvent. At this stage more or less the mix is diluted between 60% - 70%. Same pressure than before, maybe I´ve reduced again the firing distance to half an inch or so.
´
OK, there goes a salvo of pics.
´
Clarification Nº1: One of the pics shows the materials I´ve been using but I can see that I´ve forgot to show the Tamiya solvent…
´
Clarification Nº2: You´ll see some vertical / linear strokes: they´re deliberately made.
´
OK : Fire For Effect:
´
P1010739.jpg
´
P1010740.jpg
´
P1010741.jpg
´
P1010742.jpg
´
P1010743.jpg
´
P1010744.jpg
´
P1010745.jpg
´
P1010746.jpg
´
P1010747.jpg
´
P1010748.jpg
´
P1010749.jpg
´
P1010750.jpg
´
I hope you´ve liked it,
´
As always, thanks for watching, :)
´
Evaluation and criticism are awaited,
´
Jokes & jerking welcome too (oh, and I know that my blond hair is simply irresistible 8) )
RG
 
I like what you're doing with the paint Jelly ,its a good head start on the weathering proccess too ;) , colours look great and with a few washes the detail is really going to pop .

Keep at it :)

Chris.
 
Jelly!!! ;D

Sorry for having missed so much of this awesome build. You started this about the time I went MIA. I just got back and was catching up on all the stuff I missed. When I found your build here and then I read through it 3 times and took some notes. ::)

Not that I’m a Sherman expert by any means because I'm not. But I do know a bit more about these Shermi bang-boxs then them Russian/Fin steel monsters. ;) I love the research and your choice of pictures that you used during the building of the kit. The fact that you did one that was not will documented is great and allows for the use of imagination! I think it is so Kool the thought you gave to the name “CHARON”. Very fitting even if it was never really used, I just love the meaning of the name.

Your build was very well done, nice and clean. That jerry can rack on the back is awesome as are the chains for the gas filler caps. I noticed you had it sitting on a wood block and was wondering if you mounted the lower hull to the block. I do this with my builds as you know. But the thing I really what to get more information about, is how you rebuilt the ball joint for the hull MG. Like you I’m often not happy with the way most of them look right out of the box. After reading what you did it sounds interesting. Could I ask you to build up another and take more pictures of this process as it is something I would like to try on my next model? The Battle damage is some of the best I have seen; it’s not overdone and applied convincingly. I really like the way the tow cable is done, a nice touch.

I totally understand the way you feel about painting. Often the success or frailer is based on the finish that is given to the kit. While frailer maybe to strong of a word here, the builder/painter is often the hardest person to make happy. So while we as the builder/painter may feel that we did not succeed in the painting most others will not feel the same way. Kudos to you for taking on color modulation! As can be seen in the pictures you have done a great job and based on your past weathering examples this little Shermi bang-box will turn out in total awesomeness! 8)

Now that I’m back I’ll be checking in on this everyday…no pressure there my friend!
Keep up the great work!

Best Regards
Eric
 
Thought we had some pics then ;D ;D :p nudge nudge ;)

Chris.
 
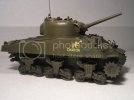
:) Well… back in the line after more than 03 months without touching “puramo” (no I was not dating with Rihanna, just with Salma Hayek)…
´
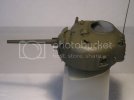
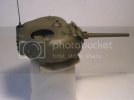
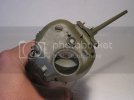
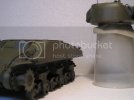
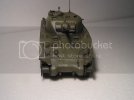
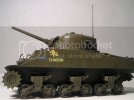
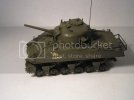
Not a lot of dramatic advances but… just added the periscopes… and last Sunday I´ve applied a homemade filter consisting in Humbrol 29 highly diluted.
´
I think that I´m going to wait until next weekend and thet I´ll decide what to do: either do some fading (I think it was called fading, the English term) or apply another filter layer…
´
Just a bunch of pics that I´ve taken today, not a great show, but I hadn´t a proper lighting (and my camera sucks, an I suck even more as photographer).
´
Here they go:
´
P1010767.jpg
´
P1010766.jpg
´
P1010765.jpg
´
P1010763.jpg
´
P1010762.jpg
´
P1010761.jpg
´
P1010760.jpg
´
Well, that´s all by now...
´
And, as always, jokes & “positive waves” comments are welcome ;D
Cheers
RG
 
good to see you getting up and running again jelly,

i thinks its looking pretty good right now
 
That's just what I was about to say Spud but you beat me to it.
A pin wash might be next if I were doing it to add definition to the details Roberto.
Your decal work is great,looks painted on.

Excellent so far my friend
Tony lee
 
Hi Jelly,

really nice build so far, looking forward to seeing it all weathered up


great stuff,


cheers

shane
 

Latest posts

Back
Top