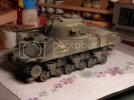
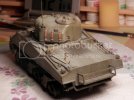
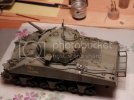
USMC M4A2 – 2 nd Pt. / C Co. / 1st CTB – “Galvanic” Op.

Thanks a lot for the backup, mates, sincerely.
´
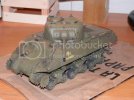
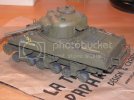
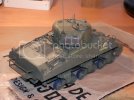
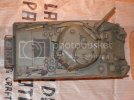
I didn´t wanted to get an intense contrast between the "base color" and the scratches and rubbing, so I´m trying to be subtle (tryin, I repeat). And also, I didn´t wanted to over-scratch it...
´
This painting phase is really being slow for me ! I´m far from finishing this phase (slow stage and slow modeller = veerrrry slooow process ;D ), because if I go into rush-mode, the Sherman can get out of this as from a cat fight, and I don´t want that. I think that before Tarawa those Shermans went into training in California and in New Caledonia (I think I´ve readen that somewhere), so they hadn´t seen any action before this (I write this because I´m tryin to do not too much chipping on this one).
´
Again guys, thanks for watching and for the comments :D
Cheers
RG
 
Jelly, your work is great... the details really show!!! your right no need to rush things. :D
 
Jelly, super job, so far. I like the small knicks and scrapes you put into the armor. You didn't go crazy, but enough to give the Serman some character! keep up the great work!
 
Well Done Jelly Man 8)

You live like Jack in the Box, In Out In Out In Out ;)

Waiting for more buddy, when you can find the time.
Tony lee
 
Howdy guys, :) , Eastrock, Rentar, Tony ... :D
´
Yeah Eastrock & Rentar, mates... ;) I really try no to rush during my modelling times... and I´m fully perceiving that this stage of the painting is critical in the aspect of not "overdo" the effect... I think that I will be able to get a moderate effect... but this is slow and I´m a slow cooker !!! Also, I´m trying to get a non-homogeneous green tone that doesn´t results in a very strong contrast with the OD base... ::)
´
Ah Tony, ;) I´ve had to go "wikipedia" to find what is a "Jack in the box" ;D ;D ;D ;D I didn´t knew the expression, now I do ! ;D but it would be better "Jelly in the box" ;D... oh "time" Tony... ::)

Time... today it was raining between 07AM - 09 AM, so after feeding the dogs, feeding the new-born kittens (yeah, in my month or so absence from home the family has growth in +5 cats and +2 swallows - those last in ther usual spring-summer nest) and doing some indoor chores, I´ve been able today to work more or less 40 minutes in the painting of the Sherman. Then the rain has stopped and I´ve gone outdoor to do another kind of chores :p ... but my lef arm is injured with "epitrocleitis" or so (I do not play golf, but sometimes I work hard at home with some tools, mainly two hand prunner, saw, and hoe... and from that kind of works I think that comes the injure ???) and when the pain has begun to ***k me nicely I´ve stopped working outside. I have the right arm elbow (inner part) pretty well "cooked" :p . And tomorrow early in the morning I have to go to my father´s home... as he passed away.. . ::) ...now I´m fixing things in that house in my "spare time" ::)
´
But like the turtle, I´ll finish the race. I don´t like to left anything without finishing... ;)
´
Cheers / Salud guys
 
:) Howdy mates,

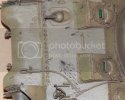
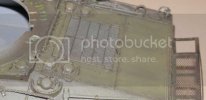
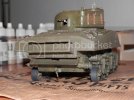
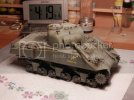
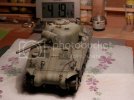
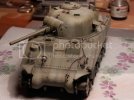
Here´s a sample of the kind of “micropainting” (or “microchipping”, I don´t know the exact term ??? ) in wich I´m currently working over the model.

It is slow. The progress is slow. I´ve never done never before this style of “micropainting” and I must recognize that it really takes time to get done.

I think that the model is “micropainted” by now more or less @ 70%. ::)

Here go some pics of how it is going so far…

Sinttulo8.jpg

Sinttulo6.jpg

Sinttulo4.jpg

Sinttulo2.jpg

Thanks for watchin´mates… ;)
Cheers,
RG
 
Jelly if you go any slower you will go back in time :p

She is looking really good all this micro stuff is showing the great results you are getting with it.
 
Jellyman your lead smears are great man 8)

You've got your marching orders Roberto,Getr Done ;)

Tony lee
 
Well lads it´s been a while since I posted here last time... as Spud says, I´m progressin´so slow that by now I´m back in 1.985 ;D

Some advances have been made: I must confess that the weathering stage is really a time-eater, a hungry one. ::)

First: Micro-chipping // micro-painting or whatever name it has. I can show you a few pics (please excuse me: taken some weeks ago). You must go rationale in this stage, because if you “go mad” it seems to me that the model could end dressed like a 60+ y.o. drag queen…

To do the micro-chipping this time I´ve only used a brush (I´ve not used the sponge, like I did in the Finnish SU-122).

To make a lighter OD to get a better contrast between the original OD and the rust, I´ve used a mix of black & dark yellow, and to paint the rust over it I´ve used German Camo Brown (all of them from Vallejo, yes). Take a look:

P6190262.jpg

P6190264.jpg

P6190265.jpg

P6190269.jpg

P6190270.jpg

Next stage was to add an effect that should combine this:

• White faded effect in the lower part of the tank, bogies, etc, due to the salt in the sea water and then going into a very hot environment.

• All the pics (except one) that I´ve seen of the Tarawa battle were taken in B/W. But I found a few color-pics taken in 1943 / 1944 from the US cemetery there and found that the “sand” in the island had a very pale grey color. So I took Tamiya´s XF-55 Deck Tan and made a very diluted solution and then proceeded to apply several washes to the bogies, rivets, angles, etc… again I didn´t want to “go mad” so I went cautious mode.

• I wasn´t convinced of the behaviour of the former water-based solution over the surfaces, so now I decided to create a color like Tamiya´s Deck Tan but with oils and pigments… I simply mixed white with a lil´ touch of black an added a very-very small quantity of Mig Productions Beach Sand pigment. Again I used this mix highly diluted in turpentine, and applied it to different areas of the Sherman, cautiously...

• Reading on the WWW I´ve found that Tarawa was not just “beach sand” as we know. It had also a lot of some kind of dust, a very thin one, made of crushed coral, and it seems to have the consistency of flour. I´ve readen that this dust went “airborne” just by stepping over it with the feet! So now I can explain myself why the few pics of the Shermans in Tarawa look so “dusty”. I made several consecutive airbrush strafes over the tank, this time with a higly diluted solution of Deck Tan and Tamiya solvent…

• After dusting the Sherman… I applied some oil streaks / fuel streaks from AK interactive…

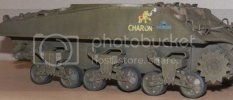
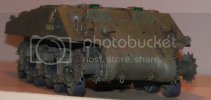
Here are the results. I still have to pigment black in the exhausts area and apply some metallic pigment (I LOVE this AK pigment) in the main gun bore, in the hits…

P8170288.jpg

P8170289.jpg

P8170290.jpg

P8170291.jpg

P8170292.jpg

P8170293.jpg


I´ve begun to weatherize the tracks, just in the same way that I´ve explained. I really takes its time (at least for a Slow-Hand like me mates). But finishing the tracks it´s not The End of this story…

As always, positive-waves comments and jokes are welcome… ;)
Cheers
RG
 
Looking good Jelly. I can see you've done your homework. Take your time and have fun.
 
wow Jelly i taught this one had hit the bin long ago :p

She is looking fantastic bud, You should have it done before the start of 2014 i recon :p

I'd like to gt hold of a decent Sherman kit and build one because they are cool looking
 
Hey Jelly, You have definitively crafted this Sherman into a Jewel. The overall
weathering is sweet. Like the bullet strikes and shell hits on it. Those reference
photos you have show these tanks with lots of hits. Well done. Keep up the
great work. Bill
 
Hi Jelly,

really like what you've done with the M4 built the same kit a few years back, needless to say yours same out way better than mine :p


great stuff,


cheers,


shane.
 
Hey Jelly my man!

It has been sometime since I last commented on the outstanding build. This Sherman is coming along great and the fact that you are taking your time shows in the results. Remember only YOU have to be happy with how your model.

Keep up the great work! 8)
 
Hey! :D
It seems that today here the sun is going to shine with strength ! :D

Nice to hear from all of you… :)

Geegad, TRM, noname, Spuddy (you´re very optimisticm my sweetheart !!! I bet you this pie won´t exit the oven until summer 2.016 ha,ha,ha ), Panzerman, longlance67, errains… thanks a lot for the comments, my friends! Coming from modellers like you, it is a really booster!

Yeah I´m going really slow - I openly recognize it-, but I don´t / won´t quit… ;)

Next step:

I consider almost finished the track painting & weathering... after painting them in Tamiya brown, I´ve applied a very diluted wash of “slate” grey (made with black & white oils plus a very, very little quantity of “sand beach” pigment to add a subtle yellowish shade to the gray…)

next... spray to the tracks a very, very thinned coat of Tamiya Buff... and then add some metallic pigment (the AK one, that stuff works superb, believe me) to the exposed parts of the forward wheels, track teeth & so…

I´m a little worried about the track shag ::)… but maybe I´m crossing the bridge before arriving to it… lets see what happens…

I´ve got the Jerrycans (I´ll use 4 of them)… I need some more stuff… maybe an odd ma deuce ammo box, a helmet here, etc… but not in large quantities… those tank hit the beach really “light” of extra loading (except for the water jerrycans).

The most difficult thing I´ve found in this build is… not to “overdo” the weathering … I think I´ve got it, YOU are the Judges! ;)

Thanks again, my friends! :D
Cheers
Roberto.
 
Hey Jelly! :D

It looks like you got a great plan there and your weathering look just about right. :)
Not sure what you mean about the "Track Sag" but keep in mind that Sherman tracks are what is call "live" and therefore do not sag or have vary little sag in them. The "live" tracks use rubber bushings in and around the pin that prevent them from sagging where as German and Russian tracks do not, that's why they sag. Of course there is more to this but thats it in a nut-shell.

Hope that is not to confusing ::)
 

Latest posts

Back
Top