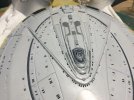
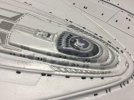
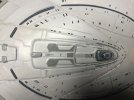
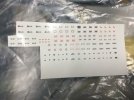
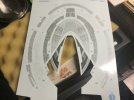
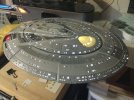
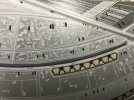
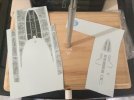
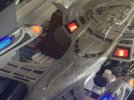
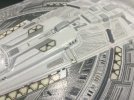
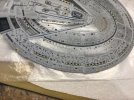
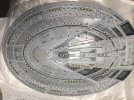
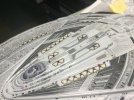
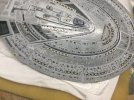
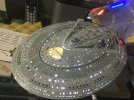
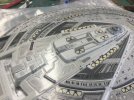
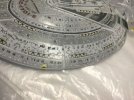
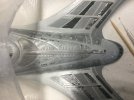
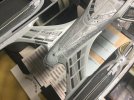
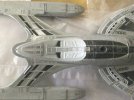
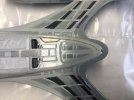
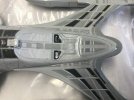
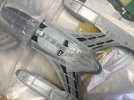
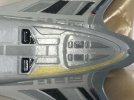
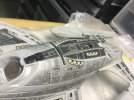
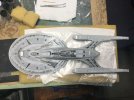
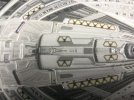
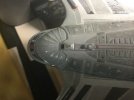
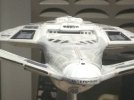
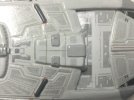
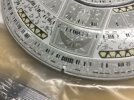
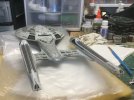
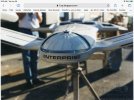
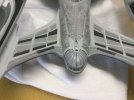
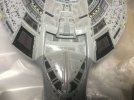
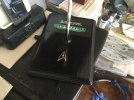
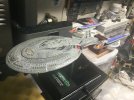
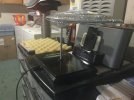
USS Enterprise E from Star Trek Nemesis

I gave the nacelle aztec decals a few coats of liquid decal film to thicken and hopefully toughen them up.
I may lay the individual strips down in sections anyway, easier to handle and squeeze out any water from underneath that way:
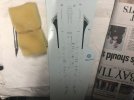
51175752202_a51b261f64_z.jpg
USS Enterprise E - Nemesis-WIP - Nacelle Aztec Decals by Steve J, on Flickr

meatloafr over on All Scale Trek printed me up several sizes of decals for the RCS thrusters on the saucer and nacelles and the black tuning fork that goes on the front between the bussards.
Saves me from having to paint them on.
Also he printed me several variations of a Nemesis decal for the base:
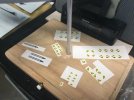
51177218834_ab3dbe4a1d_z.jpg
USS Enterprise E - Nemesis-WIP - More Decals by Steve J, on Flickr

I was able to glue down a single short piece of the PE nacelle grill that was popping up a tiny bit.
Hardly noticeable from most angles but naggingly irritating to the perfectionist in me.
Micro Krystal Klear was applied under the offending 1/4 inch section using a toothpick and
held down with my clean thumbs at each end until the glue set, about 5 minutes.
The glue dried clear but I went ahead and cleaned out any excess in the trench either side
using an exacto knife to slice along the edge of the grill (so as not to grab the glue under the grill as
well when I picked it out) followed by a quick pass with alcohol on a pointy small cotton swab to dissolve any remaining gunk:
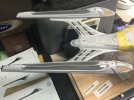
51177218819_7eefa17ab3_z.jpg
USS Enterprise E - Nemesis-WIP - Nacelle Grill Glue Down by Steve J, on Flickr

Taking a slight detour from decals...

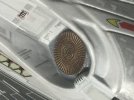
These grills turned out great. Had to spend some time picking out bits of Testors copper enamel
from the teeny tiny holes with a sharp metal pick but it was worth the effort. The trench aztec decal looks great too:
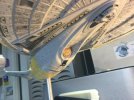
51176432316_5315ef7a52_z.jpg
USS Enterprise E - Nemesis-WIP - Deflector Dish Detail by Steve J, on Flickr

And veering way off course...

Gratuitous shot of the finished lower saucer aztec and escape pods. Nice shot of the lit deflector grills too:
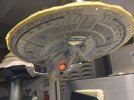
51177218854_6344b6e7e2_z.jpg
USS Enterprise E - Nemesis-WIP - Lower Saucer by Steve J, on Flickr

Rest assured I have since gotten back to the task at hand and have but three sections of decal left to complete the nacelle Aztecs.
Of course I won't be completely done since the decals didn't quite fit right so a few will need ... TOUCHUPS!

So I will end up having to brush paint the areas that need touch ups (or simply to be filled in) with black or medium grey paint.
First though I will seal the decals with a lacquer gloss coat before applying my paint over, or adjacent to, the decals.
 
Last edited:
Finished the aztec decals on the nacelles. Just need to add the tuning fork decal to the front and RCS thrusters to the back. Also will add the stripes and registry decals:

51186310273_fa2c82ffc5_z.jpg
USS Enterprise E - Nemesis-WIP - Nacelle Decals by Steve J, on Flickr

These grey and black patches up forward fit poorly. I ended up overpainting the black decal section to fill in a gap between it and the grey patch. The black section was also about 1/4 inch too short; and didn't quite reach the end of the slot in the hull. Anyway, the touchups went well. I sealed the decal with clear gloss lacquer before brushing with thinned black enamel. The enamel was a little darker than the decal so I painted the whole section:

51187162380_8e0f454636_z.jpg
USS Enterprise E - Nemesis-WIP - Nacelle Decals by Steve J, on Flickr

Should be finished with the nacelles tomorrow. Then I'll tackle the upper saucer decals.
 
The "tuning fork" decals went on between the bussard collectors without too much incident:

51189164694_a15002f806_z.jpg
USS Enterprise E - Nemesis-WIP - Nacelle Fork Decal by Steve J, on Flickr

Yesterday I added Aztecs to the upper bridge superstructure as well as the dark blue dome on top. Not everything you see in this photo is decal though as I did a number of medium grey panels with a brush. The decals fought me from the start and I had to perform some miraculous recoveries refloating with warm water to save a few. The tip of the dark grey "scythe" on the starboard side at the front got irreparably mangled so I will need to either paint or add a section of cadaver decal to restore the tip. No big deal:

51193990471_0327d4abc4_z.jpg
USS Enterprise E - Nemesis-WIP - Bridge and Superstructure Aztecs by Steve J, on Flickr

The dome decal went on the easiest after I took my time cutting it out from the decal sheet with a sharp exacto knife.
After positioning and tamp down with a swab using Micro Sol, I brushed it with Solvaset which got rid of any remaining wrinkles of which there weren't many:

51194204483_d9c452fd29_z.jpg
USS Enterprise E - Nemesis-WIP - Bridge and Superstructure Aztecs by Steve J, on Flickr

After a few coats of Solvaset:

51194761494_18b1bd4bef_z.jpg
USS Enterprise E - Nemesis-WIP - Bridge and Superstructure Aztecs by Steve J, on Flickr


ST Modeler included these tiny added "window" or "ports" or somethings for added detailing, it also includes the round access ports for the aft end of the main upper superstructure that will fit nicely on the photo-etched:


51193282232_c6e11c87c5_z.jpgUSS Enterprise E - Nemesis-WIP - Extra Detail Decals by Steve J, on Flickr
 
So far so good. The top decals have gone on very well:

51198858566_3f8cb29f77_z.jpg
USS Enterprise E - Nemesis-WIP - Upper Saucer Decals by Steve J, on Flickr

Decided to add the thin black panel lines on top and sides of the main shuttle bay control room in this CGI image using donor decal material:


USS Enterprise E - Nemesis-WIP - Control Room CGI Image by Steve J, on Flickr

Using some leftover decal material from a 1/2500 Enterprise D kit I carefully sliced sections of thin black stripes to lay atop the saucer shuttle bay control room:

51199067473_cf8cbf1f77_z.jpg
USS Enterprise E - Nemesis-WIP - Donor Decals by Steve J, on Flickr

The black stripes I cut off the leftover donor decal sheet were used to make the panel lines seen on the top and sides of the shuttle bay control room. Using decal material was the only way to make these lines as I could not foresee being able to make such extremely thin lines using a brush. After the decals set I brushed on a coat of Future hence the glossy finish:

51199067488_b22c9c7f12_z.jpg
USS Enterprise E - Nemesis-WIP - Shuttle Bay Control Room Panel Lines by Steve J, on Flickr


Finished up aztecing the upper saucer. Spent an hour poking holes thru the windows openings before giving them all an individual good brushing with Solvates to shrink the decal film down tight inside the opening prior to filling with Krystal Klear:

51201485648_aa2bbc22b1_z.jpg
USS Enterprise E - Nemesis-WIP - Upper Saucer Aztecs Done by Steve J, on Flickr

While working on the saucer I covered the nacelles and the aft end of the secondary hull with a wax paper bag salvaged from an empty box of Cheerios. It fits nicely over the nacelles as well as the saucer to protect the areas already decaled from getting nicked or rubbed:

51200569002_b4993bcacd_z.jpg
USS Enterprise E - Nemesis-WIP - Wax Paper Bag by Steve J, on Flickr

I like how the Raytheon Effect looks under the decal. Still need to add the RCS thruster decals and the escape pods. Once those are on I'll spray with Glosscote before applying the ships registry and insignia decals. Also any stripes or additional detail decals:

51202062119_fd45f472a8_z.jpg
USS Enterprise E - Nemesis-WIP - Upper Saucer Aztecs Lit by Steve J, on Flickr
 
Thanks Q!
Here's a video showing current progress...

51202958527_04147db0f2_z.jpg
USS Enterprise E - Nemesis-WIP - Current Status Video by Steve J, on Flickr

Next thing will be aztecs for the upper secondary hull followed by the lower secondary hull.
Seal entire ship with Glosscote before adding ship's name and registry decals and stripes.
And any additional hatches or whatever detail decals I want to add.
 
Thanks Wolf Star! She's far from a perfect build but most of my more complex builds have some small deficiencies. Still, I'm amazed at some of the saves I've had, all with this ship.
She seems to have overcome almost all the obstacles I have placed in her way due to my own failings. Still I persevere until the job is done, which is all a modeler can do sometimes.
I do have to say seeing the decals going on has rejuvenated my enthusiasm for this build and I'm really looking forward to photographing her when she FINALLY launches.

Urimomo,
Dude… That is one SERIOUS thumbs up.
Thank you.
 
Last edited:
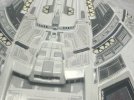
Sorry for no posts in awhile Enterprise E enthusiasts. This will be a somewhat wordy post.

I know... you are all shocked!

Here we go...

After finally figuring out what they were, I cut out several of these bits from the ST Modeler decal sheet.
These extremely small markings get spaced evenly around the sides of the phaser strips.
The ends of the phaser strips get a half circular decal and I had already done those.
Honestly, I debated even putting these on but thought they might help add a little scale to the ship if placed carefully and evenly.
So, in for a penny, in for a pound or something like that, and I took the plunge.

Also shown are the sharp pointy tweezers to pick up and soak each individual decal
in warm water and a scribing tool (?) with a screw nut to lock in a measurement, to use for spacing the decals.
This will add hours more to this build as each decal can take up to a minute to pick up, soak, place with a brush, and settle down.
There are 130 decals alone for the long arcing upper and lower phaser strips on the saucer not to mention the others aft and elsewhere:

51212012832_12420ebf58_z.jpg
USS Enterprise E - Nemesis-WIP - Tiny Phaser Strip Node Decals by Steve J, on Flickr

There are 66 of these "nodes", as I am calling them, on the long loop on top of the saucer and 64 on the two on the bottom; at least according to the blueprints of the Sovereign I have seen online.
This image is at the start but it ended up taking me at least 2 hours for this one section and the one opposite it on the port side.
Thankfully it gets faster as you go along and gain experience and can mirror.
I am using a synthetic flat soft brush which is amber colored to pick up and place the decals. The decals show up well against the amber.
Once on the model I position them using the brush and a toothpick, then using MicroSet, I tamp them down with a cotton swab before brushing with Solvaset later:

51213790120_f335ca78ab_z.jpg
USS Enterprise E - Nemesis-WIP - Tiny Phaser Strip Node Decals by Steve J, on Flickr

I applied Aztecs to the forward lower secondary hull just aft of the deflector dish.
The dark grey recessed panel in front of the phaser strip required three treatments with Solvaset to get it to finally shrink down tight with no air bubbles. You can also see a line of four oblong circles in the middle of the deflector trench I added to match the Soveregn blueprints I found on the internet:

51222896367_cf74950368_z.jpg
USS Enterprise E - Nemesis-WIP - Lower Secondary Hull Aztec Decals by Steve J, on Flickr

Finished applying the upper secondary hull and strongback aztec and panel decals.
Had to trim the black "inverted bell curve" shaped decal to fit the sidewalls of the shuttlebay porch after the Nemesis modifications.
Still need to add spine stripes and the sickle shaped decal in front of the clamshell doors.
Also have a couple of docking ports for the secondary hull to add:

51224678050_c8a8599309_z.jpg
USS Enterprise E - Nemesis-WIP - Strongback Aztec and Panel Decals by Steve J, on Flickr

These are the remaining Aztec and panel decals for the sides and underside of the secondary hull:

51223602906_9e0cd4c726_z.jpg
USS Enterprise E - Nemesis-WIP - Last of the Aztec Decals by Steve J, on Flickr

I saved these remnants from when I trimmed the decal to fit the sidewalls I had added to make the Nemesis version of the E,
I should be able to use them as donors to add the borders to the decal on the model:

51223602901_4b8dd6568b_z.jpg
USS Enterprise E - Nemesis-WIP - Strongback Bell Curve Decal Remnants by Steve J, on Flickr

It really helps to cut these larger decals up into sections before soaking and placement. Less chance of the decals ripping, folding, or wrinkling which they tend to do at the slightest provocation:

51222896352_9827e84739_z.jpg
USS Enterprise E - Nemesis-WIP - Strongback Aztec Decal Low Light by Steve J, on Flickr

Next up...

Docking ports and wing dings.

:)
 
Beautiful-looking work here. More patience than I would have in dealing with those teeny-tiny decals
 
Sorry for the delay in posting my progress.
I have more pics but I thought I'd save them for later since everyone knows I always try to keep my posts from getting too long and wordy.

Yeah...

Right...


Anyway, here we go.

Docking Ports and Wing Dings...

Added these three round docking port decals on the sides and back of deck 3. Had to make my own light grey decals in thin strips to lay down on top of the hangar deck in front of the side ports out to wrap over the edge. The aztec decal sheets did not include them so I cut some from my donor decal pile. The transporter pads were placed too. I also added a maintenance hatch just forward of the photorp launcher courtesy of the detail decals. It's barely visible in the CGI image:

51229017436_bd1c89311a_z.jpg
USS Enterprise E - Nemesis-WIP - Deck 3 Docking Port and Transporter Emitter Decals by Steve J, on Flickr

Placed the docking port decal on the aft end of deck 3 under the dual photorp launcher:

51228311172_ac24bc347a_z.jpg
USS Enterprise E - Nemesis-WIP - Deck 3 Aft Docking Port by Steve J, on Flickr

What started off with using decal material ended up being a hand brushed "wing ding" aztec on the lighter band of the upper saucer. I just wasn't satisfied with how light the decal's aztec pattern was on the light grey of the background. So I used the CGI images to paint some of the shapes a darker medium grey, other shapes I just "winged" it. The pattern is rather random and mostly evenly spaced. I am not going to paint ALL the wing dings, just enough. I'm using MM flat Neutral Grey enamel. What you see took me two hours to do what with painting and touch up with thinner and a microbrush, I estimate it will take about 8 or 10 hours to do the rest of the saucer band:

51230773245_ca9c0806f4_z.jpg
USS Enterprise E - Nemesis-WIP - Upper Saucer Aztec Wing Ding Brushing by Steve J, on Flickr

I decided to finish the starboard side before moving on to the port side. Took about 4 hours. Now I just need to mirror the wing dings so both sides match. If you could make a living painting wing dings, I'd be rich!

51232517286_f5eb073a0d_z.jpg
USS Enterprise E - Nemesis-WIP - Upper Saucer Starboard Aztec Wing Dings Done by Steve J, on Flickr

I saved this image at the largest size allowed on my iPad, the better to see all the tiny figures I painted by hand with an 18/0 brush. Tap or click on the image to see the full size image on Flickr!. If you look closely you may find a dog, a duck, a squirrel, a few snakes, and even a tiny TOS Enterprise, all done as "wing dings".
There are also a lot that look like birds.
95% of the time, the resemblance was unintentional, I only discovered them after the fact:

51240283350_09fae35c06_z.jpg
USS Enterprise E - Nemesis-WIP - Upper Saucer Aztec Wing Dings Mirrored and Done by Steve J, on Flickr

Moving along...

Having finished hand brushing the medium grey wing dings in the lightest grey saucer band, I revisited some of the detail decals on the bridge and decks 2 and 3. Added a few access panels to the sides of deck 3 and some others to the bridge and deck 2. Where possible, I chose decals applied to mirror those found on the original studio model:

51240314455_fcf234d04a_z.jpg
USS Enterprise E - Nemesis-WIP - Upper Saucer Detailing by Steve J, on Flickr

Went back and did a little aztec decaling on the secondary hull forward under and behind the deflector trench.
The rest of the underside will get decals last:

51229234063_4e05603d05_z.jpg
USS Enterprise E - Nemesis-WIP - Forward Secondary Hull Lower Aztecs by Steve J, on Flickr

Next...

Painting the "unlit" unopened windows with flat black enamel and filling the lit drilled out window ports with Kristal Klear.
That should only take 8-10 hours...
 
Last edited:
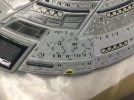
Lots of tiny windows...

The unopened windows were painted with black enamel using a 20/0 brush:

51243443143_993135f1c1_z.jpg
USS Enterprise E - Nemesis-WIP - Upper Saucer Windows Painted and Ship Registry Decals by Steve J, on Flickr

51243244361_f83cdc7af0_z.jpg
USS Enterprise E - Nemesis-WIP - Upper Saucer Windows Painted by Steve J, on Flickr

Next I'll fill the opened windows with Kristal Klear...

Microscale Kristal Klear is like thick white glue which I used along with a fine
tipped microbrush, toothpick, and cotton swab to form clear window panes.
Hmmmm, might be time to get a new vinyl work mat pretty soon:

51257201225_fea3a8ca33_z.jpg
USS Enterprise E - Nemesis-WIP - Kristal Klear by Steve J, on Flickr

A sharp toothpick worked great for filling the window openings with Kristal Klear.
Sometimes a little minor cleanup with water and a microbrush was needed but not every time.
After I was finished I noticed a side benefit to using the Kristal Klear.
Earlier during the window drilling phase, I had pushed a small piece of clear styrene too far into one of the lower saucer
window ports and it had fallen inside of the model where it would rattle around whenever I tilted the saucer one way or the other.
This bothered me but I did not want to have to open the model up to retrieve it or have to drill a large hole and hope it fell out.
Using the thick, sticky, white glue that Kristal Klear is to fill dozens of windows in the saucer turned out to be the answer.
The little clear plastic piece must have gotten stuck to some of the glue that would have leaked inside the model and now
when I twist and turn the model the annoying rattle is gone! Nice!

51256357288_85b7e5c5c5_z.jpg
USS Enterprise E - Nemesis-WIP - Toothpick Glue Applicator and No More Rattle by Steve J, on Flickr

All closed windows on the saucer have been painted black top and bottom.
Then I started filling each open window with unthinned Kristal Klear starting with
the slotted ports on the back of the bridge followed by the windows on decks 2 and 3.
You can see fresh KK in the window slots along the back of deck 3 between the docking ports in this image:

51257201160_6567a5bf4c_z.jpg
USS Enterprise E - Nemesis-WIP - Window Filling by Steve J, on Flickr

I brushed each of the unopened, undrilled window ports with flat black enamel using an 18/0 brush.
The upper saucer took about 4 hours to do. The open, drilled ports are filled with Krystal Klear which dries clear in about 20 minutes.
You can see some of the fresh KK in the rim windows to the left which look milky white.
The KK in the windows along the rim to the right has dried clear:

51257201120_5f96a7d74a_z.jpg
USS Enterprise E - Nemesis-WIP - Black Windows by Steve J, on Flickr

Next... Some strongback detailing.
 
Time for more tortuous progress my long suffering friends...

I cut these tiny bits of red decal film to place on the top of the secondary hull as shown in the CGI image. 22 altogether to place on the teeth of the "combs" on either side of the spine:

51257292497_0785ebf370_z.jpg
USS Enterprise E - Nemesis-WIP - Tiny Red Rectangles by Steve J, on Flickr

I cut the tiny red rectangles rom leftover decal material. I used my pointy tweezers to soak them in warm water, then I used a microbrush to position them carefully on what I am calling "combs" on each side of the longer of the two raised spines running down the middle of the strongback atop the secondary hull:

51258220518_852a95726b_z.jpg
USS Enterprise E - Nemesis-WIP - Little Red Strongback Dots by Steve J, on Flickr

I added a few more panels using my donor decals to complete the strongback decaling:

51259060575_3c16f154ce_z.jpg
USS Enterprise E - Nemesis-WIP - Strongback Decals Done by Steve J, on Flickr

Lower secondary hull panel and aztec decals. The big one around the power jack hole developed a few wrinkles that would not straighten out until I hit her with 3 treatments of Solvaset. Still there are some minor stripes of white that I will need to retouch with Gunship Grey where I wore away the ink with my thumbs trying to get out the wrinkle out. No big deal, I had to retouch these same dark grey toned areas on the saucer decals already and I should be able to blend the paint in pretty easily once I coat the decal with Future and give it a day to dry. Also, these are where the escape pods are located which will cover up most of the areas I'm touching up!
Still need to apply the aft lower side aztec decals and the aztec decals will be DONE! Ahahahaha! DONE!!!

51263706290_747fa4c173_z.jpg
USS Enterprise E - Nemesis-WIP - Lower Secondary Hull Decaling by Steve J, on Flickr

Later...

The CGI model had some additional light grey striping around the lower aft of the secondary hull. They partly surround the raised "bullet" shaped area under the aft shuttle bay. Here I have masked off and painted the starboard stripe with neutral grey enamel. The masking was made easier when I found the decal paper in my trash that the aztec panel decal for that area had slid off of. I used it as a template for cutting the thin strips of Tamiya masking tap:

51265877035_9130abeccf_z.jpg
USS Enterprise E - Nemesis-WIP - Aft Secondary Hull Stripe Detailing by Steve J, on Flickr

After removing the masking tape. I used a microbrush and some weak thinner to clean up the edges and touched up some sections with a 20/0 brush but this went quite well I thin:

51265577914_14a6dd543a_z.jpg
USS Enterprise E - Nemesis-WIP - Aft Secondary Hull Stripe Unmasked by Steve J, on Flickr

After allowing the paint to dry I used tracing paper to copy the shape of the grey stripe "horn" at the forward end of the starboard stripe.
I will flip it over for use as the port side template for cutting a piece of Tamiya tape. This will save me 15-20 minutes at least:

51265577909_30ed0c4e7a_z.jpg
USS Enterprise E - Nemesis-WIP - Aft Secondary Hull Detail Tracing by Steve J, on Flickr

Port horned stripe after masking and ready for paint:

51264106747_47f6d4f464_z.jpg
USS Enterprise E - Nemesis-WIP - Aft Secondary Hull Stripe Masking by Steve J, on Flickr

The secondary hull Aztecs are done which means all the aztec decals are on the model! Also the escape pods decals were applied. All I have left are stripes and ship name and registry decals for the nacelles and the pennants for the sides of the secondary hull and any detail decals I want to place here and there. Oh and I need to paint the black windows on the lower hull and fill with Kristal Klear then do any touch ups to windows that need more KK:

51268425377_009dc57f00_z.jpg
USS Enterprise E - Nemesis-WIP - Aft Secondary Hull Lower Aft Aztecs and Escape Pods by Steve J, on Flickr

Now have to fill lower secondary hull windows with KK and paint the others black. Then add the last decals before applying final clear coats:

51268445277_32e95702f5_z.jpg
USS Enterprise E - Nemesis-WIP - Ventral Aztecs Done by Steve J, on Flickr

Next up will be application of registry and pennant decals and then detailing.
 
Update...

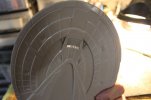
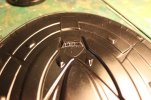
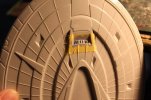
Finished the trench off with some brushed on Mister Surfacer:

49728180993_5cbcc4790d_o.jpg
USS Enterprise E - Nemesis-WIP-Backside of Deflector Trench by Steve J, on Flickr

49728730751_042b411126_o.jpg
USS Enterprise E - Nemesis-WIP-Finished Deflector Trench by Steve J, on Flickr

Using a pinvise I drilled and filed out these slots in the ventral saucer indent. This represents the auxiliary deflector array according to an LCARS schematic I found online:

49729047287_966eea8c92_o.jpg
USS Enterprise E - Nemesis-WIP-Aux Deflector Ports by Steve J, on Flickr

You always need to go at these ports from outside and in with this relatively thick plastic. So cleanup is a big thing when I drill my ports:

49729047212_ec7c71cd76_o.jpg
USS Enterprise E - Nemesis-WIP- Aux Deflector Ports from Inside by Steve J, on Flickr

I gave the aux deflector array a few coats of thick primer to smooth over any imperfections during drilling and filing:

49728182928_d8955e21ba_o.jpg
USS Enterprise E - Nemesis-WIP- Mister Surfacer by Steve J, on Flickr

Not bad. I'll do a little more work to make the slots more uniform before final hull coats:

49729046887_d2c01a805a_o.jpg
USS Enterprise E - Nemesis-WIP- Aux Deflector Array Light Test by Steve J, on Flickr

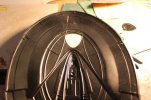
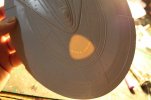
Removed Tamiya tape and sanded clean the upper saucer floodlight shape for the Raytheon Effect:

49729045177_ed02df8824_o.jpg
USS Enterprise E - Nemesis-WIP- Demasking Upper Saucer REffect by Steve J, on Flickr

Once you put a bright cool white LED at the root of the flood inside it will shine thru for a very nice effect from outside I think:

49728730126_8b6c73705b_o.jpg
USS Enterprise E - Nemesis-WIP- Floodlight Effect After Demasking by Steve J, on Flickr

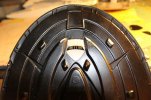
Removed mask from inside lower saucer:

49728182508_17dbc5796b_o.jpgUSS Enterprise E - Nemesis-WIP- Demasking Lower Saucer REffect by Steve J, on Flickr

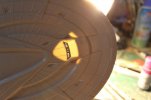
Later on I realized I needed to include the small triangular areas even though they catch less light than the areas I had already made. You can see where they are missing in this image. Pie slices. So I went back and sanded the areas inside the hull to close the arc of illumination from the flood:

49729046607_6aed8a6103_o.jpg
USS Enterprise E - Nemesis-WIP- USS Enterprise E - Nemesis-WIP- Floodlight Effect After Demasking by Steve J, on Flickr

After sanding off the trench shoulder triangles to complete the arc of illumination (the trench on the outside is a hump on the inside) I like the effect much better than before:
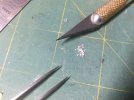
49729045572_170b2bb622_o.jpg
USS Enterprise E - Nemesis-WIP- Lower Saucer REffect Test by Steve J, on Flickr

More to come with fun with aluminum tubing and power jacks/plugs.
Also more light blocking and white coats!

Stay tuned my fellow inmates!
I plan on doing this technique on my upcoming 1/350 TOS Enterprise build. And will be eventually do this to another one which I will convert into my original fan design the Condor, which I will be covering with floodlights like the refit as its supposed to be designwise in between TOS and TMP.
 
Dorsal aztecs and windows done...

Will need to go over the saucer windows again with Kristal Klear to fill any that look too deep after the first treatment; not unexpected and should go quickly with all the practice I've had making windows:

51272547677_58afd1d352_z.jpg
USS Enterprise E - Nemesis-WIP - Dorsal Aztecs and Windows Done by Steve J, on Flickr

Decals all on and windows filled again. Will get started on the base tomorrow:

51275206856_2c7d17dd76_z.jpg
USS Enterprise E - Nemesis-WIP - All Decals Done by Steve J, on Flickr

Pennant and registry decals applied. Additional KK added to any windows that needed it. Did a little more pointing up here and there.
I'll go back and see if I want to add any more of the detail decals.
Then she'll get her clearcoats followed by anything I want to do with Tamiya pastels.
I may not do anything with weathering though. Need to work on the base soon:

51276230715_cf9341eb1c_z.jpg
USS Enterprise E - Nemesis-WIP - All Decals Done by Steve J, on Flickr

Details...

Used the aftermarket detail decals for the two hatches forward of the aft facing dual torpedo launcher.
This matches the detailing seen on the Insurrection studio model:

51277079847_110e0cd4d2_z.jpg
USS Enterprise E - Nemesis-WIP - Hatch Details by Steve J, on Flickr

Used a decal from my donor pile. A little round window from the 1/1000 scale PL Romulan Bird of Prey kit.
It frames the aft dorsal shuttle bay beacon nicely. I used another one for the beacon on the ventral side:

51277831021_2e9377a011_z.jpg
USS Enterprise E - Nemesis-WIP - Aft Upper Beacon Detail by Steve J, on Flickr

Used the aftermarket detail decals. These red oblongs match the detailing seen on the Insurrection studio model.
I am going to add some donor pile and detail decals to the shuttle bay 2 doors I think:

51278850865_e141a335a4_z.jpg
USS Enterprise E - Nemesis-WIP - Pylon Vent Detail by Steve J, on Flickr

Used the aftermarket detail decals trimmed to make a decal with four black lines for the grill below the deflector dish.
These match the detailing seen on the Insurrection studio model:

51277997853_64316a4620_z.jpg
USS Enterprise E - Nemesis-WIP - Deflector Housing Grill Detail by Steve J, on Flickr

Used the red lozenge shaped aftermarket detail decals. This matches the detailing seen on the Insurrection studio model:

51277830981_c47624b209_z.jpg
USS Enterprise E - Nemesis-WIP - Shuttle Bay 1 Control Room Details by Steve J, on Flickr

Used the aftermarket decal for the dorsal bow transporter emitter pads:

51277830976_21133516af_z.jpg
USS Enterprise E - Nemesis-WIP - Transporter Emitter Pad Details by Steve J, on Flickr

Used the aftermarket detail decals to match the round docking ports seen on the sides of the CGI model.
There is one on each side just above the pennant stripes:

51277079812_4854e7f1d3_z.jpg
USS Enterprise E - Nemesis-WIP - Docking Port Detail by Steve J, on Flickr

Next up... Detailing shuttle bay 2's doors.
 
My setup for decaling and detailing using foam padding, an old t-shirt, and wax paper to keep off dirt and whatever is on my dirty workbench.
I need to do some serious cleaning after this build is done:

51286282502_bd14fc5dfa_z.jpg
USS Enterprise E - Nemesis-WIP - E from Astern in Wax Paper dock by Steve J, on Flickr

image of the "Insurrection" studio model stern:

51279308312_323d66dee0_z.jpg
USS Enterprise E - Nemesis-WIP - Studio Model Shuttle Bay Doors by Steve J, on Flickr

Using the photo above I added detailing to the shuttle bay doors and aft end. I also repainted them a slightly darker shade of grey.
Good use was made of my donor decal stash and the detail decals too for the thinner black strips
and wing dings... or whatever those little red oblongs are in the corners:

51286282427_0183e90f7f_z.jpg
USS Enterprise E - Nemesis-WIP - Shuttle Bay 2 Door Detailing by Steve J, on Flickr

I don't think I posted a good closeup of the new tapered inverted bell curve shaped decal I had to modify to fit the more smooth
Nemesis saucer to secondary hull transition zone I sculpted from AVES.
Anyway I was pleased to be able to adapt the white border pieces from the trimmed bits to frame the new pointed tips.
You can also see the little L-shaped decals I added to the corners of the metallic black impulse engine bent frames:

51287028531_c39cc20e99_z.jpg
USS Enterprise E - Nemesis-WIP - Secondary Hull Bell Curve by Steve J, on Flickr

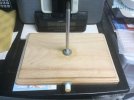
Starting work on the base, Mixed up some AVES Apoxy Sculpt and packed it around the power jack and the bottom
of the aluminum display tube, a metal washer came in handy too.
It'll be painted gloss black with a custom decal I got from meatloafr over on the All Scale Trek site:

51287750524_9977358862_z.jpg
USS Enterprise E - Nemesis-WIP - Base Puttied by Steve J, on Flickr

I used some donor decal material to add some panels and dark lines on the sides and around the photorp barrels:

51293733870_5cc9282e1c_z.jpg
USS Enterprise E - Nemesis-WIP - Photorp Launcher Detailed by Steve J, on Flickr

I gave the base 2 coats of Future floor wax. May get 1 more:

51291983982_8974275c8b_z.jpg
USS Enterprise E - Nemesis-WIP - Base Done and Futured by Steve J, on Flickr

The base has gotten three coats of Future. The ship has had as many or more. All decals are on aside from a few niggling detail decals here and there. I'll finish that today and apply the finishing clearcoats. I figure no Glosscote with all the Future but about three coats of Dullcote might be needed to bring her down to a more satin finish:

51295208980_8943a92b27_z.jpg
USS Enterprise E - Nemesis-WIP - Glossy Ship and Base by Steve J, on Flickr

Finally found a good use for the brass photo-etch Enterprise insignia leftover from a prior set of Paragrafix PE:

51296580533_eca8bf8c5f_z.jpg
USS Enterprise E - Nemesis-WIP - Glossy Ship and Base by Steve J, on Flickr

I keep saying this but... just a few more little things and she gets her final clear coats.
Then I'll get the camera, table, and lights set up for her finished shots.
 

Latest posts

Back
Top