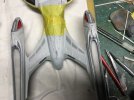
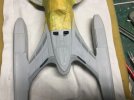
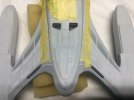
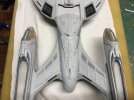
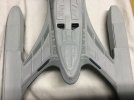
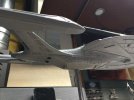
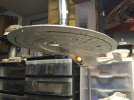
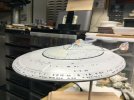
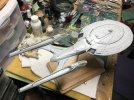
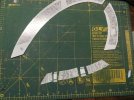
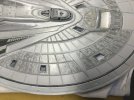
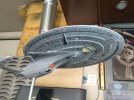
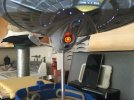
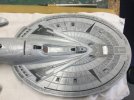
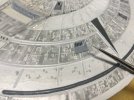
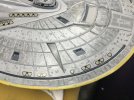
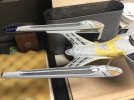
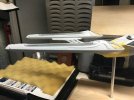
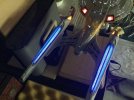
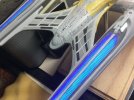
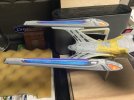
USS Enterprise E from Star Trek Nemesis

great job!
Thanks a lot for the explanations. It's as real lesson.
Thanks! I worry sometimes I get too into the details with my posts so it's good to know somebody appreciates it. Anyway, continuing on...

It took me awhile to get the stripes right, I even went back and stripped off some paint layers after too many touch-ups. Finally got it smooth and no brush strokes showing. What a chore:
50933644293_8080f112a5_z.jpg
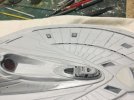
USS Enterprise E - Nemesis-WIP- Cousteau Captain's Yacht by Steve J, on Flickr

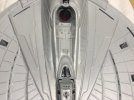
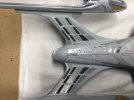
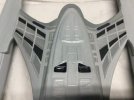
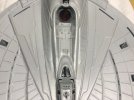
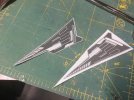
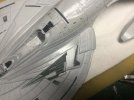
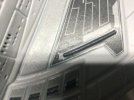
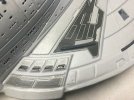
After a few iterations I finally sorted out the Captain's yacht using some black decal film and a fine liner brush for the black and grey strips.. I did fill in most of the recess around the black arrowhead on the top (actually the bottom of the yacht) with AVES before adding the two trapezoidal black pieces on each side of it using black thin sheet styrene I then used thin white styrene sheet to make what appear to be two small doors, possibly for landing gear, painted medium grey to match the grey stripe. I also repainted the whole assembly of the photorp launcher and the yacht with a slightly darker shade of the light grey I used for the hull. The three rectangles aft of the black arrowhead and fins are black decal material trimmed to fit.
The quantum torpedo port got a little more attention too as I found some more masking tape blocking half the opening. After cleanup the port now has the right shape when lit by the blue LED. This yacht took me 2 days to get done to my satisfaction:
50933644268_599573d68f_z.jpg
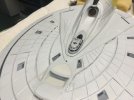
USS Enterprise E - Nemesis-WIP- Cousteau Captain's Yacht by Steve J, on Flickr

Almost done with painting the details that the wallpaper decals don't address. After I finish painting over the bussard stripes I should finally be ready to do some serious decal application:
50951578476_32afb17e94_z.jpg
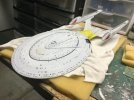
USS Enterprise E - Nemesis-WIP- Current Status by Steve J, on Flickr

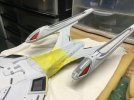
The grey cowlings atop and between the bussard collectors on each nacelle are medium light grey enamel brushed on. The grey stripes that frame the red bussard domes were cut to fit from some light grey stripe decals I had leftover from a previous starship build. I will let them dry after a coat of Solvaset to get them down tight. Then a few coats of Future before I go back and paint over them using a fine liner brush to match the grey enamel of the cowlings. After I finish all the other aztec decaling I will apply the black "tuning fork" decals to the cowlings in the center between the red domes:
50951673352_3c36b5176e_z.jpg
USS Enterprise E - Nemesis-WIP- Bussard Detailing by Steve J, on Flickr

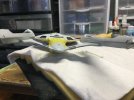
I used black decal material to make these, what I presume to be, vents on the aft edges of the nacelle struts. Technically they should have rounded ends so I will attempt to punch out some half rounds from the leftover decal I used for the vents. If that doesn't work I will punch a hole of the correct diameter in a piece of Tamiya tape, cut the holes in halves, and apply them carefully to the ends of the vents before brushing them with flat black enamel:
50995037277_39a07bd449_z.jpg
USS Enterprise E - Nemesis-WIP- Pylon Vents by Steve J, on Flickr

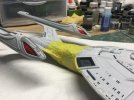
I painted over the striped grey decals framing each Bussard collector with a medium grey enamel applied freehand with a fine tipped brush:
50995037257_acdcc07c52_z.jpg
USS Enterprise E - Nemesis-WIP- Bussard Stripes Painted by Steve J, on Flickr

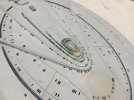
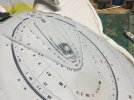
Detail brushwork on the aztec patterns present on the upper three levels of the saucer superstructure is mostly finished. Now I have masked off the front of the bridge dome before painting it a darker grey aztec. The sides of the bridge structure will also get a aztecing with the same color grey. The two decks below the bridge got a light grey aztec pattern hand painted loosely with little masking to match the look of the aztec pattern shown in the CGI images:
50994225363_089bcf9aa6_z.jpg
USS Enterprise E - Nemesis-WIP- Bridge Aztec Masking by Steve J, on Flickr

I used a mix of the hull color and a dark neutral grey for the darker grey aztec patterns on the bridge. I had to paint the fiber optic flasher strand with hull color then wipe off the tip. The horseshoe aft of the bridge dome was painted with Gunship Grey mixed with black. Have a few windows to clean up on the upper decks then final touch ups before the wallpaper decals go on:
50998562737_6652799ede_z.jpg
USS Enterprise E - Nemesis-WIP- Saucer Aztecing by Steve J, on Flickr

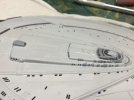
The window ports will look better once they are filled with Krystal Klear. Still I went back and did some minor cleanups, the camera picks up any imperfections of course no matter how small. I have to say I am quite happy with how the bridge aztecing went:
50997746598_fcd9074fce_z.jpg
USS Enterprise E - Nemesis-WIP- Saucer Aztecing by Steve J, on Flickr

Next up some painting on the nacelle pylons.
 
This is looking really nice. I for one like to see the details of the work that goes in behind a given modification. Your attention to all these details and effects and documentation of the process are appreciated.
 
After removing the Tamiya tape wrapped around the midsection of the secondary hull for handling purposes, I inspected for areas where paint had gotten worn a bit of which there were a few.
Fortunately I was able to mix up new batches of the primary hul light grey and the darker secondary hull/nacelle light medium grey to match the colors on the model when brushing up some areas around the shuttle bay.
I have also masked off the bussard domes in preparation for the clear gloss lacquer coat to come:

51063271138_f148a88763_z.jpg
USS Enterprise E - Nemesis-WIP- Upper Secondary Hull Touchups by Steve J, on Flickr

After unmasking and minor cleanup/touch up with an exacto knife tip, thinner and a micro brush, I am pleased with how these medium grey aztec panels at the bases of the struts turned out:

51063978421_6e6e7ea7b0_z.jpg
USS Enterprise E - Nemesis-WIP- Bottom Strut Aztec Panels Done by Steve J, on Flickr
 
Hope you guys haven't lost interest in this build.
I know it has been a long time since my last post but, take heart, I can see the finish line now.
Thanks to everyone who has replied with comments and suggestions.
Here we go...
Finally got warm enough to apply a coat of Glosscote lacquer. Now is time for some serious decal work:

51103963052_b8b04d4886_z.jpg
USS Enterprise E - Nemesis-WIP - Glosscoted for Decals by Steve J, on Flickr

Light test after first Glosscote:

51103943129_41e3caa5a7_z.jpg
USS Enterprise E - Nemesis-WIP - Glosscoted for Decals Light Test by Steve J, on Flickr

Bow port quarter. I see where some small spots along the rim will need a little hull color touching up when I'm done decaling and before sealing coats:

51103965742_92c120b97b_z.jpg
USS Enterprise E - Nemesis-WIP - Glosscoted for Decals by Steve J, on Flickr

When she's all done she will have a satin to more flatter finish:

51103963017_3607bfa6be_z.jpg
USS Enterprise E - Nemesis-WIP - Glosscoted Ready for Decals by Steve J, on Flickr


Above aft ready for decals:

51103865541_9a3d8c45d3_z.jpg
USS Enterprise E - Nemesis-WIP - Glosscoted for Decals by Steve J, on Flickr

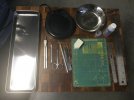
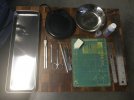
Various tools/supplies used for decal application. Most are well used:

51110294959_dc2c9140e5_z.jpg
USS Enterprise E - Nemesis-WIP - Decaling Station by Steve J, on Flickr

One new addition I made recently was the purchase of a coffee cup warmer.
Warm water makes a big difference getting the water slide decal adhesive to release the film from the backing paper prior to sliding
it into place on the model; reducing this process from an average 10-15 seconds using room temperature water to a mere 5 seconds or less.
Considering how many decals are involved this is a significant time savings.
Another item recently purchased is the long metal tray which I got mainly for longer aztec decals like the ones for the nacelles and along the sides of the secondary hull.

First wallpaper decals went on without a hitch...

The deflector trench looks great:

51105897319_fa42d3eca2_z.jpg
USS Enterprise E - Nemesis-WIP - Trench Decals by Steve J, on Flickr

The upper strut decals went on fine except for a blotch on the starboard strut near the nacelle.
I fixed that by brushing the decal with liquid decal film under a coat of Future:

51106153621_6c73d90fbe_z.jpg
USS Enterprise E - Nemesis-WIP - Strut Decals by Steve J, on Flickr

The lower strut decals weren't a perfect fit but close enough for government work:

51105897379_354b4118fc_z.jpg
USS Enterprise E - Nemesis-WIP - Strut Decals by Steve J, on Flickr

Next time I should have pics of the lower saucer which I figure to touch the least least after decaling.
I'll do the secondary hull last, at least the area forward of the nacelle pylons, as I am more likely to grab the model there when changing its position.
I must remind myself to wear gloves when doing that.
 
First wallpaper decals went on today...

Below are various tools/supplies I use for decal application.
Most are well used.
One new addition I made recently was the purchase of a coffee cup warmer and round metal bowl.
Warm water makes a big difference getting the water slide decal adhesive to release the film from the backing paper prior to sliding it into place on the model; reducing this process from an average 10-15 seconds using room temperature water to a mere 5 seconds or less.
Considering how many decals are involved this is a significant time savings.
Another item recently purchased is the long metal tray
which I got mainly for longer aztec decals like the ones for the nacelles and along the sides of the secondary hull:

51110294959_dc2c9140e5_z.jpg
USS Enterprise E - Nemesis-WIP - Decaling Station by Steve J, on Flickr

The deflector trench looks great IIDSSM:

51105897319_fa42d3eca2_z.jpg
USS Enterprise E - Nemesis-WIP - Trench Decals by Steve J, on Flickr

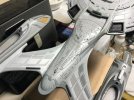
Lower saucer decals require cutting out the opening for phaser strips using an exacto knife:

51110545711_19184936cf_z.jpg
USS Enterprise E - Nemesis-WIP - Decal Trimming by Steve J, on Flickr

t's easier to cut the phaser strip opening down the centerline for application on either side of the strip rather than try to position the fragile thin decal film around it:

51110545696_444c824c6f_z.jpg
USS Enterprise E - Nemesis-WIP - Decal Sectioning by Steve J, on Flickr

After attempting to place the wet decal I found out the opening needed to be lengthened as the phaser strip was too long, this was the result of my attempt to extend the slot using an exacto knife:

51110545671_26359a77d1_z.jpg
USS Enterprise E - Nemesis-WIP - Decal Mods on the Fly by Steve J, on Flickr

I wound up sealing the decal with liquid decal film prior to brushing over the decal with thinned enamel,paint to match the dark grey color of the decal:

51109980602_f637499c23_z.jpg
USS Enterprise E - Nemesis-WIP - Decal Repair Using Enamel Paint by Steve J, on Flickr

The secret to working with these thin, fragile aztec decals is to cut them into smaller sections before application. Openings for the recessed windows on the lower saucer were particularly challengiing. Here I decided to cut the decal material framing the recesses into separate top and bottom pieces and apply them separately rather than as one piece. This also applied to the longer sections between the recesses:

51110454138_bae74ee17a_z.jpg
USS Enterprise E - Nemesis-WIP - Decali Trimming and Sectioning by Steve J, on Flickr

Today I finished about half of the under saucer aztec decals:

51109980487_9dd1027921_z.jpg[/url
[url=https://flic.kr/p/2kSq1y8]USS Enterprise E - Nemesis-WIP - Lower Saucer Aztec Progress by Steve J, on Flickr

After positioning each section using MicroSet decal setting solution I waited 15 minutes to set before brushing them lightly with Solvaset. Unfortunately, a few of the decals were too short leaving gaps at their ends. I will probably fill in the gaps using a few shades of light grey enamel to paint the aztec pattern unless I can find some leftover unused aztec decals from prior builds in my decal remnants stash.

Sorry for some of the longer descriptions. I can get a bit wordy sometimes.
NexI post I have pics of the mostly finished lower saucer aztec and the deflector dish with its grills.

Thanks for posting any comments.
 
Last edited:
Can definitely be a challenge to work with, but I like the massive amounts of masking they save me
 
OK. Time for an update...

This looks pretty good I think. The brightness is just right from what I can tell.
Two Testors copper painted brass photo-etch grills nest to form the deflector dish. Glued on with Kristal Klear:

51117799777_0ac160cb09_z.jpg
USS Enterprise E - Nemesis-WIP - Lower Saucer Aztec and Defector Dish by Steve J, on Flickr

51119161210_9ed739784b_z.jpg
USS Enterprise E - Nemesis-WIP - Deflector Dish Aglow by Steve J, on Flickr

Some of the aztec decals were too short, some were a little long. I was able to rob from Peter to pay Paul a few times but there are a few areas I will need to make up my own aztec "decal" to fill in the blanks. Also one stretch of light aztec decal on the upper side face of the phaser strip tore somehow and some decal is missing so I will paint a simple aztec pattern on some leftover clear decal sheet and patch the holes:

51118120534_530c33df36_z.jpg
USS Enterprise E - Nemesis-WIP - Lower Saucer Aztec Touchups by Steve J, on Flickr

The aztec pattern on the decals is very light and not showing much contrast against my hull color soooooo ...
I am going to go back and add some darker grey spots using a fine tipped brush and a mix of light grey, white, and light sea grey enamel.
Here are a few I just painted on the existing decal:

51118366571_9fabfa0794_z.jpg
USS Enterprise E - Nemesis-WIP - Lower Saucer Aztec Retouching by Steve J, on Flickr

Not a bad job IIDSSM. I used a 20/0 pointed brush to make these wing ding type shapes. After a few minutes I scraped the edges using a stubby exacto knife to sharpen and square up the corners. This is not an exact copy of the CGI image but I tried to follow the spacing of the panels with my brush and my own custom shapes. I also tried to mirror the aztec shapes and locations between the port and starboard sides. :

51133580040_b92bf48756_z.jpg
USS Enterprise E - Nemesis-WIP - Lower Saucer Aztec Retouch by Steve J, on Flickr

Next up is sorting out and attaching the upper nacelle warp grills...
 
Looks fantastic. I have one in my stash with the Acreation decals but I'm not lighting mine. Nice work.
 
Thanks guys!

Took a break from decaling to finish installing the upper nacelle grills to the tops of the nacelles.
I had debated decaling the nacelles before doing this work but now I am glad I didn't do any decaling as there has been a ton of touchups and cleanups with the nacelles that I could have easily damaged the aztec decals in the process.
Anyway, here now is my saga of the grills or, how to manage something acceptable after some royal screwups on the part of yours truly.

But...I degress... here we go...thanks for listening...

The CGI reference images for the work I would do on the nacelle grills and surrounding areas:

51161774227_4ccbf9f068_z.jpg
USS Enterprise E - Nemesis-WIP - Port Nacelle CGI Screen Cap by Steve J, on Flickr

51161774217_346e0e07e9_z.jpg
USS Enterprise E - Nemesis-WIP - Port Nacelle Above CGI Screen Cap by Steve J, on Flickr

After gluing in place with Kristal Klear I puttied any gaps around the grills with AVES Apoxy sculpt.
The putty was an almost perfect color match for the medium grey raised frames around the grills.
I feathered the putty to cover the curved forward and aft sections of the PE grill into the grey raised frames which went really well:

51161774177_85e8b1f6bb_z.jpg
USS Enterprise E - Nemesis-WIP - Nacelle Grills Finally Done by Steve J, on Flickr

These will get a brushing with Liquitex Matte Varnish at the end of the build:

51161774122_4925a27755_z.jpg
USS Enterprise E - Nemesis-WIP - Nacelle Grills Installed by Steve J, on Flickr

I am amazed at how good these look lit up. The blue glow is nice and even - no hot spots:

51163224619_e4ee81b0ba_z.jpg
USS Enterprise E - Nemesis-WIP - Nacelle Grills Lit After Install by Steve J, on Flickr

I cleaned a little more out between the brass strips.
Once I have the decals on and sealed I will spray the ship with Dullcote which will give the ship a satin semi-gloss finish when applied over the Glosscote clear lacquer sealing coat. I will then brush the grills with Liquitex matte varnish.
t looks really good with a flat finish:

51162436836_a932f88711_z.jpg
USS Enterprise E - Nemesis-WIP - Detail Nacelle Grills Lit After Install by Steve J, on Flickr

These are not perfect but I am surprised how well these turned out after all the touch ups and cleanups I had to do mostly due to my own mistakes. This included the almost unthinkable task of tearing a glued brass photo-etch grill off the clear kit part and respraying the grill with medium grey Krylon primer after I had made a mess of retouching the grill with an inferior brush after it was installed.
Still, the lacquer primer tented to crack off the thin PE strips during installation necessitating more touchups but, after much practice and using a 20/0 very fine tipped brush, I was able to brush the individual brass strips with a very steady hand using medium grey enamel.
Many cycles of retouching and clean out of the clear slots while using a sharpened round toothpick, a fine tipped microbrush, cotton swab, alcohol (not a beer unfortunately), and canned air took place before I was satisfied.
The final matte varnish coat will help too:

51162681593_e66565c917_z.jpg
USS Enterprise E - Nemesis-WIP - Nacelle Grills Lit After Install by Steve J, on Flickr

Next up ... back to decaling. I do not anticipate having to make any more paint touchups.

I know... famous last words.,, shhhhhhhhhh...
 
Strips of black decal material were trimmed to fit and placed atop the grey divider down the center of the nacelle grills as well as the strips down the middle of the aft ends of the nacelles. After brushing with Solvaset and drying the decals were then coated with Future clear acrylic gloss for permanent protection:

51165445129_9dc6d30ac1_z.jpg
USS Enterprise E - Nemesis-WIP - Nacelle Striping by Steve J, on Flickr
 
While waiting for Glosscote to fully cure I took these gratuitous images of the main saucer shuttle bay. I do like how the "porch lights" turned out with two bent fiber strands pointing down under the shuttle control room overhang. The second coat of Glosscote went on the nacelles and struts only.
The masking tape on the strongback is there only to protect the paint from the oils on my hand as it's the spot where I grab the model most of the time,.
It will come off before I decal the secondary hull which will be the last thing decaled:

51172015530_c2997b00d1_z.jpg
USS Enterprise E - Nemesis-WIP - Porch Lights by Steve J, on Flickr

I like this angle looking up from under the front of the nacelle. You can even see the ends of the two lit fibers:

51171150013_6bdb6fa3a2_z.jpg
USS Enterprise E - Nemesis-WIP - Porch Lights by Steve J, on Flickr

Next thing will be decaling the nacelles.
 
Last edited:

Latest posts

Back
Top