Star Wars Theme Group Build

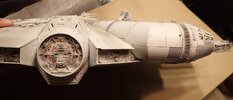
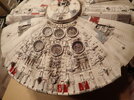
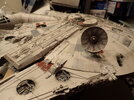
Progress has slowed down, but at least still progress
Got some more of the decals on and refined weathering here and there

Did not realize just how any little decals there are. close to 200 not counting the panel decals (I painted instead of using those)

Although did take a big step ahead by actually putting the two saucer halves together. No more interior access except from the battery area and gun turret wells. A kind of scary step because if I forgot something lighting wise there is no going back. No longer can change my mind mind about doing an interior for the cockpit tube and opening the door. Frankly, I never would have finished I went that route

This finally allowed me to get on many of the missing surface greeblies as well

P8092461.JPGP8092456.JPGP8092468.JPGP8092464.JPG
 
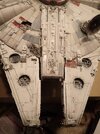
Progress has slowed down, but at least still progress
Got some more of the decals on and refined weathering here and there

Did not realize just how any little decals there are. close to 200 not counting the panel decals (I painted instead of using those)

Although did take a big step ahead by actually putting the two saucer halves together. No more interior access except from the battery area and gun turret wells. A kind of scary step because if I forgot something lighting wise there is no going back. No longer can change my mind mind about doing an interior for the cockpit tube and opening the door. Frankly, I never would have finished I went that route

This finally allowed me to get on many of the missing surface greeblies as well

View attachment 121646View attachment 121645View attachment 121648View attachment 121647
The weathering is looking good. This is an amazing kit, I like it even more as this is one of the only kits based on A New Hope and not Empire. gluing the two halves together will make me nervous as well. When I finally get to mine I want to do as much of the interior as I am able to. I really want the hallway out of the cockpit lit, along with a bunch of lighting in the cockpit area. So Did your kit have over 600 pieces in total?
 
The weathering is looking good. This is an amazing kit, I like it even more as this is one of the only kits based on A New Hope and not Empire. gluing the two halves together will make me nervous as well. When I finally get to mine I want to do as much of the interior as I am able to. I really want the hallway out of the cockpit lit, along with a bunch of lighting in the cockpit area. So Did your kit have over 600 pieces in total?

Thanks

looks like 612 to be exact according to the Amazon listing.

It really is the pinnacle of Star wars kits in my opinion. Bandai's attention to detail and getting it right is unmatched.
and the level/crispness in detail for that scale is a whole other level
Round 2 has been really stepping up though with their new kits but still have some soft/skipped details.
Fine Molds are nice for what they were, and in certain areas like panel lines on the X-Wings they are more in scale than Bandai, but they dropped the ball in the shape/size and proportions department. I feel no urge to improve or fix a Bandai kit regarding accuracy.
My only knock on their kits are the X-Wing fuselage and Y-Wing head. The panel lines there are too thick and often made worse by the snap together nature of casing the stripes in molded in color parts

Funny, the Fine Molds Falcon actually has over 900 parts according to the box, but is in the end less detailed. To Bandai's credit, they did combine a lot of what was individual parts on the Fine Molds falcon into one part from what I remember, particularly with the side wall and maintenance pit stuff and engine deck

Either way, most of that count is the often tiny greeblies and piping. Anyone who has built a Bandai or even Fine Mold Y-Wing will be quite familiar with all those small bits
 
That's the Y-Wing fighter
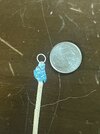
Haha! Same. I spent an hour sifting through my hardware drawers trying to find something to replace the little round antenna on my Gustav that apparently fell into a black hole on my living room carpet.

Ended up clipping the end of a small spring I salvaged from a broken printer.

I promptly told my wife, "see woman?! this is why I save things like this!"

View attachment 121680
 
Lol :D

You did such a fantastic job on this kit. I love a good challenge (dropping sacrifices to the carpet gods is my forte.) :p

Which kit is this?
Haha! Same. I spent an hour sifting through my hardware drawers trying to find something to replace the little round antenna on my Gustav that apparently fell into a black hole on my living room carpet.

Ended up clipping the end of a small spring I salvaged from a broken printer.

I promptly told my wife, "see woman?! this is why I save things like this!"

IMG_8203.jpeg
 
Haha! Same. I spent an hour sifting through my hardware drawers trying to find something to replace the little round antenna on my Gustav that apparently fell into a black hole on my living room carpet.

Ended up clipping the end of a small spring I salvaged from a broken printer.

I promptly told my wife, "see woman?! this is why I save things like this!"

View attachment 121682
We can use that "thing" which they wanted us to throw away or wonder Why we keep. There is always a need for everything. ;)
 
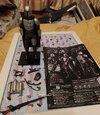
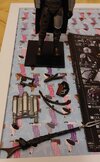
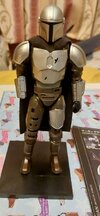
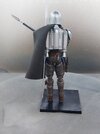
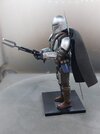
I thought I would make a start on my Mandalorian so hope it's OK with you all if I add this to the group build ?

I decided to spray the silver coloured parts in chrome, think it looks much better. Pantherman
View attachment 120654View attachment 120655View attachment 120656View attachment 120658View attachment 120659View attachment 120660

View attachment 120657
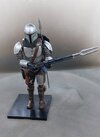
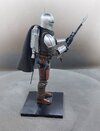
So I have manged to do a bit more on Din. Please excuse the not so tidy workbench on the bed, it's low on the PM scale but works.
Pantherman 20240810_203206.jpg20240810_203219.jpg20240810_203224.jpg
 
Very nice! I like his cape and accessories. You did another professional job, brother!

And I like the weenie-dog paper too.;)
Thanks. It's a beany tray my daughter gave me so no matter how uneven the surface the beany bit always makes the tray level. Stops all those tiny bit's rolling of the tray. Pantherman
 
Nice work Pantherman.

Made some more progress this weekend. I was a dum-dum and forgot to put the guns and head shell on the first time, so the impression was too shallow and there was no relief for the guns. Had to break out the Dremel to make a pit that I could refill and make an impression. I do have to say that Sculptamold is pretty tough. Nice stuff. I also primed, based coated, and gloss coated the model. I ended up using Light Ghost Gray Tamiya Spray.

Mockup_1.jpg


Mockup_2.jpg
 
Last edited:
Nice work Pantherman.

Made some more progress this weekend. I was a dum-dum and forgot to put the guns and head shell on the first time, so the impression was too shallow and there was no relief for the guns. Had to break out the Dremel to make a pit that I could refill and make an impression. I do have to say that Sculptamold is pretty tough. Nice stuff. I also primed, based coated, and gloss coated the model. I ended up using Light Ghost Gray Tamiya Spray.

Mockup_1.jpg


Mockup_2.jpg
Looks great. Nice diorama!
 
You really have so many great ideas for your builds. I really enjoy watching you and my brothers builds from start to finish.
Thanks, this was a perfect build for me at this time as no glue and very little painting to do.

I think I will build him again in the future but I will paint all the parts and gloss finish them. Pantherman
 
Nice work Pantherman.

Made some more progress this weekend. I was a dum-dum and forgot to put the guns and head shell on the first time, so the impression was too shallow and there was no relief for the guns. Had to break out the Dremel to make a pit that I could refill and make an impression. I do have to say that Sculptamold is pretty tough. Nice stuff. I also primed, based coated, and gloss coated the model. I ended up using Light Ghost Gray Tamiya Spray.

Mockup_1.jpg


Mockup_2.jpg
The snowfield looks fantastic. It looks like it's jumped straight off the screen.
 
Back
Top