You are using an out of date browser. It may not display this or other websites correctly.
You should upgrade or use an alternative browser.
You should upgrade or use an alternative browser.
1/350 IJN "AKAGI"
- Thread starter ComfortablyNumb
- Start date
Belugawrx
Well-Known Member
- Joined
- Jul 22, 2013
- Messages
- 615
Hey Tim
I just went through this build from the start, and I gotta tell ya, You have got some patience threshold!!
This is truly amazing...
The realism you achieve in something sooo small... Wow
Those utility boats look as if they could be models unto themselves.
Very very nice work sir.
I will be following from now on.
Keep up the great work
Cheers
Elm City Hobbies
Active Member
- Joined
- May 7, 2009
- Messages
- 3,239
Gotta love those Master barrels!
ComfortablyNumb
New Member
- Joined
- Sep 14, 2011
- Messages
- 140
Thanks guys and ok, some more pics then
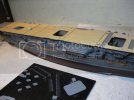
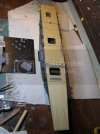
Dry fitting the decks, with some of the deck photoetch started in foreground:
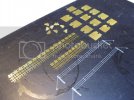
pe parts before painting, the two gray ones are to be painted black
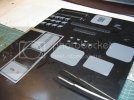
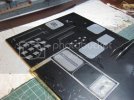
Some of the deck pe is painted
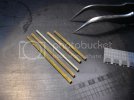
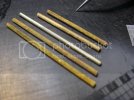
Brass prop shaft experiments I cut 5 peices of brass rod to fit as (the 4) prop shafts...I polished one, in the way I was going to use..and then I put the other 4 into a vinegar/salt bath for 3 days and let it almost dry out, and this is what I got.
  I don't know what to think...do you think they do look more realistic for shafts that have been at sea for awhile? Or should I polish them up and install shiny? hmm......
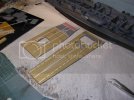
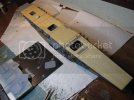
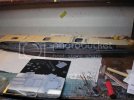
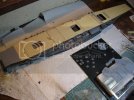
Some more shots for the wood deck dry fitted on the hull...
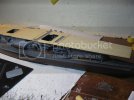
Cheers, Tim
Dry fitting the decks, with some of the deck photoetch started in foreground:

pe parts before painting, the two gray ones are to be painted black

Some of the deck pe is painted


Brass prop shaft experiments


Some more shots for the wood deck dry fitted on the hull...


Cheers, Tim
ComfortablyNumb
New Member
- Joined
- Sep 14, 2011
- Messages
- 140
Thanks for the comments guys!!!...thats really nice of you and I REALLY appreciate the encouragement!! Trust me on that 
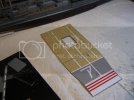
well I took the plunge this morning! First time working with dry transfers...was I nervous about them? Youbetcha!!! You only get one try with these things and everything (30+ transfers) must line more or less perfectly over 30" of deck (with no visual clues or guidelines provided by the transfer instructions as to exact placement) or I will have a major visual problem on my hands! So...slow and careful was the motto here!
So...I put the #1 line on...and it turned out ok I think. (phew!!) One thing I found is you must burnished down the leading edges of all the little pieces QUITE well (more than I would have thought) or they will pull up and split. This happened to me on one of the pieces when I was pulling up the cellophane (very slowly!), but I noticed it right away and laid it back down before any damage was done. Here's some pics:
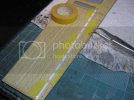
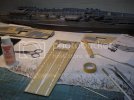
Laying down the line after positioning with tape:
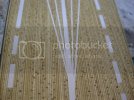
After burnishing and removal of cellophane: (not without incident)
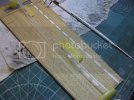
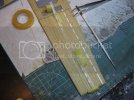
One down, 31 more to go! ... This one line took me over a half hour. Everything about Agaki has a million parts it seems
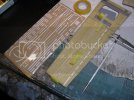
**edit** A question for anyone...do dry transfers vary as to quality and ease of use? The quality is here for sure, but I found I had to burnish the h3ll out of these ones to get them to stick to the wood! Cheers to all model ship builders ...and especially those who have commented on this thread! -Tim
well I took the plunge this morning! First time working with dry transfers...was I nervous about them? Youbetcha!!! You only get one try with these things and everything (30+ transfers) must line more or less perfectly over 30" of deck (with no visual clues or guidelines provided by the transfer instructions as to exact placement) or I will have a major visual problem on my hands! So...slow and careful was the motto here!
So...I put the #1 line on...and it turned out ok I think. (phew!!) One thing I found is you must burnished down the leading edges of all the little pieces QUITE well (more than I would have thought) or they will pull up and split. This happened to me on one of the pieces when I was pulling up the cellophane (very slowly!), but I noticed it right away and laid it back down before any damage was done. Here's some pics:
Laying down the line after positioning with tape:

After burnishing and removal of cellophane: (not without incident)


One down, 31 more to go! ... This one line took me over a half hour. Everything about Agaki has a million parts it seems

**edit** A question for anyone...do dry transfers vary as to quality and ease of use? The quality is here for sure, but I found I had to burnish the h3ll out of these ones to get them to stick to the wood! Cheers to all model ship builders ...and especially those who have commented on this thread! -Tim
ComfortablyNumb
New Member
- Joined
- Sep 14, 2011
- Messages
- 140
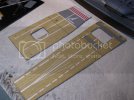
Thanks guys! I found I was able to speed up the process a bit once I got used to them a little. Dry transfers sure give a different look, but one I like for this application as you can slightly see the wood of the deck coming through the line, as you would on the real thing. You have to look close to see it, but its there 
Alternatively, masking/airbrushing the straight lines would be doable I think, but I sure wouldn't want to try to do that middle figure in the pic below with tape/airbrush
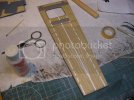
Cheers, Tim
Alternatively, masking/airbrushing the straight lines would be doable I think, but I sure wouldn't want to try to do that middle figure in the pic below with tape/airbrush


Cheers, Tim
ComfortablyNumb
New Member
- Joined
- Sep 14, 2011
- Messages
- 140
ComfortablyNumb
New Member
- Joined
- Sep 14, 2011
- Messages
- 140
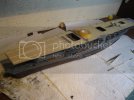
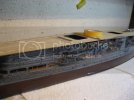
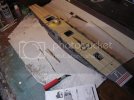
Thanks gentlemen. A small update with Agaki's, almost done, new hat on:
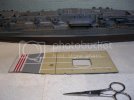
I placed what I had done for the deck so far, onto the hull to check/mark the longitudinal alignment of the stripes for the middle part of the deck. Better to double check as you get one shot at the transfers
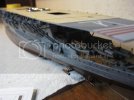
Once the deck is fully decaled (tranfer-ed?) , I will be sealing it and then turning it upside down to add the pe underdeck supports you saw a couple of pages back. Thanks for viewing! -Tim
**edit** for what its worth)... to "warm up" the transfers (these ones are 6 years old) and to make them more pliable/willing to come off the cellophane topper and lay down nicely, I borrowed my wife's blow dryer. It has a very low setting and I used that to warm them a tiny bit once they were taped in place on the deck (but not yet burnished down)...then I did the burnishing. It made a difference I found. Thanks again, Tim
I placed what I had done for the deck so far, onto the hull to check/mark the longitudinal alignment of the stripes for the middle part of the deck. Better to double check as you get one shot at the transfers


Once the deck is fully decaled (tranfer-ed?)
**edit** for what its worth)... to "warm up" the transfers (these ones are 6 years old) and to make them more pliable/willing to come off the cellophane topper and lay down nicely, I borrowed my wife's blow dryer. It has a very low setting and I used that to warm them a tiny bit once they were taped in place on the deck (but not yet burnished down)...then I did the burnishing. It made a difference I found. Thanks again, Tim

