1988 Mclaren Honda MP4/4 Top Studio Build *95% Done*

Re: 1988 Mclaren Honda MP4/4 Top Studio Build

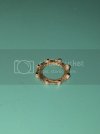
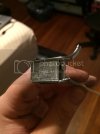
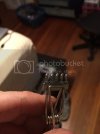
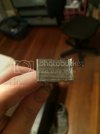
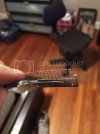
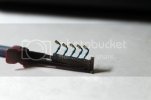
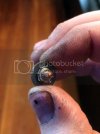
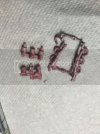
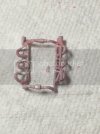
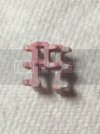
Well T, allow me to show you. Mind you they arent painted at all or complete. theres a nut and wire tie that goes to each pair of raised styrene on the rings.

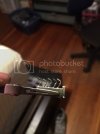
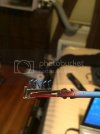
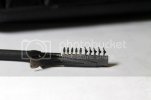
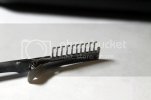
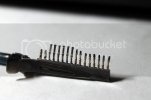
So what i had to do was glue solder to the edge of the PE disc like so. You can imagine how hard it was to get them straight and every time i pushed down, if it wasnt straight down the piece would fly out of my hands and bend the pieces. Well the solder would keep bending cause my hot ass hands would soften it i guess, and it really didn't want to stay glued. then once you glue them like the pic below, you have to cut them short, then put a PE disc on top and then cut them flush and sand them even. basically the disc was a spacer so when you sand they're all even size tall. But with the solder, cause everything wasnt perfectly straight it was impossible to put the disc on without either bending it or popping out the solder. so i got styrene rods in the same size cause its fairly rigid and doesnt want to melt in my hands. and its easier to manipulate to make the disc fit. worked much better. it was very hard and tedious.
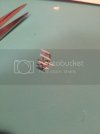
brakes_zpsa463faa2.jpg

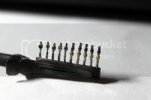
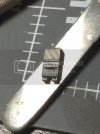
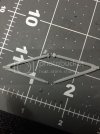
this is after the cutting and sanding. im going to paint everything with alclad pale gold to make it look one color. then theres these PE parts that simulate nut locks that goes across a pair of the styrene nubs.
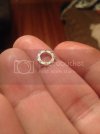
brakes2_zpse2b7ea1b.jpg

Semi Completed Rotor Assembly
brakes_comp_zpsd2557666.jpg
brakes_comp2_zps43fea0d1.jpg
 
Re: 1988 Mclaren Honda MP4/4 Top Studio Build

WOW, impressive...x4!! ;D Great job on the brake(s), this will be a treat when all painted up!! ;)
 
Re: 1988 Mclaren Honda MP4/4 Top Studio Build

Totally will be. The detail you've added is killer.
 
Re: 1988 Mclaren Honda MP4/4 Top Studio Build

Thank you Scott and T! Coming from you guys I take that as a very high compliment. Can't wait to show everyone more progress. Been a lil slow cause house sitting so I can't paint anything. Soon enough though!
 
Re: 1988 Mclaren Honda MP4/4 Top Studio Build

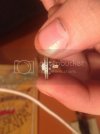
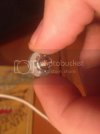
Small update on brakes

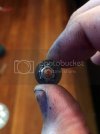
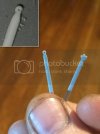
Added the wire locks soooo tiny. Still not painted.

A6C5102E-2C37-4B1D-B881-22C93C632D0D_zps4jpf6ea6.jpg

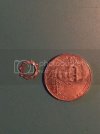
Nickel for reference

B5B033BF-5E5A-4A52-9746-E00B100B1A1B_zpsapnfhos4.jpg

I know there's quite a bit of extra glue but this stuff is so tiny and fragile it's the only way I can do it with my limited ca experience. I even used tiny applicators for the glue. I'm sure it'll look fine when I base coat and then paint.
 
Re: 1988 Mclaren Honda MP4/4 Top Studio Build

Nice work Anthony! Not easy getting pin point application on those tiny spots! A small piece of wire does the trick pretty good sometimes! Keep up the grea work!
 
Re: 1988 Mclaren Honda MP4/4 Top Studio Build

Thanks. That's why I got it and the Yamaha. I'm not really into f1 car builds but when I saw the pics I had to have it. It's a challenge cause I've never modeled with small stuff or ca but I just take my time and it's my third model since I restarted as a kid. It's not going to be a perfect build but I'm pretty confident in my handy skills that it will still look good. Plus I'll learn what not to do by the time I get to the bike which I'm really excited for.
 
Re: 1988 Mclaren Honda MP4/4 Top Studio Build

finally started painting some parts. did some chrome. this alclad stuff is amazing. there's still more color to go on these chromed parts but wanted to share anyhow..

E762D980-8AE7-4279-B9E5-4286E1D234EA_zpsegqcydnf.jpg

068CAEE0-2D87-4AC5-AFDF-45BDBA44ACC2_zpspwobpyeq.jpg

D9F2A332-BD74-4FAE-B5EF-E443D2625794_zpsqg8hngtv.jpg

D9F2A332-BD74-4FAE-B5EF-E443D2625794_zpsqg8hngtv.jpg

4874E4D7-7F84-49F8-83E4-96B87B8DB3A9_zpste1yxj0r.jpg

A0B15963-DA2E-48B5-BDE6-20643DA9150B_zpsm8x1vopd.jpg

Got excited and painted some of the fittings the proper color

6E5989F8-64E3-4B07-9253-2B41756671C6_zpsq806anqs.jpg
 
Re: 1988 Mclaren Honda MP4/4 Top Studio Build

painted some more fittings. i know theres a couple missed spots, but ive since gone over them again.

IMG_1266_zpsfe50e339.jpg

IMG_1265_zpse1d2bc5f.jpg

IMG_1264_zpse7da623f.jpg

IMG_1263_zpsa904e1df.jpg

IMG_1262_zps02a3df9c.jpg
 
Re: 1988 Mclaren Honda MP4/4 Top Studio Build

You building a model, or a real car at that size?
Lots of little bitty fiddly bits there
 
Re: 1988 Mclaren Honda MP4/4 Top Studio Build

seriously..

i got time to model for about 6 hours straight and i got all the little connectors painted the correct colors. then it kinda hit me how big this build actually is. i havent even wired them yet, and still have 80% of resin and oem parts to paint. and still have to do some more body mods. this ones gonnna take me months! dont get me wrong, i enjoy it, but i didnt realize the enormity of this project when i bought it.

funny thing is, i got this cause i thought the tamiya harley fat boy was too expensive but it had a lot of detail and thats what i originally wanted to do. so i was like, this is only 20.00 more parts wise and has a ton more to do. didnt account for all 25 paints i needed to buy, and airbrush, and compressor, tools, sanding implements, jars to store washes and thinned paints, files, spray booth.. lol shoulda bought the damn harley ;)
 
Re: 1988 Mclaren Honda MP4/4 Top Studio Build

Labor of love Anthony! ;D

I would think that a number of the paints you might be able to mix using the ones you have, no? Especially if you are talking greys, blacks and variations on certain other colors like dark and light reds and whathaveyouz!

Keep plugigng away at it!! Looking forward to your next update!! ;)
 
Re: 1988 Mclaren Honda MP4/4 Top Studio Build

inded it is sir. it was more that i was only 2 models in and had like 4 colors and no tools yet cause i was just casually modeling. so i had to stock up on essentials. yeah i can mix colors and have been but i didnt really have any colors to mix to begin with.
 
Re: 1988 Mclaren Honda MP4/4 Top Studio Build

small update:

pre assembled the rotors. they look pretty good considering all the CA i have on the tiny part. coulda done better but what can you do?

IMG_5563_zpsd0ee1b0a.jpg

IMG_5564_zps09055275.jpg

One of the ECU's. Directions said to do it semi gloss black but i liked flat better so i dullcoated it.
IMG_5572_zpse0f42a5a.jpg

Suspension parts. One of the knobs must have fell off or broke off so i had to repair it. added some styrene rod. im getting pretty good at adding these lil nibs back on cause they seem to all fall off.

IMG_5573_zps6b89dea0.jpg

and i thought this was going to be a small nightmare, the top left is how i got it, must have been a bubble. so i was going to use tamiya putty and sculpt it but i cringe every time i think about using it, then i remembered TRM told me to make some styrene putty, which i have a whole jar of! so i added a dab and i apparently had just the right amount and apparently the one black piece of styrene that fell in tinted the white putty the almost exact shade of the resin gray. you almost cant tell! im so proud of this repair. Thanks TRM!!

IMG_5575_zps203dbf4a.jpg
 
Re: 1988 Mclaren Honda MP4/4 Top Studio Build

I am gonna have to get you some rubber gloves soon!! ;D

Nice fix on the fiddly parts!!! Quick fix with the putty!! ;)

Oh, as for the rotor...that is SICK brotha!!! Fine looking piece of hardware there!! Keep the great work going!!
 
Re: 1988 Mclaren Honda MP4/4 Top Studio Build

yeah i was going to apologize for my hands but i figured everyone knows why they are so stained. its not like im cooking for you guys lol. ill get some gloves soon so you dont have to bare to look at them anymore. its the least i can do.
 
Re: 1988 Mclaren Honda MP4/4 Top Studio Build

rotors are done, brakes are 1/2 painted (have to paint pads once dry). They all look much better in person, my lighting isnt so awesome so they have a lot of glare. i have a lot of stuff drying, so more pics soon...

IMG_5591_zps5dba3613.jpg

IMG_5595_zps2feb2dc2.jpg

IMG_5596_zps8dcad3d8.jpg
 
Re: 1988 Mclaren Honda MP4/4 Top Studio Build

so i had a bit of a modeling tragedy/lesson last night. ive been pretty open how this is learning experience for me. so if what im about to say is common knowlege i apologize. I was just not aware yet, but thats how we learn..

so i put together a few parts that are painted the same color and was just going to paint them together. it was the fuel rail, wiring harness and another piece so it can sit on the engine. its extremely delicate. (pics to follow). and i decided to go by the book as opposed to the other document they had on their site. it followed a diff manner but i realized it didnt cover everything. so as you all know, CA is used on resin. and i glued these two parts and realized i needed to add photo etch to the pegs that attach the 2 pieces. impossible to do while its glued and impossible to make it work glued. so i was like, ill just get them apart and then add my own styrene pegs and redrill out the holes since the oem pegs were sure to break off. so i submerged the piece in CA debonder, not realizing its mostly acetone...

took the piece out after 10 mins and it was essentially rubbery now, and when i handled it, it basically just cracked in my hands into 4 pieces. it pretty much disintegrated, and what was left was so soft i couldnt do anything with it.. that was my lesson learned. didnt realize it would eat the resin. and its not a part they sell as part of an upgrade kit and the box stock unit is completely different and has absolutely no detail. so now im panicking cause i dont know what to do and i dont want to spend 135.00 on another kit for 2 parts. so i calmed down and said i MUST fix this. I also emailed Top Studio to see what i could do. Basically i told them what happened, sent pics and asked if i could buy those parts.i mean this is a VERY important part. lots of detail. so i washed the piece in hot then cold water to hopefully counteract the acetone. well it got a lil stiffer. still soft by any means, but it was harder for sure. so i took the 4 pieces and glued them CAREFULLY, and glued the 2nd piece together as well. so theres dried glue ALL over this thing. I basically scraped all i could off the top and left most of the bottom glue cause its hidden and i didnt want to do any more structural damage.

then i drilled 12 tiny tiny holes. then i used some .20 polystyrene rod to make new nubs for the top piece. i had to be SOOO careful drilling cause it was like drilling a hole on a pen tip. and the piece was rubbery, so i didn't want to crack it more. i basically took the 24" polystyrene rod, and dipped the end in medium CA (needed time to re position) then once it dried i cut the rod short and went to the next one, this way i didn't have to use tweezers on the thin rod.so then i test fit it and it all went back together!!! was so proud of myself. this thing was a MESSSSSS. so i got an email from Top Studio and they are sending me the 2 parts free of charge which is ahhhhmazing. That's excellent customer service. it wasn't their problem i wasn't knowledgeable and om in the USA so i know its not costing them a tiny amount. i figured it wouldn't be worth it to them and they'd tell me there wasnt anything they could do but i was thankfully wrong.

but yeah, close call. still got the part for backup.

Part before it broke into 2 more parts (4 pieces total)
photo_zps39c6d110.jpg

Top part underside after gluing pieces and stryrene knobs.
IMG_5581_zps8455f40b.jpg

Support after glue
IMG_5582_zps34a72c37.jpg
 

Latest posts

Back
Top