1988 Mclaren Honda MP4/4 Top Studio Build *95% Done*
- Thread starter foenetik
- Start date
foenetik
Active Member
- Joined
- Feb 16, 2014
- Messages
- 165
Re: 1988 Mclaren Honda MP4/4 Top Studio Build
what do you mean? dont post as much and wait till i have more to update?
yeah im glad it didnt go wrong as well.
Quaralane said:More detail in the update.
Glad to hear that the cutting didn't go wrong for you
what do you mean? dont post as much and wait till i have more to update?
yeah im glad it didnt go wrong as well.
foenetik
Active Member
- Joined
- Feb 16, 2014
- Messages
- 165
Re: 1988 Mclaren Honda MP4/4 Top Studio Build
Thanks!
Julien said:Amazing build !
Thanks!
foenetik
Active Member
- Joined
- Feb 16, 2014
- Messages
- 165
Re: 1988 Mclaren Honda MP4/4 Top Studio Build
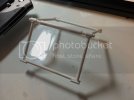
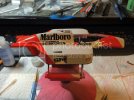
since theres no way on earth im putting the body on and covering all this work, i was going to put the body next to the chassis. however this seemed kinda crude. i assume in the real world they have a stand as to not ruin the body. so i decided to scratch build one. came out decent. as usual, first time scratch building anything. its not complicated at all but its not the star of the show so i wanted to keep it simple. need to paint it. going to make it alum and TRM gave me the suggestion of chroming the brackets and such. so im going to do that, i think it will add some nice contrast of materials.
thanks for looking!
One of the legs. added a bead around where the pipes connect. was going to make it look like weld seams but i cant seem to get it to form when i put glue on it and press down. they kinda look like a collar so ill probably leave it so i dont ruin it.
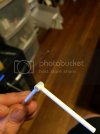
since the legs are at an angle, i had to find a way to sand the feet down so that they would fit into the angle styrene feet. devised this little contraption. worked like a charm, didnt have to guess any angles.
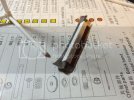
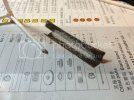
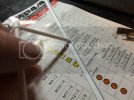
Completed Stand
Stand with body
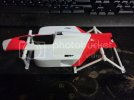
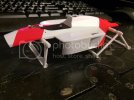
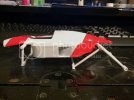
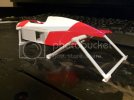
since theres no way on earth im putting the body on and covering all this work, i was going to put the body next to the chassis. however this seemed kinda crude. i assume in the real world they have a stand as to not ruin the body. so i decided to scratch build one. came out decent. as usual, first time scratch building anything. its not complicated at all but its not the star of the show so i wanted to keep it simple. need to paint it. going to make it alum and TRM gave me the suggestion of chroming the brackets and such. so im going to do that, i think it will add some nice contrast of materials.
thanks for looking!
One of the legs. added a bead around where the pipes connect. was going to make it look like weld seams but i cant seem to get it to form when i put glue on it and press down. they kinda look like a collar so ill probably leave it so i dont ruin it.

since the legs are at an angle, i had to find a way to sand the feet down so that they would fit into the angle styrene feet. devised this little contraption. worked like a charm, didnt have to guess any angles.


Completed Stand

Stand with body


Re: 1988 Mclaren Honda MP4/4 Top Studio Build
I had the same problem with alclad. I had to practice a few times, but the trick is to airbrush it at an angle, rather than pointing the airbrush straigh at the object. Almost the way you write with a pen. Also, spray very light. Most of the time my best finishes were with one coat. I prefer to rattlecan gloss black and airbrush the alclad and have had great results.
TRM said:Looking pretty nice with the primer on!! Love how there is that slight texture to the interior part! Keep pushing on!!
I had the same problem with alclad. I had to practice a few times, but the trick is to airbrush it at an angle, rather than pointing the airbrush straigh at the object. Almost the way you write with a pen. Also, spray very light. Most of the time my best finishes were with one coat. I prefer to rattlecan gloss black and airbrush the alclad and have had great results.
foenetik
Active Member
- Joined
- Feb 16, 2014
- Messages
- 165
Re: 1988 Mclaren Honda MP4/4 Top Studio Build
Thanks Vinceqn. ill give that a try.
vinceqn said:TRM said:Looking pretty nice with the primer on!! Love how there is that slight texture to the interior part! Keep pushing on!!
I had the same problem with alclad. I had to practice a few times, but the trick is to airbrush it at an angle, rather than pointing the airbrush straigh at the object. Almost the way you write with a pen. Also, spray very light. Most of the time my best finishes were with one coat. I prefer to rattlecan gloss black and airbrush the alclad and have had great results.
Thanks Vinceqn. ill give that a try.
foenetik
Active Member
- Joined
- Feb 16, 2014
- Messages
- 165
Re: 1988 Mclaren Honda MP4/4 Top Studio Build
Update Time! Made quite a bit of progess.
Just want to say something really quick about the model since im getting close to wrapping it up:
Ive learned a lot with this model. When i started it, it was the 3rd model i worked on since a 15 year break. So needless to say im still a novice modeler. However, with this kit ive learned to work with all sizes of Photo Etch, Sharpened some body painting skills, learned how to detail an engine, and learned in general how the process of modeling correctly works. Now, with that said, as i put it together, i realized some big mistakes i made. For example, i know to dry fit parts to make sure they fit. However, it didnt occur to me that i should also dry fit the sub assemblies to the car prior to gluing instead of assuming all the locating pins and such would make it line up right. Because i didnt really think to do this. The engine wont sit where its supposed to in relation to the rest of the car, and some other major parts arent where they should be. Now, this COULD be fixed however it would require MAJOR surgery, buying new parts and lots of time that, frankly, im not interested in doing. There is no way to finagle it into its correct alignment, trust me. Im not really into F1, i just got the car cause im a sucker for details, and a challenge. Its not a labor of love, so its not worth it to go back that far to me. So i mounted it as best as i can to make it look as best as i can. With that said, im happy with it and how it will end up. I got what i wanted out of it. Tons of experience and lessons learned. Its going to look nice in the end, but i didnt want anyone to look at the Top Studio Site, or other modelers pics and see how off mine is. I also had to make some creative choices and change things to make it all come together due to the alignment issues.
Again, im happy with it, and im getting to the point where i want to do something else. I will apply what i learned to future models (especially the top studio kit for the YZR bike i got) and will be a better modeler for it. So because its not a super clean build and there's mistakes, I decided to make it look post race. This includes some weathering (dirt, slight grime, oil fuel stains, etc etc). I actually am very happy with how the weathering is coming out so far. Im keeping it pretty light but these cars go through hell each race.
Here is my progress so far, and thank you VERY much to all of you who stuck around for this, i know it took forever but its a really tough kit. It was worth every penny and im SUPER excited to move onto the next models i have.
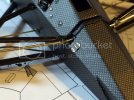
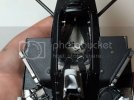
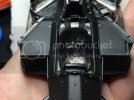
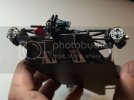
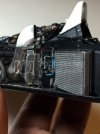
Im not exactly sure what this is, maybe a gear selector? has numbers on it.

Cable and bracket for the gear selector (at least i think thats what it is)
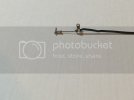
"Dashboard". Notice the redicuously tiny toggle switches on the right. those were fun. ahem.
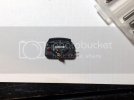
Steering Wheel backside. Two connectors to pigtail.
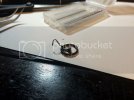
Cockpit Detail Shots, Seatbelts
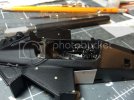
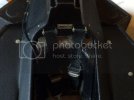
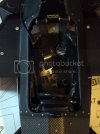
Rivet Detail
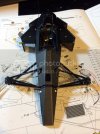
Front suspension
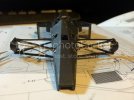
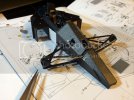
Decided to pin all the spindles to make mounting easier, and add detail (not part of the instructions)
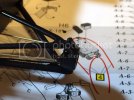
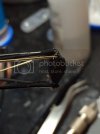
These were fun to bend...even with a PE Bender
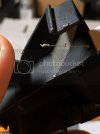
Inside the air duct
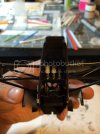
Underneath cockpit (wont be seen once put to floor)
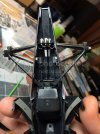
Cockpit mounted to floor w/ intercoolers
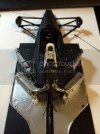
Engine added to floor
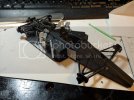
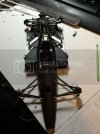
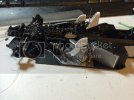
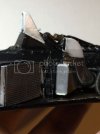
After weathering, Brakes added, lines connected, General Shots of car to hopefully show details..
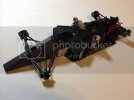
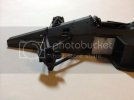
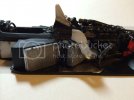
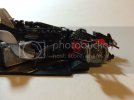
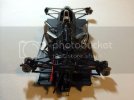
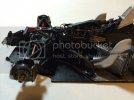
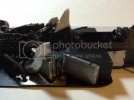
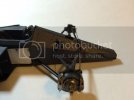
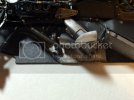
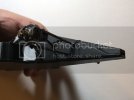
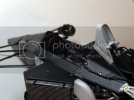
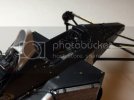
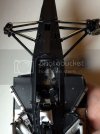
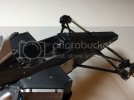
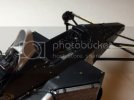
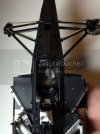
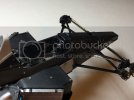
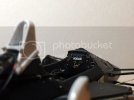
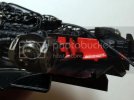
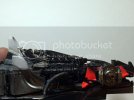
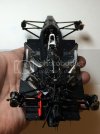
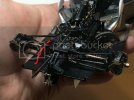
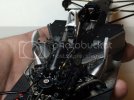
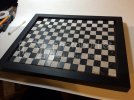
So heres the base im working on. My dad had some extra floor tiles from when he did his garage so i figured out how big they need to be for scale (1ft x 1ft). They are some kinda composite material (thought they were like a linoleum) so they were brittle and VERY hard to cut even. So the floor isnt exactly square but i kinda like it. Looks like an old garage, and it kinda represents this model. Looks cool but not perfect. Once i mount the car im going to add fuel and oil stains. Not a lot but looking like something spilled and was wiped up. It will stain the floor even though its made for a garage and is resistant. My dads garage has plenty of stains. Should look neat with the car, body and the tires piled on the side. Going to lift the car off the ground somehow too. havent figured it out yet. I also am leaving one caliper off and to the side, like its being worked on (hoses still attached) and sitting on an oil and brake fluid stained rag. Want to be a lil different than what i see all the other f1's doing. Im going to add some subfloor, and adhesive remnants on the missing tile as well.
And finally, i bought some smaller brass rod, to make the body stands. it will be more accurate. Havent started it yet.
Update Time! Made quite a bit of progess.
Just want to say something really quick about the model since im getting close to wrapping it up:
Ive learned a lot with this model. When i started it, it was the 3rd model i worked on since a 15 year break. So needless to say im still a novice modeler. However, with this kit ive learned to work with all sizes of Photo Etch, Sharpened some body painting skills, learned how to detail an engine, and learned in general how the process of modeling correctly works. Now, with that said, as i put it together, i realized some big mistakes i made. For example, i know to dry fit parts to make sure they fit. However, it didnt occur to me that i should also dry fit the sub assemblies to the car prior to gluing instead of assuming all the locating pins and such would make it line up right. Because i didnt really think to do this. The engine wont sit where its supposed to in relation to the rest of the car, and some other major parts arent where they should be. Now, this COULD be fixed however it would require MAJOR surgery, buying new parts and lots of time that, frankly, im not interested in doing. There is no way to finagle it into its correct alignment, trust me. Im not really into F1, i just got the car cause im a sucker for details, and a challenge. Its not a labor of love, so its not worth it to go back that far to me. So i mounted it as best as i can to make it look as best as i can. With that said, im happy with it and how it will end up. I got what i wanted out of it. Tons of experience and lessons learned. Its going to look nice in the end, but i didnt want anyone to look at the Top Studio Site, or other modelers pics and see how off mine is. I also had to make some creative choices and change things to make it all come together due to the alignment issues.
Again, im happy with it, and im getting to the point where i want to do something else. I will apply what i learned to future models (especially the top studio kit for the YZR bike i got) and will be a better modeler for it. So because its not a super clean build and there's mistakes, I decided to make it look post race. This includes some weathering (dirt, slight grime, oil fuel stains, etc etc). I actually am very happy with how the weathering is coming out so far. Im keeping it pretty light but these cars go through hell each race.
Here is my progress so far, and thank you VERY much to all of you who stuck around for this, i know it took forever but its a really tough kit. It was worth every penny and im SUPER excited to move onto the next models i have.
Im not exactly sure what this is, maybe a gear selector? has numbers on it.

Cable and bracket for the gear selector (at least i think thats what it is)

"Dashboard". Notice the redicuously tiny toggle switches on the right. those were fun. ahem.

Steering Wheel backside. Two connectors to pigtail.

Cockpit Detail Shots, Seatbelts


Rivet Detail

Front suspension


Decided to pin all the spindles to make mounting easier, and add detail (not part of the instructions)


These were fun to bend...even with a PE Bender

Inside the air duct

Underneath cockpit (wont be seen once put to floor)


Cockpit mounted to floor w/ intercoolers

Engine added to floor


After weathering, Brakes added, lines connected, General Shots of car to hopefully show details..


So heres the base im working on. My dad had some extra floor tiles from when he did his garage so i figured out how big they need to be for scale (1ft x 1ft). They are some kinda composite material (thought they were like a linoleum) so they were brittle and VERY hard to cut even. So the floor isnt exactly square but i kinda like it. Looks like an old garage, and it kinda represents this model. Looks cool but not perfect. Once i mount the car im going to add fuel and oil stains. Not a lot but looking like something spilled and was wiped up. It will stain the floor even though its made for a garage and is resistant. My dads garage has plenty of stains. Should look neat with the car, body and the tires piled on the side. Going to lift the car off the ground somehow too. havent figured it out yet. I also am leaving one caliper off and to the side, like its being worked on (hoses still attached) and sitting on an oil and brake fluid stained rag. Want to be a lil different than what i see all the other f1's doing. Im going to add some subfloor, and adhesive remnants on the missing tile as well.

And finally, i bought some smaller brass rod, to make the body stands. it will be more accurate. Havent started it yet.
mrcivicwithstyle
New Member
- Joined
- Jul 15, 2012
- Messages
- 105
Re: 1988 Mclaren Honda MP4/4 Top Studio Build
WOW


 Love the Detail All this car needs is a battery and I think she will start and go. Great Job cant wait to see her done
WOW
Jqaprilia4601
New Member
- Joined
- Feb 4, 2014
- Messages
- 66
Re: 1988 Mclaren Honda MP4/4 Top Studio Build
Good day sir.
First off may i just say, even though you might not think so, I definitly think this is an amazing build!!!! very well done on this one.
Second one, can I ask a something of you, the instructions for all your top studio parts....is there any way you can mail me a copy of your instructions? it is very dificult for me to get that kit into south africa, and it cost a fair bit aswell. I would love to give my scratch building a test. I have this kit in my stash and I have been dying to get into it but, once I found out about the top studio kit, I had a decent look at mine and found it lacking. Those instrucktions would be invaluble to me.
I you can help, please let me know and I will PM you my email address.
thanks in advance.
foenetik
Active Member
- Joined
- Feb 16, 2014
- Messages
- 165
Re: 1988 Mclaren Honda MP4/4 Top Studio Build
yeah, no problem at all. however, if you want to keep your email private you can go to topstudiohobby.com and click on instructions its the MD29011 kit. same goes for the other kits like the bike kit. theyre all online.
Heres a link.
http://www.topstudiohobby.com/instruction/MD29011_instruction.pdf
Also, if theres anything i can offer for help when you get going just let me know.
Jqaprilia4601 said:Good day sir.
First off may i just say, even though you might not think so, I definitly think this is an amazing build!!!! very well done on this one.
Second one, can I ask a something of you, the instructions for all your top studio parts....is there any way you can mail me a copy of your instructions? it is very dificult for me to get that kit into south africa, and it cost a fair bit aswell. I would love to give my scratch building a test. I have this kit in my stash and I have been dying to get into it but, once I found out about the top studio kit, I had a decent look at mine and found it lacking. Those instrucktions would be invaluble to me.
I you can help, please let me know and I will PM you my email address.
thanks in advance.
yeah, no problem at all. however, if you want to keep your email private you can go to topstudiohobby.com and click on instructions its the MD29011 kit. same goes for the other kits like the bike kit. theyre all online.
Heres a link.
http://www.topstudiohobby.com/instruction/MD29011_instruction.pdf
Also, if theres anything i can offer for help when you get going just let me know.
Jqaprilia4601
New Member
- Joined
- Feb 4, 2014
- Messages
- 66
Re: 1988 Mclaren Honda MP4/4 Top Studio Build
Good morning sir!
as per your advice I managed to get myself the instructions for the Top Studio kit.......now comes the heavy work....trying to build all this stuff from scratch....ahhhh the fun!!
thanks again foenetik
Good morning sir!
as per your advice I managed to get myself the instructions for the Top Studio kit.......now comes the heavy work....trying to build all this stuff from scratch....ahhhh the fun!!
thanks again foenetik
foenetik
Active Member
- Joined
- Feb 16, 2014
- Messages
- 165
Re: 1988 Mclaren Honda MP4/4 Top Studio Build
no problem and like i said, if theres any advice\help i can give just shoot me a PM
Jqaprilia4601 said:Good morning sir!
as per your advice I managed to get myself the instructions for the Top Studio kit.......now comes the heavy work....trying to build all this stuff from scratch....ahhhh the fun!!
thanks again foenetik
no problem and like i said, if theres any advice\help i can give just shoot me a PM
foenetik
Active Member
- Joined
- Feb 16, 2014
- Messages
- 165
Re: 1988 Mclaren Honda MP4/4 Top Studio Build
Small Update:
Did some decals..
This wasnt in the plans but they looked so plain...
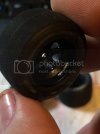
Rear Spoiler

Bottom of rear spoiler

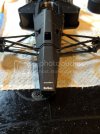
Nose
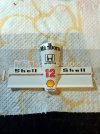
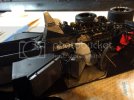
Cockpit
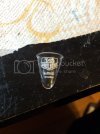
Windscreen (still need to paint black along bottom inside)
Body
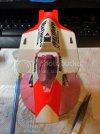
Body After Clear*
*
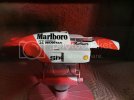
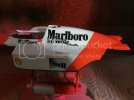
So this was a first.. Only this one did it (thank goodness). But after clearcoating this decal went all 60's on me. Not sure why. I waited 3 hours after using MicroSet. Even swabbed them all down. Never had it happen before. So ive decided which side will be facing the back of the diorama haha.
cue sad trumpet...
Small Update:
Did some decals..
This wasnt in the plans but they looked so plain...

Rear Spoiler

Bottom of rear spoiler

Nose

Cockpit


Windscreen (still need to paint black along bottom inside)

Body


Body After Clear*

*
So this was a first.. Only this one did it (thank goodness). But after clearcoating this decal went all 60's on me. Not sure why. I waited 3 hours after using MicroSet. Even swabbed them all down. Never had it happen before. So ive decided which side will be facing the back of the diorama haha.
cue sad trumpet...

foenetik
Active Member
- Joined
- Feb 16, 2014
- Messages
- 165
Re: 1988 Mclaren Honda MP4/4 Top Studio Build
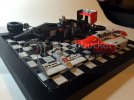
Well its almost done. just waiting on the tool set to get here. Its got a tool box but not sure im going to use it. if i do i might stack it on top of the smaller tires. but we will see. going to put some on the mechanics mat (made the mat to cover the sad decal) and on the floor by the brake assembly. i also adjusted the wing a bit so its not as crooked. unfortunately thats part of overything not lining up and cant do much about it. but its looks straighter now. I kept the body weathering minimal as they keep the cars pretty meticulous. This is right after a race, maybe in between so they havent had time to clean it yet. im happy with it. thanks everyone who stuck around. i really do appreciate it. ill take nicer photos once i get the tools in there.
here we go.. comments and crits welcome(although its kinda done, so crits will be applied to future models )
)
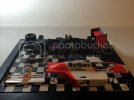
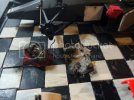
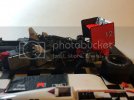
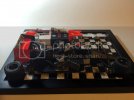
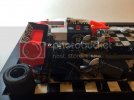
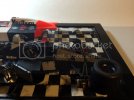
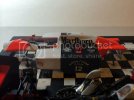
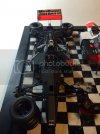
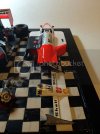
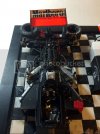
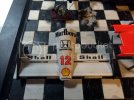
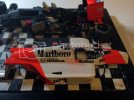
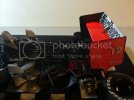
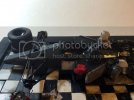
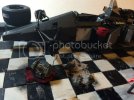
Well its almost done. just waiting on the tool set to get here. Its got a tool box but not sure im going to use it. if i do i might stack it on top of the smaller tires. but we will see. going to put some on the mechanics mat (made the mat to cover the sad decal) and on the floor by the brake assembly. i also adjusted the wing a bit so its not as crooked. unfortunately thats part of overything not lining up and cant do much about it. but its looks straighter now. I kept the body weathering minimal as they keep the cars pretty meticulous. This is right after a race, maybe in between so they havent had time to clean it yet. im happy with it. thanks everyone who stuck around. i really do appreciate it. ill take nicer photos once i get the tools in there.
here we go.. comments and crits welcome(although its kinda done, so crits will be applied to future models


Similar threads
- Replies
- 16
- Views
- 423
