A-Wing newb build

Well i thought i'd try making a quick vid as it seems to show what i've got done better than a few pics, but i'm not too sure now! lol

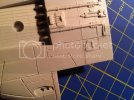
Think i'm slowly getting the hang of scribing and i'm fairly pleased so far with my efforts, although as you may see there are a few areas i got a bit carried away on. Time to break out the putty. ;D

Newb A-Wing build

P.S. Sorry for the quality as i dont have a vid cam just my trusty iPhone.

TTFN Matt
 
Hey Matt nice to see you have a try at it,
scribing can be a tricky thing :mad: Sometimes
it's good to think about the scale of the panel
line and it's relation to the ship. At times
to keep it in scale you may only need one pass
or possibly two, keep practicing you will get better!
 
Looks like you are doing a pretty good job of it. But like Jamaicanmodels69 said, they do look a tiny bit too deep. Other than that, great work!
 
Thanks for the pointers and tips guys, every time i pick this model up i seem to learn something new. lol

My scribing is getting neater and faster but your quite right the lines are a little deep but thats why i started on the bottom so that i could get in some practice before tackling the top. ;) I see Tamiya make an actual panel scribe tool, is this any better than a scalpel?
 
I mainly use dental picks to scribe with, and have never used a scalpel. But I did get the Tamiya tool to evaluate after a few of my YouTube subscribers mentioned it. I haven't had time to give it a try yet......

Maybe one of the others has used it?
 
Been trying to make just a few lighter passes with the scalpel and keep the deapth shallow, seems to look better to me......what do u think?

IMG_0999.jpg

Like you say its all about practice and technique. ;)

TTFN Matt
 
Hey Matt I was wondering if you are scribing next to the
raised panel lines or sanding them down and scribing as you go?
Sanding next to the raised panel line has some advantages
such as....you have a map to where they go. But at the same time
the raised panel lines on this kit are very small, they don't give you
much ledge to run the knife next to. I think that dymo tape Grendles
was speaking about would help you out with keeping them a bit more straight.
Try practicing on some scrap styrene if you pick up the tape and see how it goes.
They still look a bit deep but better, try to angle the knife so your really
using the very tip of it. When you give the lines a sanding they will clean
up a bit and appear to look a bit shallower.
 
I've been looking for that Dymo tape but every shop i ask in they look blank when i try to explain what the stuff looks like. I shall have to keep searching.
 
The panels lines look great. Should make a huge difference to the end result. :)
 
Looks great! Not sure where ypor from mate but you can get dymo tape in staples in the uk ;)
 
I've found knock-off brand label tape in dollar stores from time to time. It's probably lousy for making labels but it works great as a straight edge.
 
Thanks all for the encouragement, i have next week off so i hope to be able to crack on with a lot more of the model. I have nearly all the underside re-scribed now and hope to start the top half soon.

@merseajohn
I'm from the UK mate so i'll nip into a Staples this weekend, work permitting, and have a look around. Cheers. Oh and great vid on weathering your Falcon, very helpful to see that sort of thing 'for real' so to speak rather than just reading about it, makes me look forwards to painting this A-Wing up. :)
 
Hello guys

Just a quick update, i've been working on the lighting for the model. It's very basic by the standards i've seen so far on this site but it's my first crack at this so any tips are more than welcome. :)

The plan is to have two white LED's mounted in the engines, the ones i have are bright but maybe not bright enough. I did try to buy super bright LED's but they were all out of stock in the shop so had to make do with standard 5mm white, i'll see if they grow on me but at the moment i'm thinking they aren't bright enough!!! I know it's hard to tell from the video but what do you chaps think?
The red, green and flashing LED's are for the cockpit, plan is not to mount them in the cockpit but connect them to fibre optics and mount them in the control console instead.

A-Wing model electronics test

I'm wiring the LED's in parallel so if one burns out the rest stay on, fingers crossed, but tbh circuit design is something i haven't done since college and basic training so if you spot something wrong please say. I have a few questions actually, i'm running on a 6v battery pack and so i believe i need resistors to protect the LED's? I'm using just one per pair of LED's to save battery life.....is this wrong? I was also curious if you stress test the circuit and if so for how long?

Also the guy in the shop said he didn't know what to use when gluing the fibre optic cable in, he said everything either melts it or wont adhere to it....what do you use?

Have a good weekend dudes.

TTFN Matt
 
First, I use one resistor for each LED. The resistors don't eat that much power so they won't drain the batteries that fast. The LED's themselves consume far more power.

What are you using for the blinker circuit? This can be a problem because different timing chips consume different amounts of power.

As for fiber, I have used both white glue (PVA) and epoxy to glue them in. The brand of white glue I use is Microscale's Krystal Klear. It dries faster than normal PVA and holds a bit better at the start. I found epoxy to be too messy.
 
OK thanks for that Grendels.

I'm not using a blinker circuit, the LED is a native flashing type LED so it's a fixed rate, i only got it to give the cockpit some life and look like a computer thats active e.g. sensors or targeting! lol

The guy in the store said PVA wouldn't adhere and that it pops free when dry but i shall try some as i thought it sounded funny at the time.....failing that i have some two-part expoxy hiding somewhere.

Regards painting, do you mount the fibre optics after painting or before and then mask them off?

Well today it's surgury time for my pilot, wish him luck.....Bwahahahaha (reaches for Dremel) ;D
 

Latest posts

Back
Top