Air- Tamiya P-47M T-Bolt
- Thread starter Alan Kelley
- Start date
suavetomcat
New Member
- Joined
- Mar 4, 2013
- Messages
- 303
Looking great mate. Can't wait to see how this one turns out.
Chris
Chris
Alan Kelley
New Member
- Joined
- Feb 4, 2015
- Messages
- 51
Cheers, Chris. Slow but steady progress this week- will get some pics posted tomorrow- have some taken, just not loaded into photobucket yet. Might be in the shop on Friday afternoon.
Alan Kelley
New Member
- Joined
- Feb 4, 2015
- Messages
- 51
A bit more to show. I post a bit at night whilst at work, but the work computers will not allow me to access photobucket, so all photos have to be added at home.
I have the fuselage buttoned up. Not too many seams to sort, except for one rather nasty atttachment point on the nose, right where a pop fastnener is supposed to be, so have had to re-add this once the sanding once done. I used a little bit of Mr Surfacer 500 in the seams .
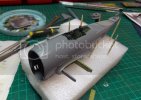
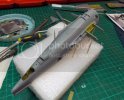
Air intake on the nose added and painted. AK Xtrmeme Duralinium was used for the metal. Homemade wash.
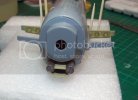
Wheel wells on the fuselage painted and weathered.
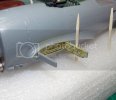
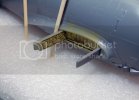
Added some of the hydraulic lines in the wheels wells using copper wire. The connectors are fine Albion Alloys tubing.
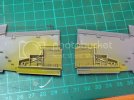
I bought a new airbrush today, an Iwata HP-C plus, so am looking forward to getting the rest of this built and some paint on her.
Regards, Alan.
I have the fuselage buttoned up. Not too many seams to sort, except for one rather nasty atttachment point on the nose, right where a pop fastnener is supposed to be, so have had to re-add this once the sanding once done. I used a little bit of Mr Surfacer 500 in the seams .


Air intake on the nose added and painted. AK Xtrmeme Duralinium was used for the metal. Homemade wash.

Wheel wells on the fuselage painted and weathered.


Added some of the hydraulic lines in the wheels wells using copper wire. The connectors are fine Albion Alloys tubing.

I bought a new airbrush today, an Iwata HP-C plus, so am looking forward to getting the rest of this built and some paint on her.
Regards, Alan.
adampolo13
New Member
- Joined
- Dec 7, 2011
- Messages
- 2,633
Great progress update. She's looking good! I just picked up the same Iwata, I'm enjoying for sure!
JohnSimmons
For Spud: I was once Merseajohn
- Joined
- Jan 4, 2011
- Messages
- 5,645
Cracking stuff here mate! 8)
nicholassagan
sippin on gin + juice
- Joined
- Dec 28, 2011
- Messages
- 2,013
Those colors and washes look spot on.
Alan Kelley
New Member
- Joined
- Feb 4, 2015
- Messages
- 51
Thanks for the comments guys.
I have put the spine and tail onto the fuselage and that is as much as the building goes.
I have been painting the inside of the cowls and need now to glue them all together.
Only other thing I have done( busy weekend at work )is to remove and clean up pretty much every other part off the sprues. Now to get them all glued together and prepped for paint.
I will get some pics up tomorrow( on work computer right now)
Alan Kelley
New Member
- Joined
- Feb 4, 2015
- Messages
- 51
The tail and spine are glued in place and the fuselage mounted in my Sphere Products small aircraft holder ready for the wings to go on and painting to commence.
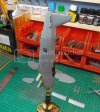
The inside of the cowl painted and cowl ring painted- this still need a bit of weathering done to it.
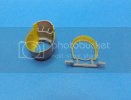
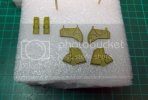
The inside of the landing gear covers painted- still a bit of mud to add here.
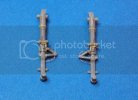
Finally- ready for paint. The landing legs. I drilled them out for brake hoses- the connector is Albion alloys brass tube and I used copper wire for the hoses.
Next couple of days I will get the airframe fully glued together and finally start to bring her to life.
Alan.

The inside of the cowl painted and cowl ring painted- this still need a bit of weathering done to it.

The inside of the landing gear covers painted- still a bit of mud to add here.

Finally- ready for paint. The landing legs. I drilled them out for brake hoses- the connector is Albion alloys brass tube and I used copper wire for the hoses.

Next couple of days I will get the airframe fully glued together and finally start to bring her to life.
Alan.
nicholassagan
sippin on gin + juice
- Joined
- Dec 28, 2011
- Messages
- 2,013
Nice work Alan!
Alan Kelley
New Member
- Joined
- Feb 4, 2015
- Messages
- 51
Thanks, Nick. Greatly appreciated.
Alan Kelley
New Member
- Joined
- Feb 4, 2015
- Messages
- 51
Been playing with my new airbrush.
Had a bit of bother trying to get my setting right to spray Alclad, but am there now ( I think).
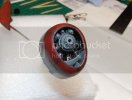
I have painted the front cowling and mounted the motor.
I am pleased with the result. I have a nice subtle fading on the black, but it doesnt really show in these pics.
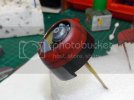
I have also painted the Rudder. It has more tonal definition than this picture is showing. Need to put a protective coat on it and do the panel lines next.
Had a bit of bother trying to get my setting right to spray Alclad, but am there now ( I think).
I have painted the front cowling and mounted the motor.
I am pleased with the result. I have a nice subtle fading on the black, but it doesnt really show in these pics.


I have also painted the Rudder. It has more tonal definition than this picture is showing. Need to put a protective coat on it and do the panel lines next.

adampolo13
New Member
- Joined
- Dec 7, 2011
- Messages
- 2,633
Looking good dude!
Alan Kelley
New Member
- Joined
- Feb 4, 2015
- Messages
- 51
Thanks, Adam. Life has got a little in the way of modelling over the past couple of days. Only thing I have done since the last update is glue the wings on.
This will be touch and go to get finished, although I do have a nice 4 day break off work this weekend.
This will be touch and go to get finished, although I do have a nice 4 day break off work this weekend.
amateurmodeler
Member
- Joined
- Aug 10, 2010
- Messages
- 529
Coming along very well.
suavetomcat
New Member
- Joined
- Mar 4, 2013
- Messages
- 303
Looking good mate!
Chris
Chris
JohnSimmons
For Spud: I was once Merseajohn
- Joined
- Jan 4, 2011
- Messages
- 5,645
I hope you get this one finished!
Alan Kelley
New Member
- Joined
- Feb 4, 2015
- Messages
- 51
Thanks for the comments guys.
Have got the whole plane painted in NMF- The upper surfaces will all be black, the underside being metal. Will get some photos up in the morning- will be tight enough to get finished, but should get it done.
Had a bit of a disaster this morning when the whole plane came out of the clamp I was using and landed with an almighty whack on the ground. Thankfully the only damage was the wing joint came free, but I have managed to get it all glued back together and repainted.
Alan Kelley
New Member
- Joined
- Feb 4, 2015
- Messages
- 51
Sadly- this will not be finished for the competition. Some rather issues going on in my personal life means my modelling activities are on the back burner for a while.
