You are using an out of date browser. It may not display this or other websites correctly.
You should upgrade or use an alternative browser.
You should upgrade or use an alternative browser.
Andy's Tamiya 1/35 M1A2 Operation Iraqi Freedom
- Thread starter Andy the Sheep
- Start date
Edbert
Well-Known Member
- Joined
- May 16, 2024
- Messages
- 531
I agree, the highlights are done. Maybe put some lowlights in, panel lines do not specifically exist, at least like on aircraft, but shadows and places hidden from the bleaching desert sun do.Those highlights look to me to be about right. I wouldn't want to overdo it, to avoid the model looking too, well, painted.
Andy the Sheep
Active Member
- Joined
- Oct 7, 2024
- Messages
- 25
After fiddling with the external loads, trying different colours and shades, but keeping in mind that everything will be heavily covered by dust and sand, obtained with a very thinned wash of Vallejo Iraqi sand in a small size pot I had at the bottom of the paint drawer, a relic from the Merkava Mk1 1/72 I built years ago, here are the results.
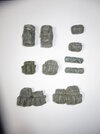
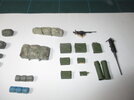
Once loaded on the tank they will be weathered accordingly.
Then decals were applied. Finally panel lines with Tamiya panel line accent dark brown.
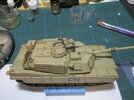
The "F4" on the CIP to the back of the turret needs a lot of retouching as the transparent film is too visible.
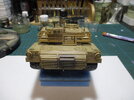
I think I'll try to weather the tank with oils, but I'm still considering the chalks and pastels option.
See you soon and thank you for your attention and support.
Andrea


Once loaded on the tank they will be weathered accordingly.
Then decals were applied. Finally panel lines with Tamiya panel line accent dark brown.

The "F4" on the CIP to the back of the turret needs a lot of retouching as the transparent film is too visible.

I think I'll try to weather the tank with oils, but I'm still considering the chalks and pastels option.
See you soon and thank you for your attention and support.
Andrea
Andy the Sheep
Active Member
- Joined
- Oct 7, 2024
- Messages
- 25
mark2
Well-Known Member
- Joined
- Oct 1, 2024
- Messages
- 199
Looking good AndyAn update while the second layer of weathering is drying. This time with a pale yellow oil wash.
View attachment 129436View attachment 129437
Tamiya decals are always thick...
Andy the Sheep
Active Member
- Joined
- Oct 7, 2024
- Messages
- 25
Modelprofessor
Active Member
- Joined
- Nov 22, 2021
- Messages
- 92
It looks good . I'm glad to see you didn't chip it all over
Andy the Sheep
Active Member
- Joined
- Oct 7, 2024
- Messages
- 25
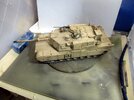
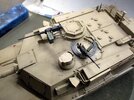
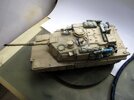
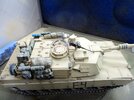
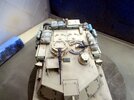
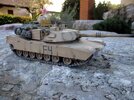
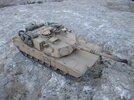
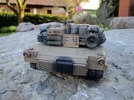
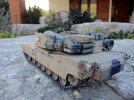
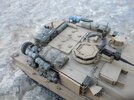
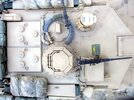
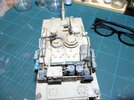
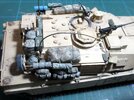
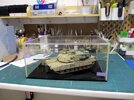
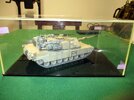
It seems I reached the end of the road; M1A2 OIF is completed, and that's a result in itself, indeed! 
Here are some pics. Hope to provide more tomorrow, taken outside, weather permitting.
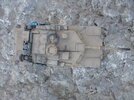
The last two were taken at 5 pm, almost dark in late november.
The one taken with the flash on looks like, IMHO, that the tank is under an artillery/mortar IL fire.
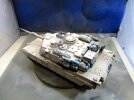
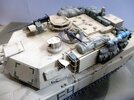
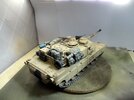
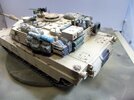
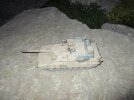
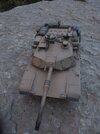
Thank you for following and for your kind comments.
Andrea
Here are some pics. Hope to provide more tomorrow, taken outside, weather permitting.
The last two were taken at 5 pm, almost dark in late november.
The one taken with the flash on looks like, IMHO, that the tank is under an artillery/mortar IL fire.


Thank you for following and for your kind comments.
Andrea
Andy the Sheep
Active Member
- Joined
- Oct 7, 2024
- Messages
- 25
Andy the Sheep
Active Member
- Joined
- Oct 7, 2024
- Messages
- 25
Thank you. I highlighted the flat surfaces with the base color + some white then some dark brown Tamiya panel liner followed by an oil pin wash with burnt amber, pale yellow and white and finally an oil wash with a diluted pale yellow+white mix trying to let it flow into the areas I thought the sand would sit. I had the same problem with the contrast. As Jakko suggested, I started with what looked like a too much sharp contrast then blended it gradually with weathering. The external loads were weathered with highly diluted acrilycs.Andrea,
A great tribute to your late pal. Beginning to take shape. I feel your pain re: lightening a single colour, I am no expert but mine never look contrasty enough. Your Abrams looks fine to me in the picture above.
Andy the Sheep
Active Member
- Joined
- Oct 7, 2024
- Messages
- 25
Andy the Sheep
Active Member
- Joined
- Oct 7, 2024
- Messages
- 25
They are from Aber, Edbert. They are glued to the kit antenna bases, I just bended them using my fingers and painted dark green. The cable securing them to the turret is from stretched sprue. I added a small piece of thermic rubber tube (those used to seal electric cables junctions) to the base as the gluing surface was too small.

