Basic to Rusting and weathering
- Thread starter TRM
- Start date
Glorfindel
Active Member
- Joined
- May 2, 2011
- Messages
- 1,504
The only thing better then salt on this would be bacon. And even if you don't use bacon this is easily just as tasty. This is like a treat for the eyes watching this come together. Not that Kate Beckinsale isn't great to look at it's just that I have a better chance of learning how to do this as opposed to dating Kate Beckinsale.
Just throwing it out there.
Just throwing it out there.
TRM
New Member
- Joined
- Mar 18, 2011
- Messages
- 5,024
No teasing Scott...LOL!!! Happy you like!
John...I would say that is the quote of the day!! LOL!!! Thanks BTW!!
Hey Ken!!
Thanks Adam!! You may Sir!! ;D
Thanks Roman!! Glad you like!!
Thanks Mr. S!! Let's see what it looks like when I get done, first!! :
Thank you Glorfindel for the kind words!! LOL....I would gladly give Kate some private lesson!!!


Just a little more.....
Back at it, amongst other things too. So, all that salt needs to be removed now.
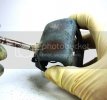
With a good, stiff bristled brush to brush and somewhat stipple the the granules of salt away. If they become stubborn and problematic, a damp (not wet) brush should loosen it up and knock it away.
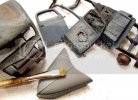
Next I do want to more or less wet the area I want to chip and scrub.
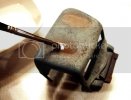
Using the stiff bristled brush again, I stipple, scrub, stab pick away at the paint as the water softens the layers of color.
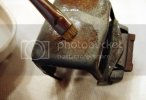
In nooks and crannies you will need to detail the water into the crevasses. If the paint is being stubborn or it has been a day or so from the time of painting, some aggressiveness will be needed. I suggest mixing some standard alcohol with water 50/50 for starters. With a fine tip brush use it like a pin wash ion the area you wish to remove. Then a little scrub with a cotton swab (bud) or stipple with a brush and the lovely rust color will begin to show through in the crack.
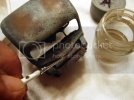
With a nice collection of unsalted model pieces I chose to run a filter of sorts over everything. This blends some colors and brings other out, not to mention cleaning up the whole salting mess. Remember that you want to run just a filter, not a wash. This is more thinner than color. You can always run more coats if you think it is needed. I only applied one using AK's Brown Blue Wash. I did not fully mix the contents. You can get the same result from mixing oil paint with thinner between 60% and 80% thinner to paint. You are just blending the color with this coat.
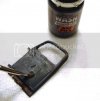
This is what this looks like with the chipping complete and one filter applied.
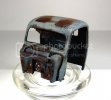
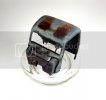
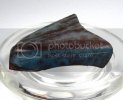
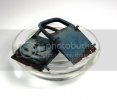
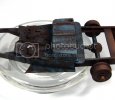
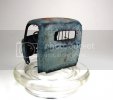
That is it for tonight! Up next will be the first of a few applications of pigments and getting this model together.
Thanks for tuning in!!!
John...I would say that is the quote of the day!! LOL!!! Thanks BTW!!
Hey Ken!!
Thanks Adam!! You may Sir!! ;D
Thanks Roman!! Glad you like!!
Thanks Mr. S!! Let's see what it looks like when I get done, first!! :
Thank you Glorfindel for the kind words!! LOL....I would gladly give Kate some private lesson!!!
Just a little more.....
Back at it, amongst other things too. So, all that salt needs to be removed now.

With a good, stiff bristled brush to brush and somewhat stipple the the granules of salt away. If they become stubborn and problematic, a damp (not wet) brush should loosen it up and knock it away.

Next I do want to more or less wet the area I want to chip and scrub.

Using the stiff bristled brush again, I stipple, scrub, stab pick away at the paint as the water softens the layers of color.

In nooks and crannies you will need to detail the water into the crevasses. If the paint is being stubborn or it has been a day or so from the time of painting, some aggressiveness will be needed. I suggest mixing some standard alcohol with water 50/50 for starters. With a fine tip brush use it like a pin wash ion the area you wish to remove. Then a little scrub with a cotton swab (bud) or stipple with a brush and the lovely rust color will begin to show through in the crack.

With a nice collection of unsalted model pieces I chose to run a filter of sorts over everything. This blends some colors and brings other out, not to mention cleaning up the whole salting mess. Remember that you want to run just a filter, not a wash. This is more thinner than color. You can always run more coats if you think it is needed. I only applied one using AK's Brown Blue Wash. I did not fully mix the contents. You can get the same result from mixing oil paint with thinner between 60% and 80% thinner to paint. You are just blending the color with this coat.

This is what this looks like with the chipping complete and one filter applied.


That is it for tonight! Up next will be the first of a few applications of pigments and getting this model together.
Thanks for tuning in!!!
S
ScaleModelMadman
Guest
Really cool stuff T, really excellent. 8)
Glorfindel
Active Member
- Joined
- May 2, 2011
- Messages
- 1,504
Just great stuff T. Just about ready for print.
Elm City Hobbies
Active Member
- Joined
- May 7, 2009
- Messages
- 3,241
Awesome....don't know how I missed this!
Glorfindel
Active Member
- Joined
- May 2, 2011
- Messages
- 1,504
TRM said:Thank again G! Not quite yet! LOL...think you will be surprised to what is left on this! :
Surprised? I've had to change my underwear already.
Beobachtungsbereich
Prep for STAB....STAB ON!
- Joined
- Oct 7, 2011
- Messages
- 254
I agree....this is just like discovering cheat codes!
Thanks so much for putting this together. Getting some inspiration for another project now!
Regards
Thanks so much for putting this together. Getting some inspiration for another project now!
Regards
schweinhund227
New Member
- Joined
- Jun 24, 2009
- Messages
- 2,511
Thanks TRM for this ! I might give it a try !!! Maybe its time to Walk the walk and Talk the Talk !!!
Those skills will come up "handy" with my new luv affair with Ma.K kits!!!
Thanks for taking the time to do this....
One question ! what do you use to clean those Chipping fluids from your A.B. ??? and can you brush those vs. Spraying it ??? just asking !
Norm.
Those skills will come up "handy" with my new luv affair with Ma.K kits!!!
Thanks for taking the time to do this....
One question ! what do you use to clean those Chipping fluids from your A.B. ??? and can you brush those vs. Spraying it ??? just asking !
Norm.
TRM
New Member
- Joined
- Mar 18, 2011
- Messages
- 5,024
Thanks Scott, glad you made your way by to hang out!!
G....just spit my coffee all over the keyboard!!! So glad I am at work when that happens. :-X.......... ;D
Thnaks Scott!! You can read this one for Dinner ;D
Thanks again Chris!
Hi ya Beo!! Gald you could make it!! Looking forward to what you were inspred to!!!
Hey Norm!! Thanks for swinging by!! I like the sounds of the MaK, really liking those!! Thanks to Scott for answering your question!!
I got broad shoulders ER...I can take it!!!
Hey Matt!!! Thanks! I say now it shouldn;t be too long but ...lol...you know how things go sometime!! :
Yeah....lets throw another one in the mix............
Her is a mock up to check if I am on the right track here.
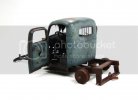
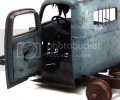
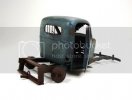
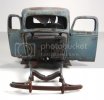
OK, pigment application! This is another one of those interesting areas where there are several styles of application and countless products to choose from. If just starting out don't worry too much about filling 8 cabinets with 7000 jars of pigs and washes, trust me, you will end up there soon enough.
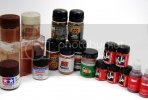
This is only the tip of the iceberg. What I am showing here, besides a confusing mess of stuff, is a starting point of some items you can use from this point on in the project. For the most part I will be using the pigments located in the far left of the picture in the square cylinders but always play around with whatever comes to mind. Nothing special about these pigments, just the ones I chose.
One thing to remember about pigments is to first be comfortable with what you are using and second, quality. There are several on the market that are, let say, not up to snuff. The big kids on the block....AK of course and Mig, along with the new kid, K4 which is just getting to the market, are all great! A small amount goes a long way. They can be applied with alcohol, spirits, and water or pigment fixers. These all have a great consistency and stick well to most surfaces.
My pallet.
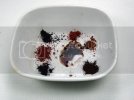
Armed with a little bit of pigment (lol...more than I said I would use) lets dig in!
First, I like to wet the area with some pre-mixed enamels.
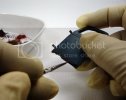
For this I actually use AK Interactive's Streaking Grime or Track Wash, NOT mixed. If you do not mix these up they make great pin washes and of course a great base for pigments. This can also be achieved with just spirits or a real thin wash of whatever, like Burnt Sienna or Umber.
After you dampen the area, take your damp brush and grab some pigment. For this I want the rust to remain darker. Being left in the woods in a damp environment the rust will be moist and dark on most areas. Then blot lightly into the pre-mix you just applied.
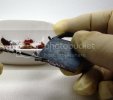
With a fine tip brush, pin point some spotted rust areas with just the dampened mixture. REMEMBER...less is more always! It is always easier to ad more of anything, not always easier to remove some things.
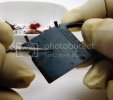
After the dry pigment has been added to selected areas, take your clean brush and dip it in some spirits and wipe of the brush on the edge of the bottle or container, leaving the brush wet, just not soaking and dripping.
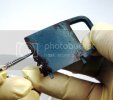
Apply this to the area where you put your pigments. What I am doing here is softening the look to the pigments I just put down and effectively feathering out the pigment and giving the rusted area a more natural appearance.
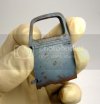
This is repeated for each side of each door and so onto the rest of the model.
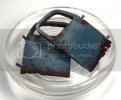
In this next picture, I added a wash using AK Interactive's Track Wash to the inside of the cab. This area would be dark and damp, so this is a great base to start with. After applying the wash, I took a clean brush with spirits and went back over the area to remove residual wash exposing my rust base and paint.
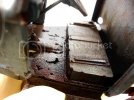
Next up I wanted to hit the firewall. I stated with the same approach as the base to the doors. Dampen the area and then apply some dark pigment. I feel it is always good to go dark to light when applying these pigments. You obtain a much better blend I think.
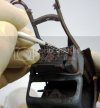
Next I used a slightly lighter rust. This looks really bright when it is wet, but it will dry much lighter. It is always good to test things out on a separate piece of plastic if you are ever unsure.
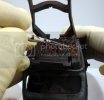
Here is what it looks like while it is still wet. A bit shinny and brighter at the moment.
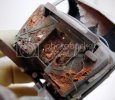
Once dry though, we can take a stiff bristled brush and lightly stipple the area. This will blend the colors nicely.
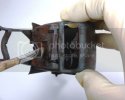
And this is what you end up with.
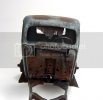
Up until now this has moved along really well. I will be finishing up the first round of pigment application and getting ready to move on to the next stage of weathering.
Thank for stopping by!!! ;D
G....just spit my coffee all over the keyboard!!! So glad I am at work when that happens. :-X.......... ;D
Thnaks Scott!! You can read this one for Dinner ;D
Thanks again Chris!
Hi ya Beo!! Gald you could make it!! Looking forward to what you were inspred to!!!
Hey Norm!! Thanks for swinging by!! I like the sounds of the MaK, really liking those!! Thanks to Scott for answering your question!!
I got broad shoulders ER...I can take it!!!
Hey Matt!!! Thanks! I say now it shouldn;t be too long but ...lol...you know how things go sometime!! :
Yeah....lets throw another one in the mix............
Her is a mock up to check if I am on the right track here.


OK, pigment application! This is another one of those interesting areas where there are several styles of application and countless products to choose from. If just starting out don't worry too much about filling 8 cabinets with 7000 jars of pigs and washes, trust me, you will end up there soon enough.

This is only the tip of the iceberg. What I am showing here, besides a confusing mess of stuff, is a starting point of some items you can use from this point on in the project. For the most part I will be using the pigments located in the far left of the picture in the square cylinders but always play around with whatever comes to mind. Nothing special about these pigments, just the ones I chose.
One thing to remember about pigments is to first be comfortable with what you are using and second, quality. There are several on the market that are, let say, not up to snuff. The big kids on the block....AK of course and Mig, along with the new kid, K4 which is just getting to the market, are all great! A small amount goes a long way. They can be applied with alcohol, spirits, and water or pigment fixers. These all have a great consistency and stick well to most surfaces.
My pallet.

Armed with a little bit of pigment (lol...more than I said I would use) lets dig in!
First, I like to wet the area with some pre-mixed enamels.

For this I actually use AK Interactive's Streaking Grime or Track Wash, NOT mixed. If you do not mix these up they make great pin washes and of course a great base for pigments. This can also be achieved with just spirits or a real thin wash of whatever, like Burnt Sienna or Umber.
After you dampen the area, take your damp brush and grab some pigment. For this I want the rust to remain darker. Being left in the woods in a damp environment the rust will be moist and dark on most areas. Then blot lightly into the pre-mix you just applied.

With a fine tip brush, pin point some spotted rust areas with just the dampened mixture. REMEMBER...less is more always! It is always easier to ad more of anything, not always easier to remove some things.

After the dry pigment has been added to selected areas, take your clean brush and dip it in some spirits and wipe of the brush on the edge of the bottle or container, leaving the brush wet, just not soaking and dripping.

Apply this to the area where you put your pigments. What I am doing here is softening the look to the pigments I just put down and effectively feathering out the pigment and giving the rusted area a more natural appearance.

This is repeated for each side of each door and so onto the rest of the model.

In this next picture, I added a wash using AK Interactive's Track Wash to the inside of the cab. This area would be dark and damp, so this is a great base to start with. After applying the wash, I took a clean brush with spirits and went back over the area to remove residual wash exposing my rust base and paint.

Next up I wanted to hit the firewall. I stated with the same approach as the base to the doors. Dampen the area and then apply some dark pigment. I feel it is always good to go dark to light when applying these pigments. You obtain a much better blend I think.

Next I used a slightly lighter rust. This looks really bright when it is wet, but it will dry much lighter. It is always good to test things out on a separate piece of plastic if you are ever unsure.

Here is what it looks like while it is still wet. A bit shinny and brighter at the moment.

Once dry though, we can take a stiff bristled brush and lightly stipple the area. This will blend the colors nicely.

And this is what you end up with.

Up until now this has moved along really well. I will be finishing up the first round of pigment application and getting ready to move on to the next stage of weathering.
Thank for stopping by!!! ;D
Beobachtungsbereich
Prep for STAB....STAB ON!
- Joined
- Oct 7, 2011
- Messages
- 254
Just a question that may be on a few minds, besides mine:
Is there any negative effect of using any of the washes over acrylics? I'm going to be trying out a few things in the next few days with AK's worn effects and streaking products and I don't want any surprises.
I'm a wee bit gun shy on this stuff.
Regards
Is there any negative effect of using any of the washes over acrylics? I'm going to be trying out a few things in the next few days with AK's worn effects and streaking products and I don't want any surprises.
I'm a wee bit gun shy on this stuff.
Regards
TRM
New Member
- Joined
- Mar 18, 2011
- Messages
- 5,024
Thanks Scott! Yup, the AK line works well fixing the pigs, especially the AK pigs. You can use different washes and filters to shift the color a bit too.
Hi ya Beo!! There is absolutely nothing negative using oils or enamels over acrylics. The beauty most of the time is once you paint in acrylic you can effectively move right to washes, filters pin washes and such. I don't always use a clear coat in this step as the oils and enamels have no effect to the acrylic. However I would recommend a quick satin coat before AK Streaking "anything" as this is recommended by the manufacturer. When in doubt though, always use a testbed application, like flat styrene stock or an old junky model.
Hi ya Beo!! There is absolutely nothing negative using oils or enamels over acrylics. The beauty most of the time is once you paint in acrylic you can effectively move right to washes, filters pin washes and such. I don't always use a clear coat in this step as the oils and enamels have no effect to the acrylic. However I would recommend a quick satin coat before AK Streaking "anything" as this is recommended by the manufacturer. When in doubt though, always use a testbed application, like flat styrene stock or an old junky model.
Similar threads
- Replies
- 8
- Views
- 2K
- Replies
- 10
- Views
- 2K
- Replies
- 11
- Views
- 2K
Latest posts
-
-
-
-
-
-
CANADIAN VERSION AMT 1971 Dodge Charger Muscle Car! $37.00 Shipped!!
- Latest: SuperheroSanctum
-
